ShaggyTools Help

Knowledge Base

Application Guide

Lighting Profile Manager

Getting Started

Getting Started

Welcome to Lighting Profile Manager.

Lighting Profile Manager (LPM) helps you find a lighting profile that matches the console, console software, fixture, and fixture firmware you plan to use. LPM guides you through each selection and shows the compatibility information available for that combination.

If LPM finds a matching profile, you can review its details and save it to Personal Profiles, your saved-profile list in LPM.

Log In to Lighting Profile Manager

Lighting Profile Manager uses your ShaggyTools account.

Open Lighting Profile Manager. The ShaggyTools login screen appears.
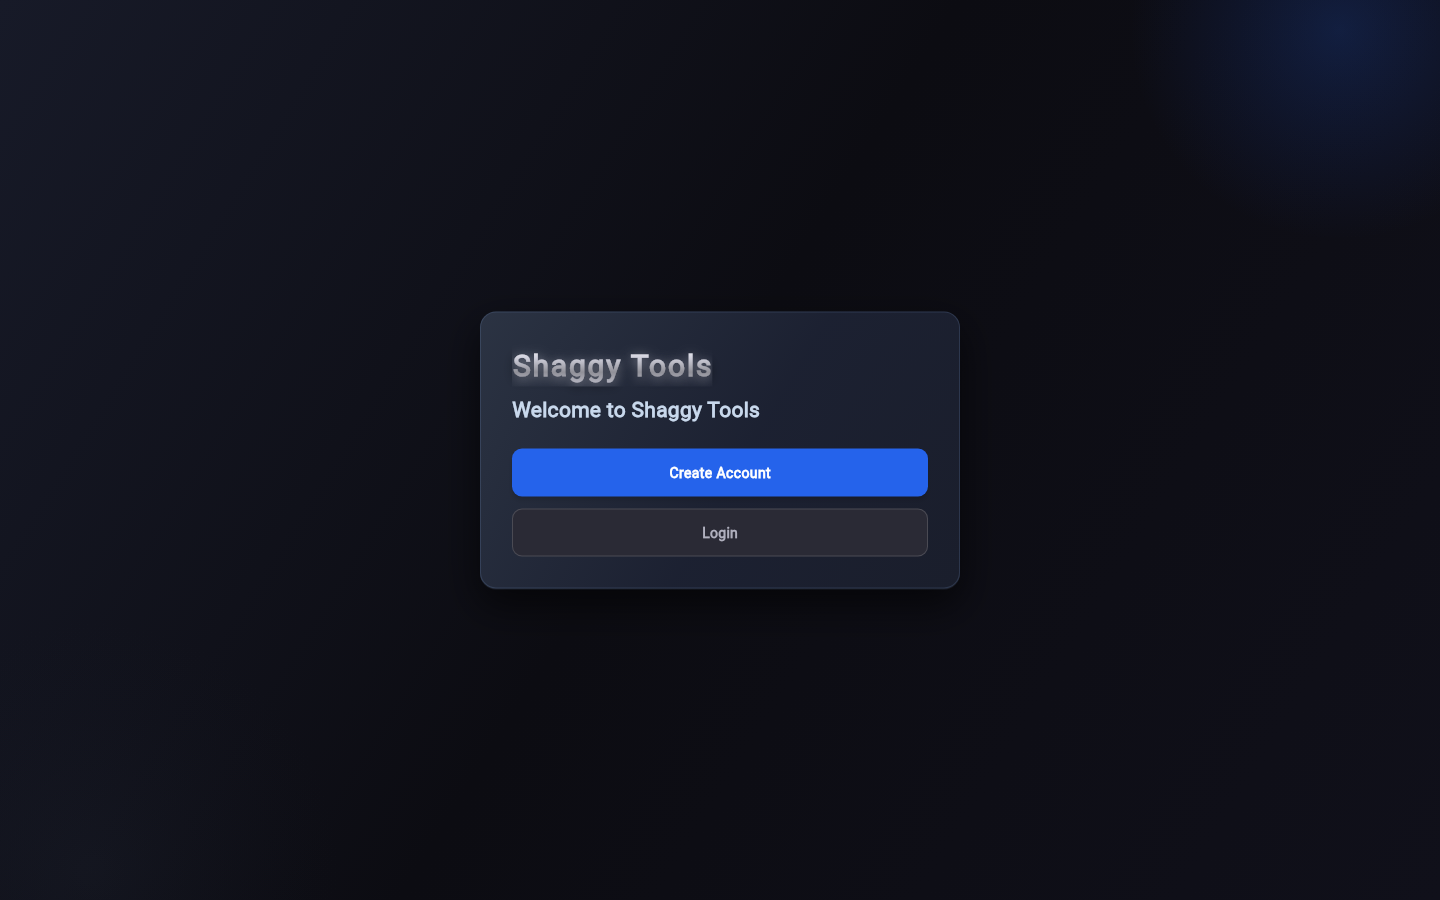
ShaggyTools login screen
ShaggyTools login screen Application screenshot

If you already have an account:

  1. Select Login.
  2. Enter your credentials.
  3. Continue.

If you do not yet have an account:

  1. Select Create Account.
  2. Follow the account-creation process.
  3. Return to LPM after your account has been verified.

Open Lighting Profile Manager

After signing in, Lighting Profile Manager normally opens to an empty workspace.

If you previously selected Save Draft, LPM restores the saved draft so you can continue where you left off.
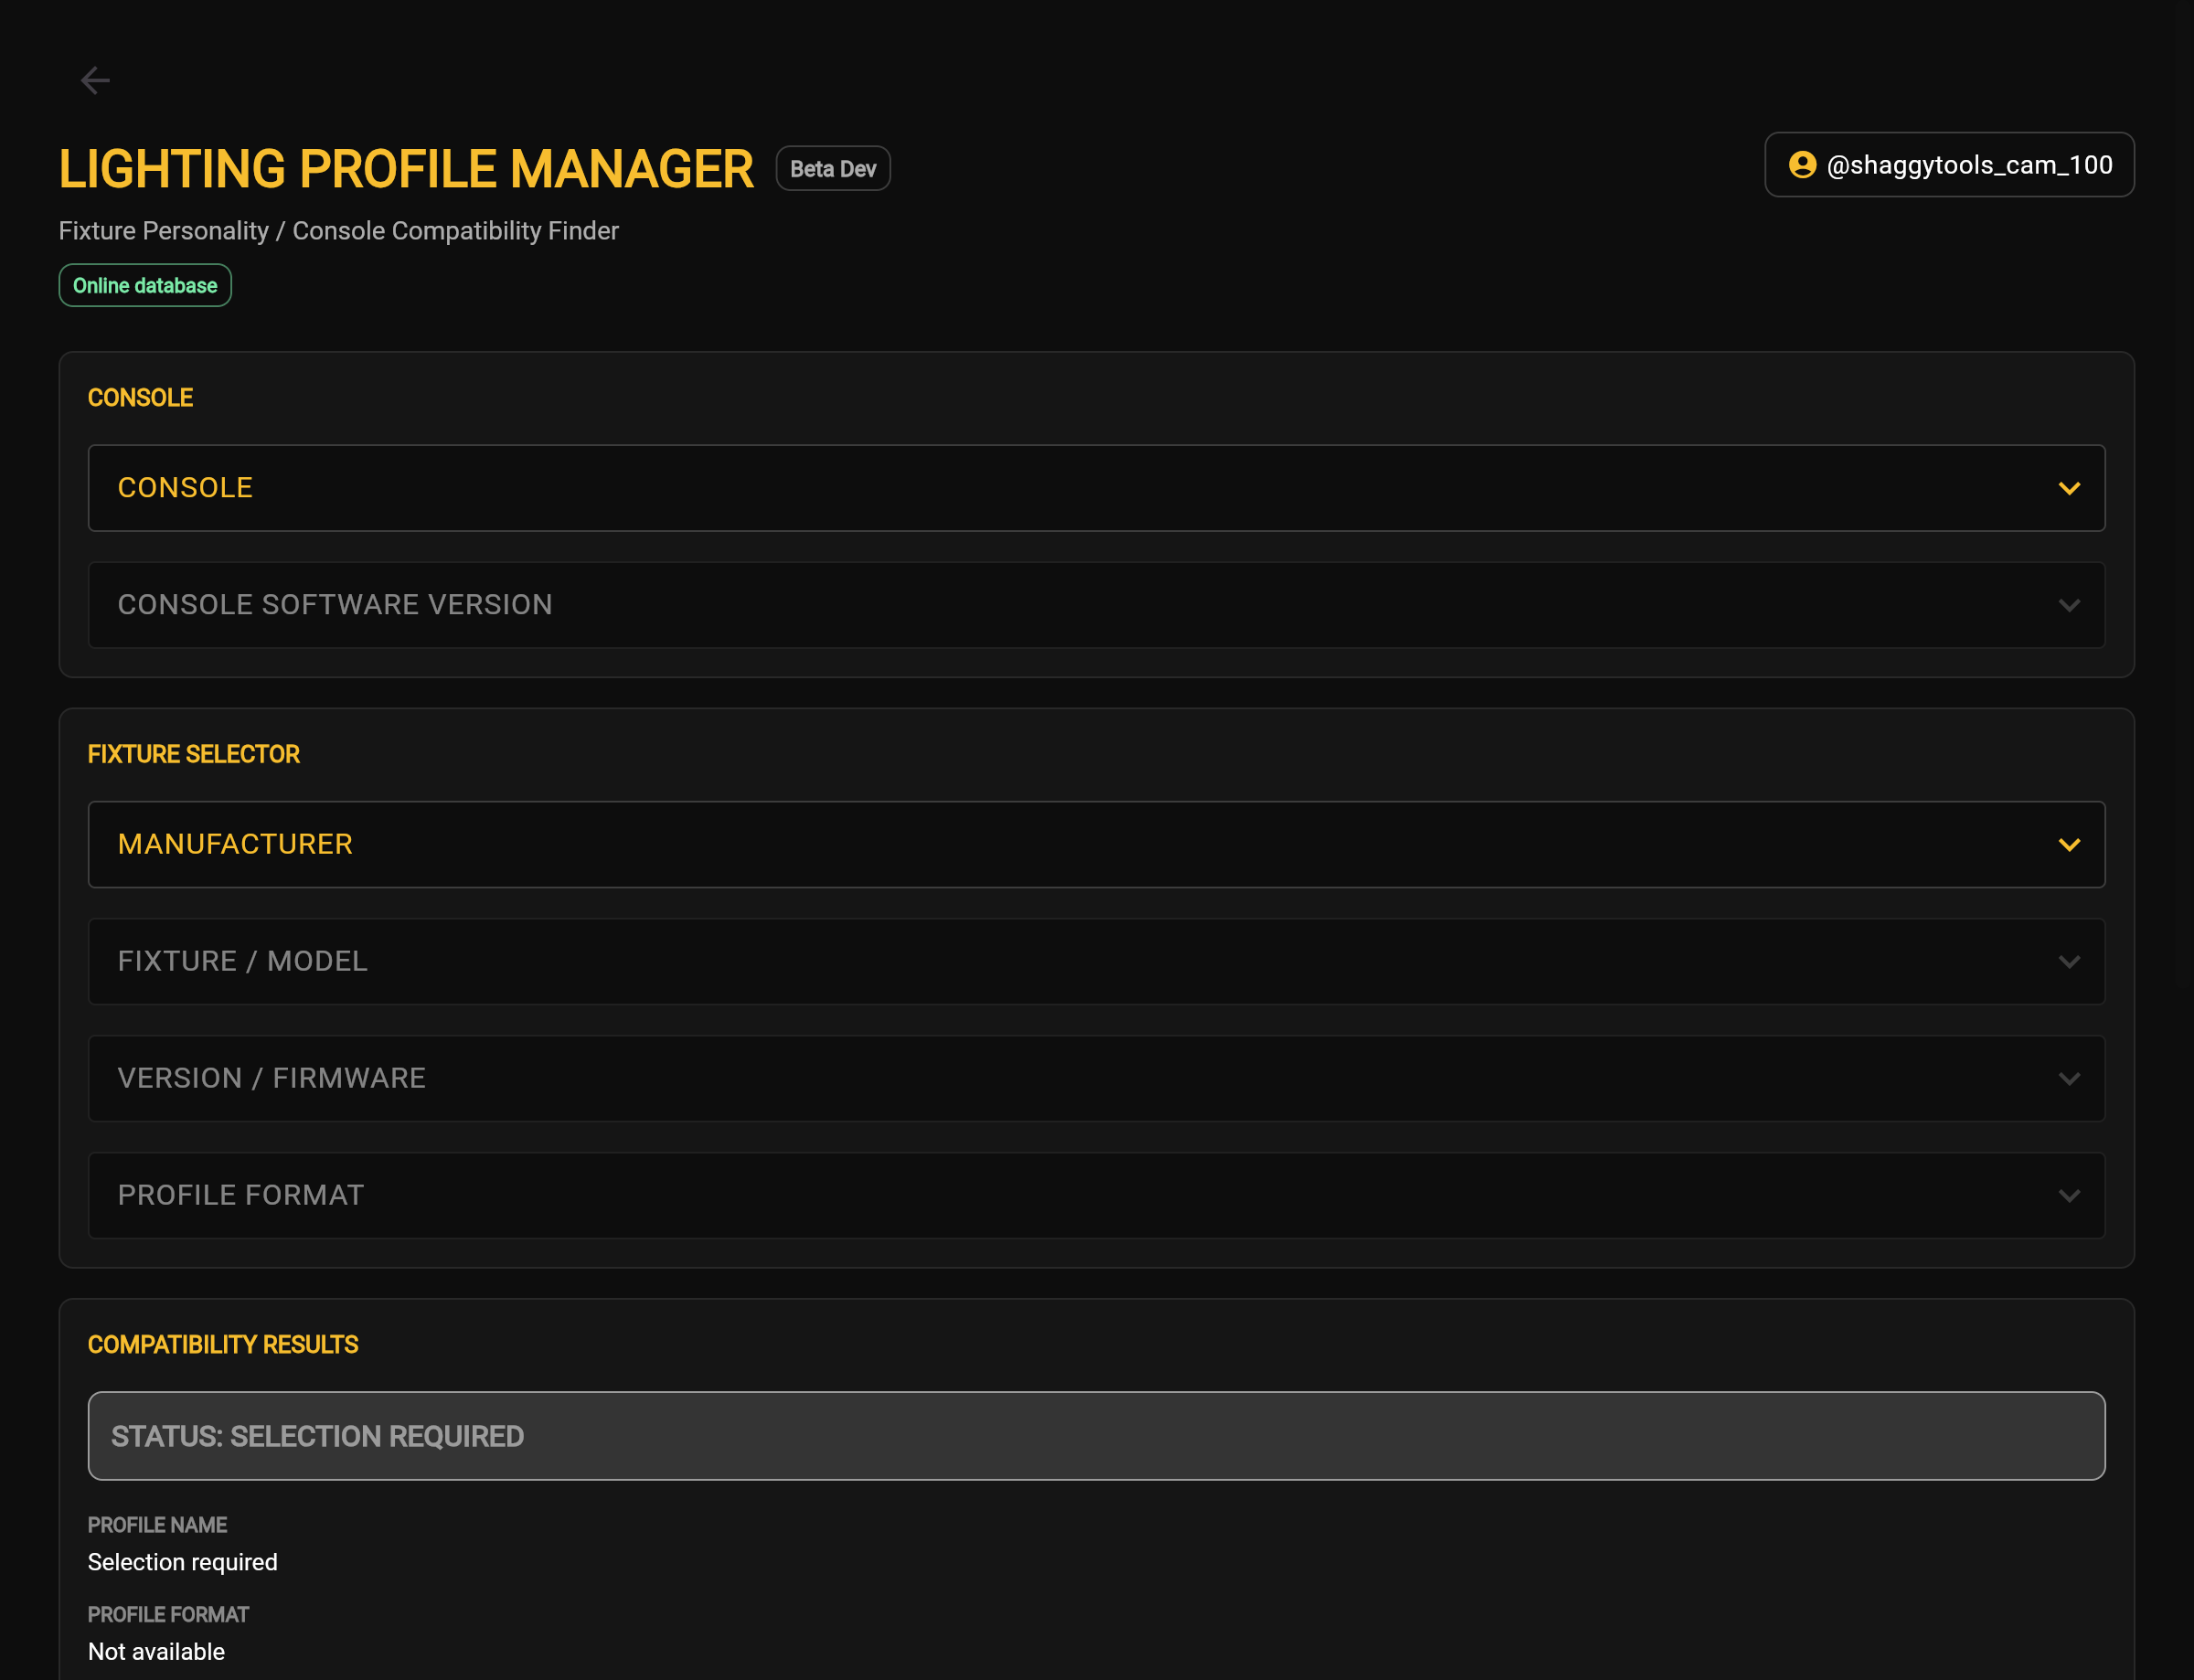
Initial authenticated workspace
Initial authenticated workspace Application screenshot

From the empty workspace, begin selecting:

  • Console
  • Console Software Version
  • Manufacturer
  • Fixture / Model
  • Version / Firmware
Getting Started Tips
  • The empty workspace is the normal starting point unless you previously saved a draft.
  • You do not need to create a profile before searching existing compatibility information.
Getting Started Frequently Asked Questions

Why is my screen empty? No profile has been selected yet. Begin by choosing your console and software version.

Do I have to create a profile before using LPM? No. Start by selecting your console and fixture information. You can save and organize a matching profile after LPM displays the result.
Getting Started Related Topics

Workspace Overview

Understand the Lighting Profile Manager Workspace

The Lighting Profile Manager workspace is the main screen. Use it to select your console and fixture information, review compatibility, and open LPM features.

When LPM opens, the workspace normally appears empty. If you previously selected Save Draft, LPM may restore your saved draft so you can continue where you left off.

Select Console and Fixture Information

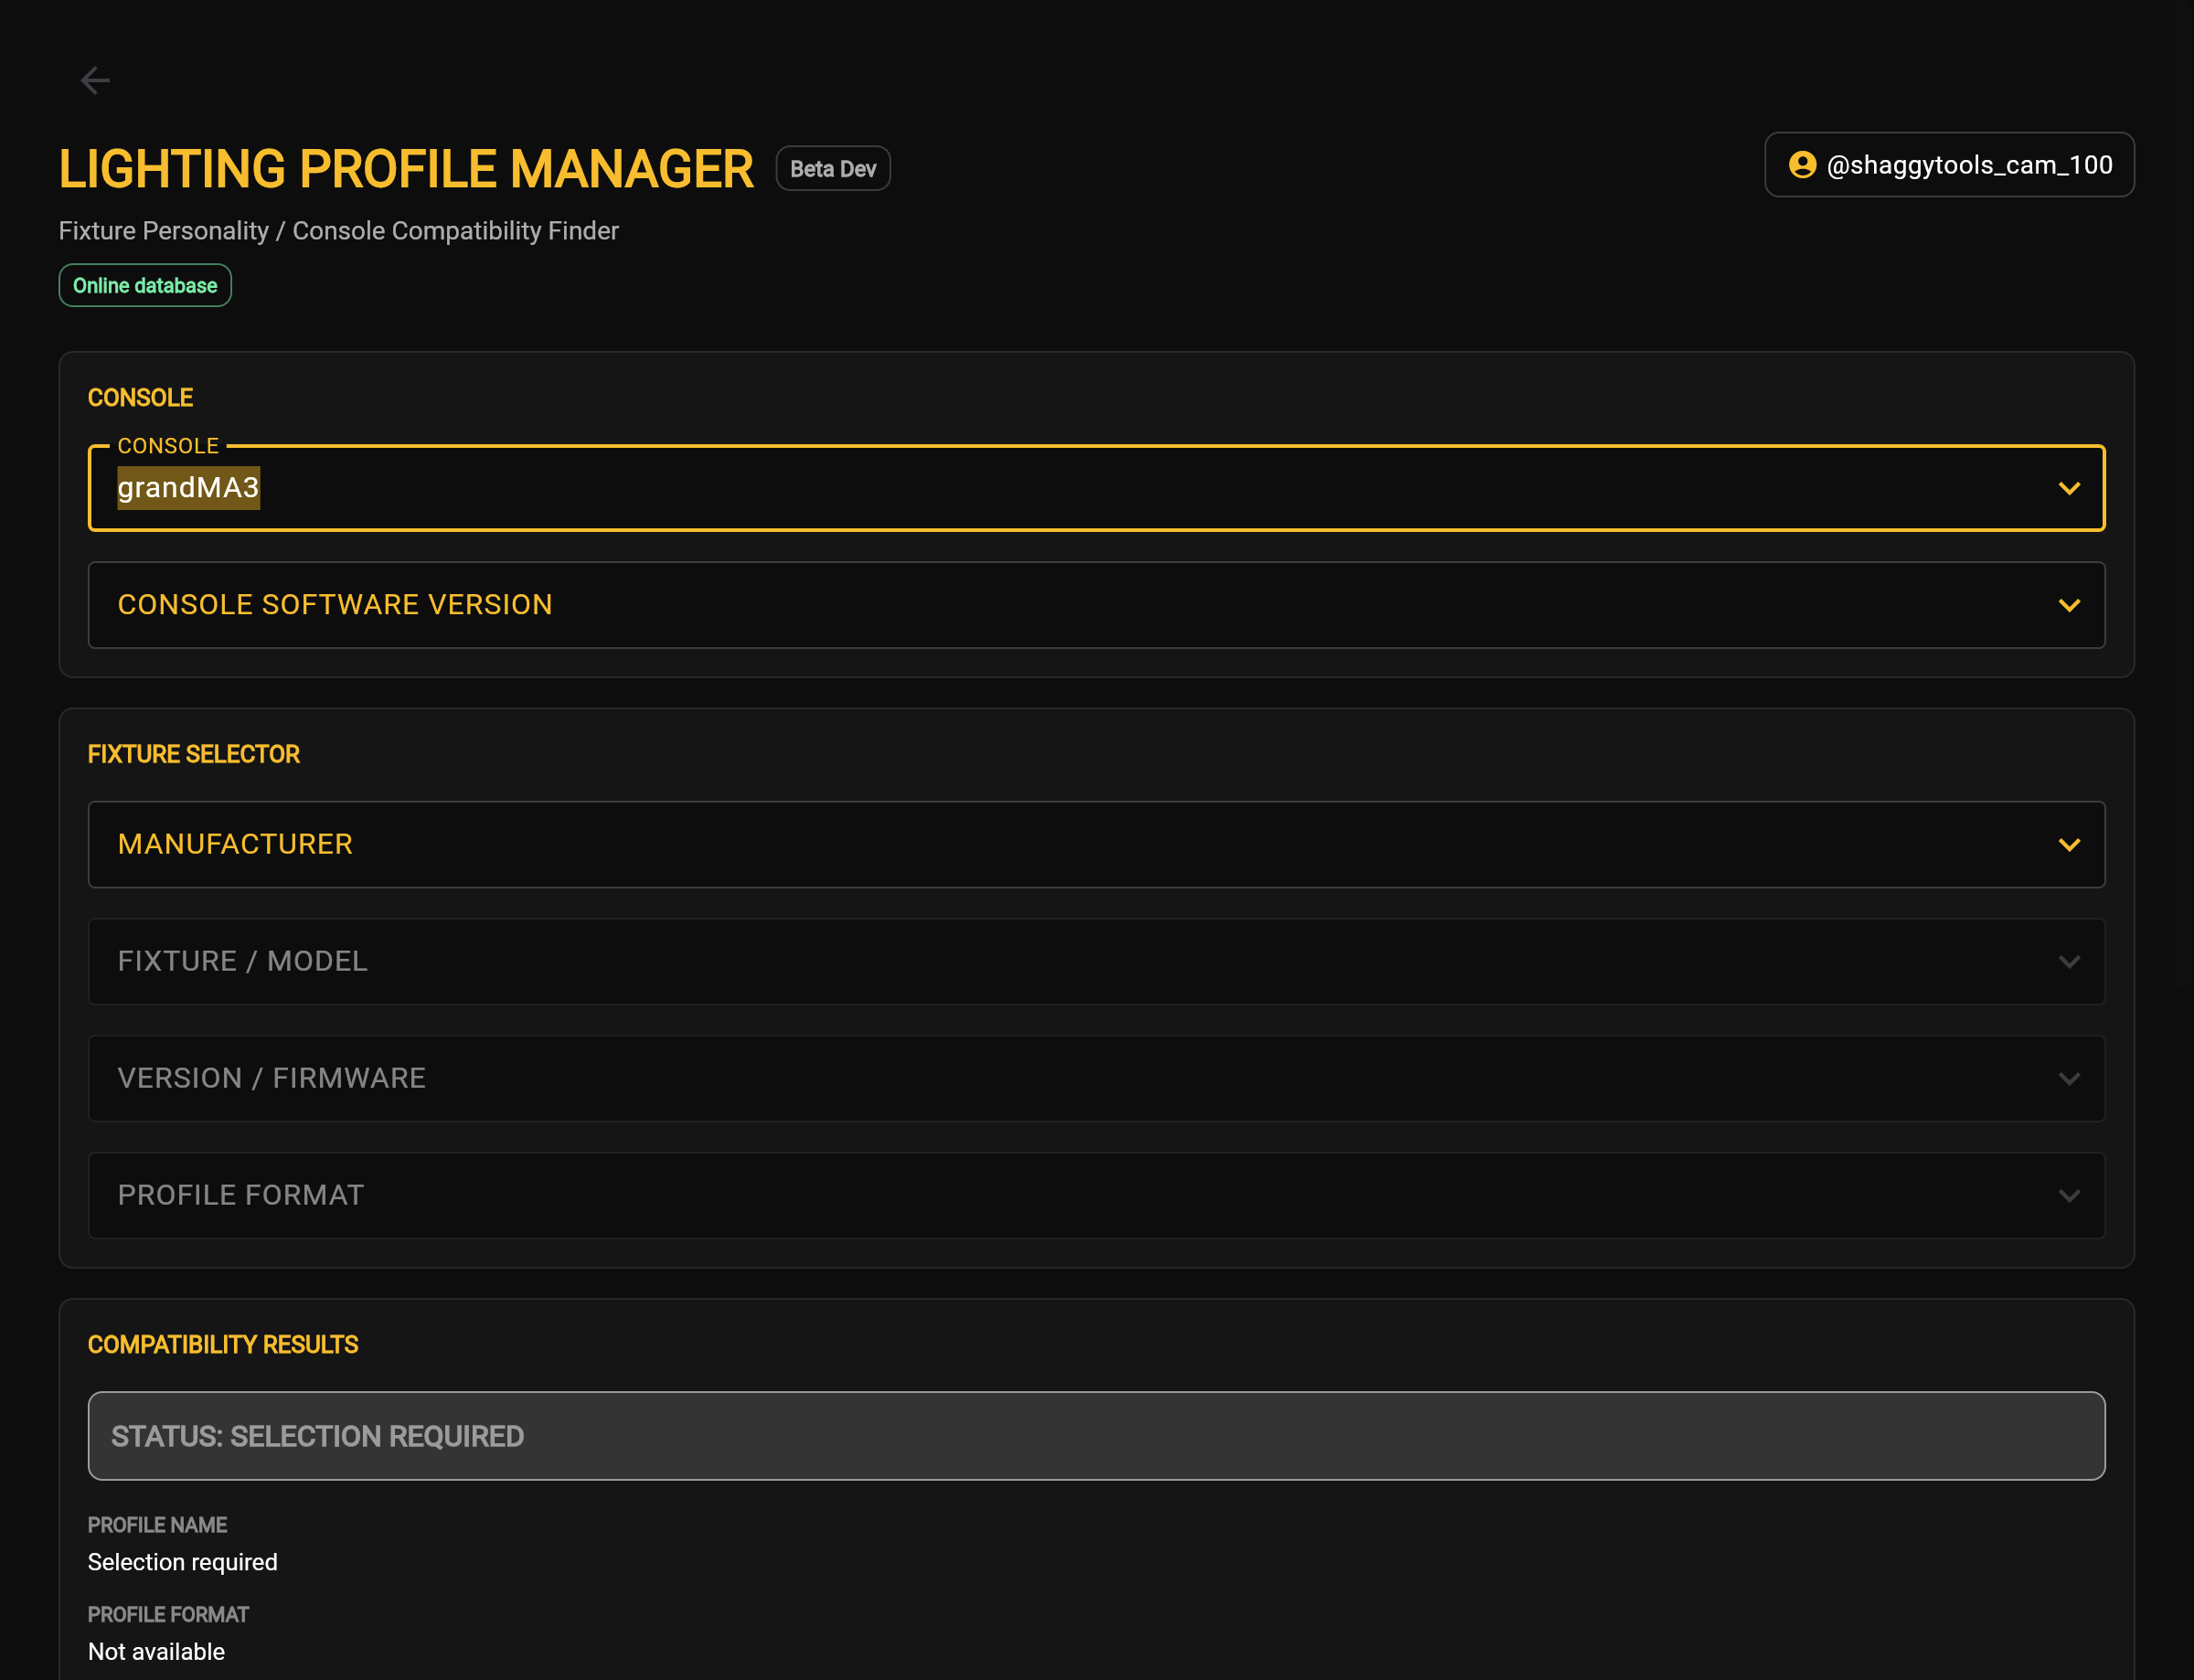
Begin by selecting:

  • Console
  • Console Software Version
  • Manufacturer
  • Fixture / Model
  • Version / Firmware

As you make selections, additional information becomes available throughout the workspace. The complete process is covered in Compatibility Checking.

Initial workspace before selections
Initial workspace before selections Application screenshot

Use the Manage, Share, and RADAR Menus

The workspace provides three main menus:

  • Manage
  • Share
  • RADAR

Use Manage to open Personal Profiles, Notification List, and Lighting Profile Groups. Share and RADAR open separate LPM features. If a menu action is unavailable, first select or save a profile.

Understand an Empty Workspace

No compatibility information is displayed until profile selections begin. If a previously saved draft exists, the workspace may restore that draft instead of opening empty.

Workspace Tips
  • Begin by selecting your lighting console.
  • Continue through the selection workflow in the order presented.
  • Save Draft allows unfinished work to be resumed later.
Workspace Frequently Asked Questions

Why is nothing displayed? LPM is waiting for profile selections. Begin by selecting your console.

Why didn't my workspace open empty? If you previously selected Save Draft, LPM may restore your draft automatically.

Troubleshoot the LPM Workspace

If the workspace appears empty, begin with the Console field. If you expected previous work, confirm that you selected Save Draft before leaving your earlier session.

Workspace Related Topics

Empty Compatibility

Understand Empty Compatibility Results

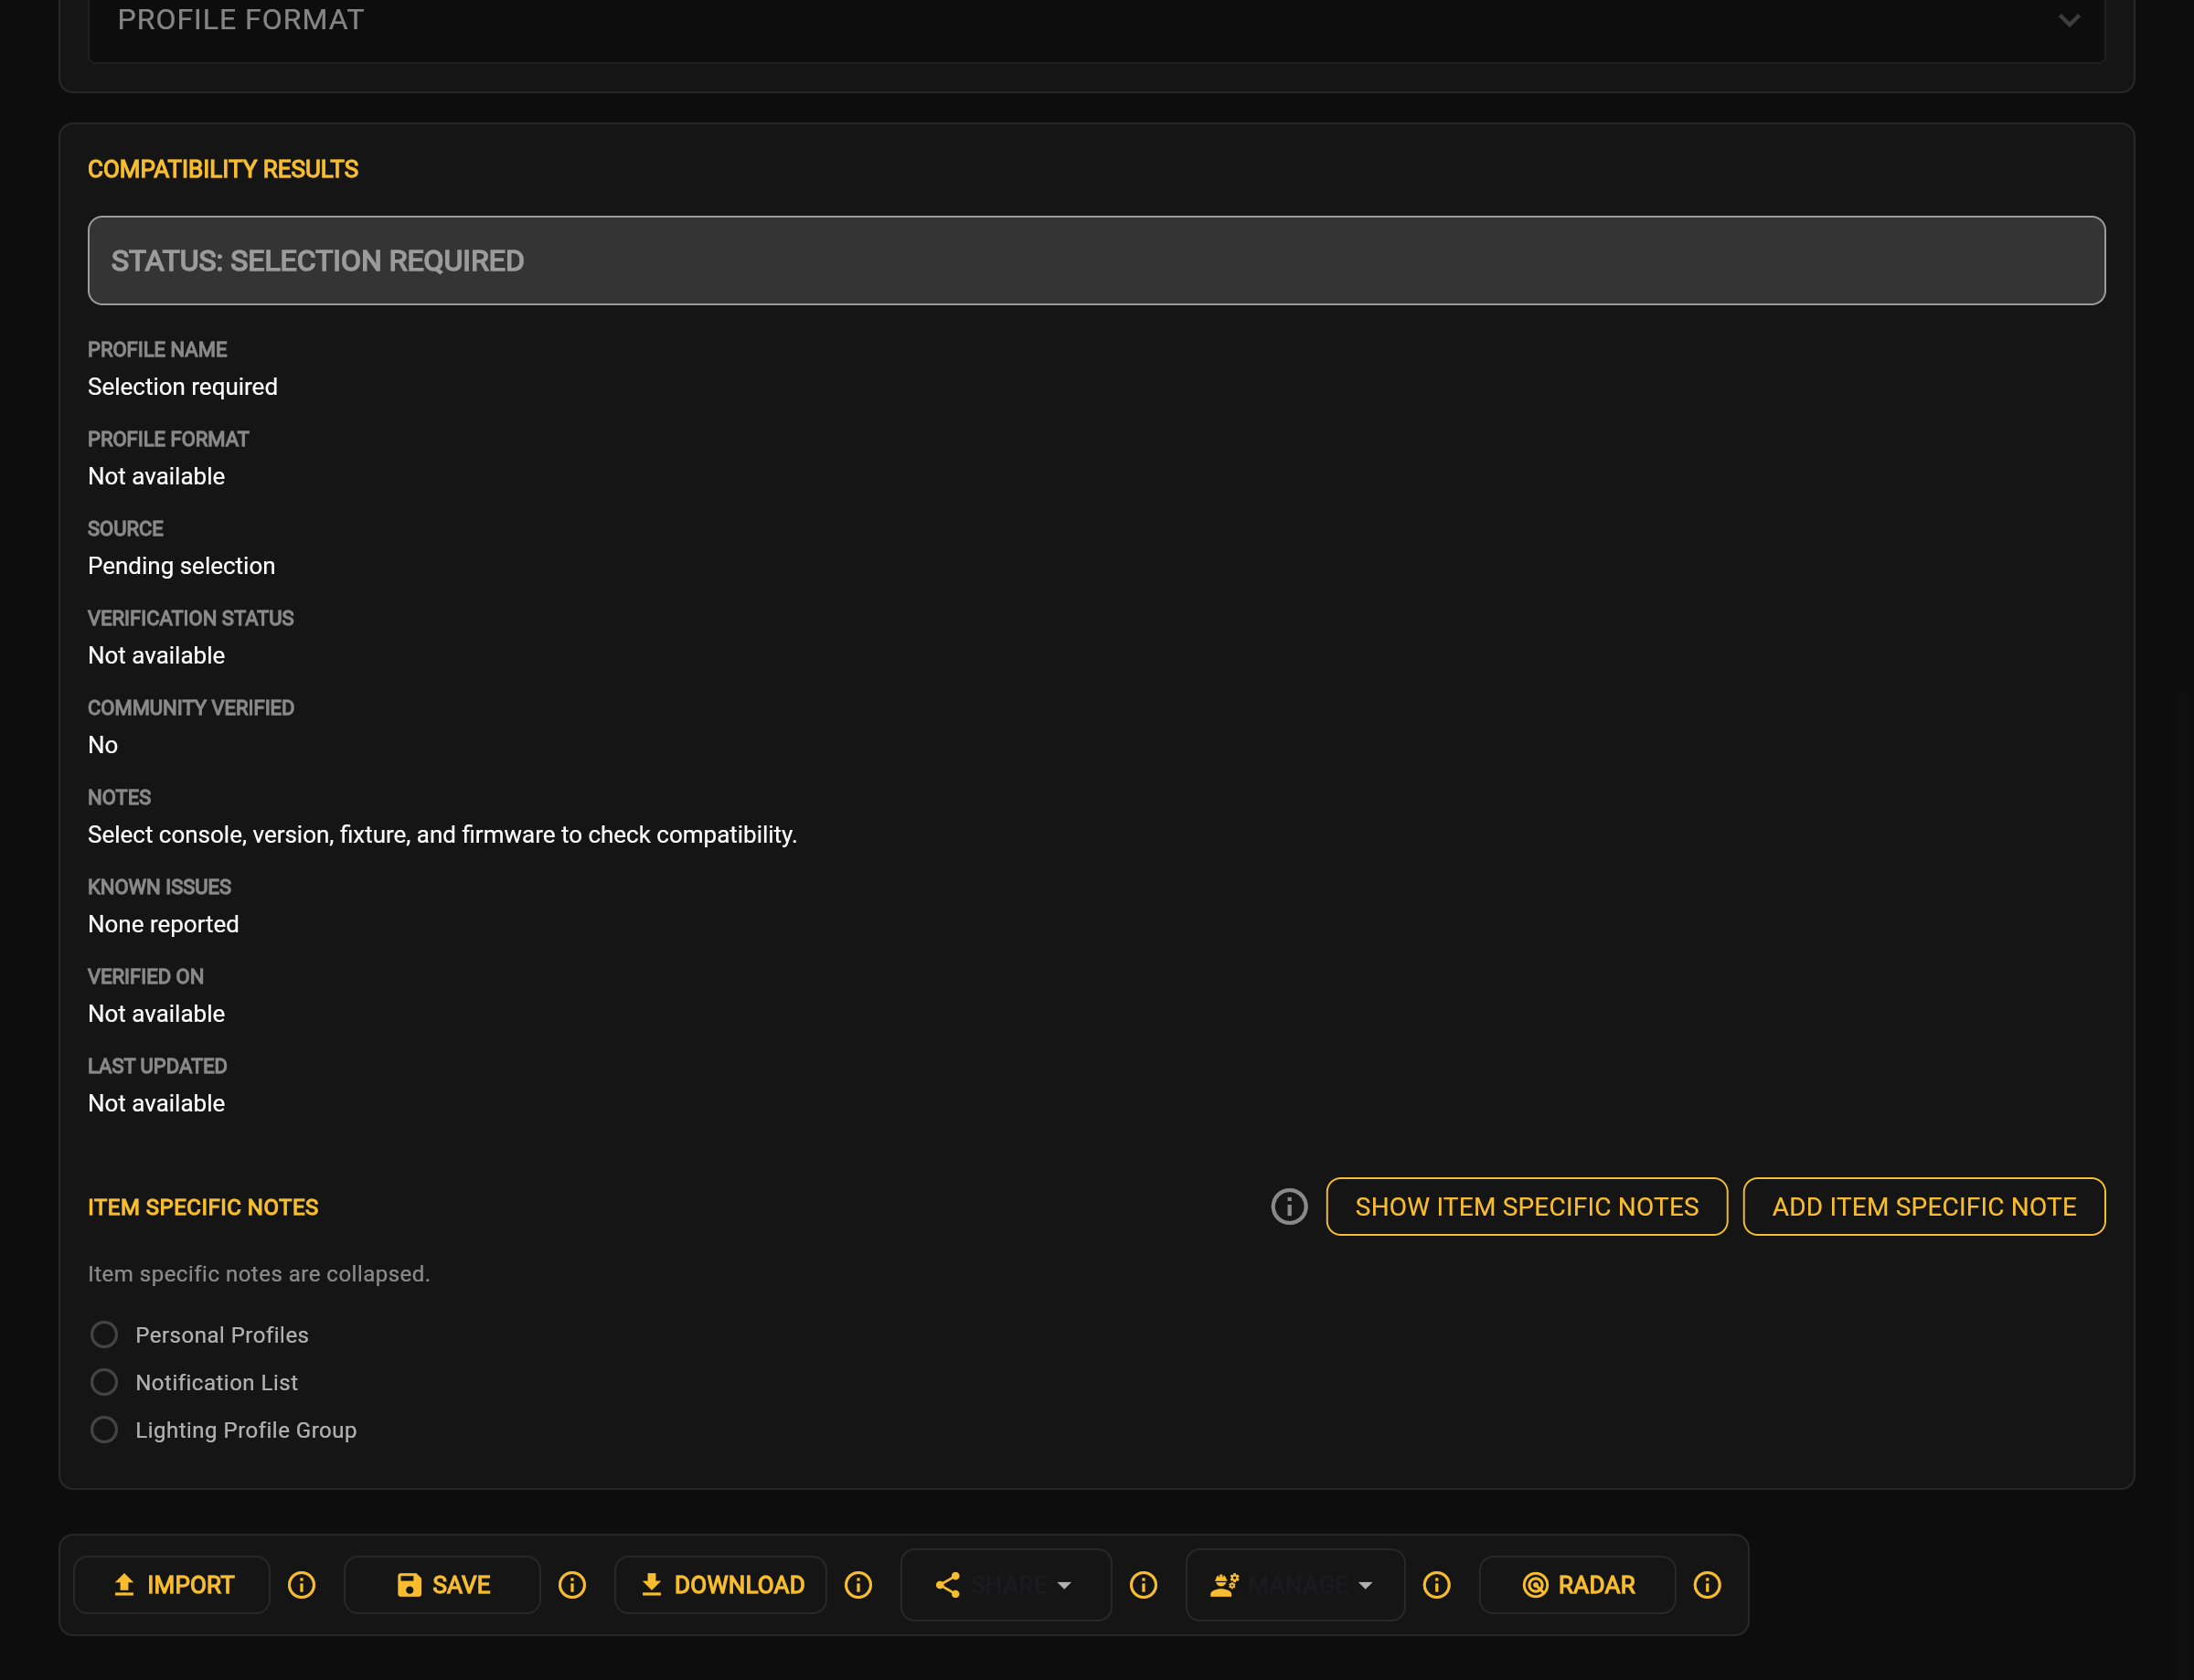
The Compatibility section is empty until you provide the console and fixture information LPM needs to check for a matching profile.

Empty Compatibility view
Empty Compatibility view Application screenshot

This means LPM is waiting for you to complete the selection fields.

Complete the Profile Selections

Complete the selection sequence:

  1. Console
  2. Console Software Version
  3. Manufacturer
  4. Fixture / Model
  5. Version / Firmware

The complete process is covered in Selecting a Lighting Profile. The checking process is covered in Compatibility Checking.

Empty Compatibility Tips
  • An empty Compatibility view is expected before you complete the required selections.
  • Begin with Console when you are ready to search.
  • Compatibility evaluation depends on the required selections.
Empty Compatibility Frequently Asked Questions

Why are there no compatibility results? The compatibility search is not yet complete. Complete the required profile selections before expecting compatibility information.

Is something wrong? No. The Compatibility section is expected to be empty before you complete the selections.

Troubleshoot Empty Compatibility Results
  • Verify that you completed the required profile selections.
  • If selections are present, continue to Compatibility Checking.
Empty Compatibility Related Topics

Primary Actions

Understand Primary Actions

The Primary Actions area contains actions you can use with a Lighting Profile. When the selection fields are empty, some buttons are unavailable. They become relevant after LPM has enough information to show a result.

Primary Actions before completed selection
Primary Actions before completed selection Application screenshot

Complete the Console, Console Software Version, Manufacturer, Fixture / Model, and Version / Firmware fields before using actions that depend on a result.

Primary Actions Tips
  • Complete the profile selections and review the result LPM displays.
  • Continue to Compatibility Checking after completing your selections.
Primary Actions Frequently Asked Questions

Why are some actions unavailable? Some actions remain unavailable before you complete the profile selections. Complete the selections, then wait for Compatibility Checking to finish.

Troubleshoot Unavailable Primary Actions
  • Review the current profile selections.
  • Continue to Compatibility Checking.
  • Open the Help article named for the action you want to use.
Primary Actions Related Topics

Selecting a Lighting Profile

Select Console and Fixture Information

To look for a matching Lighting Profile, tell LPM which console and fixture combination you use. Complete the fields in this order:

  1. Console
  2. Console Software Version
  3. Manufacturer
  4. Fixture / Model
  5. Version / Firmware

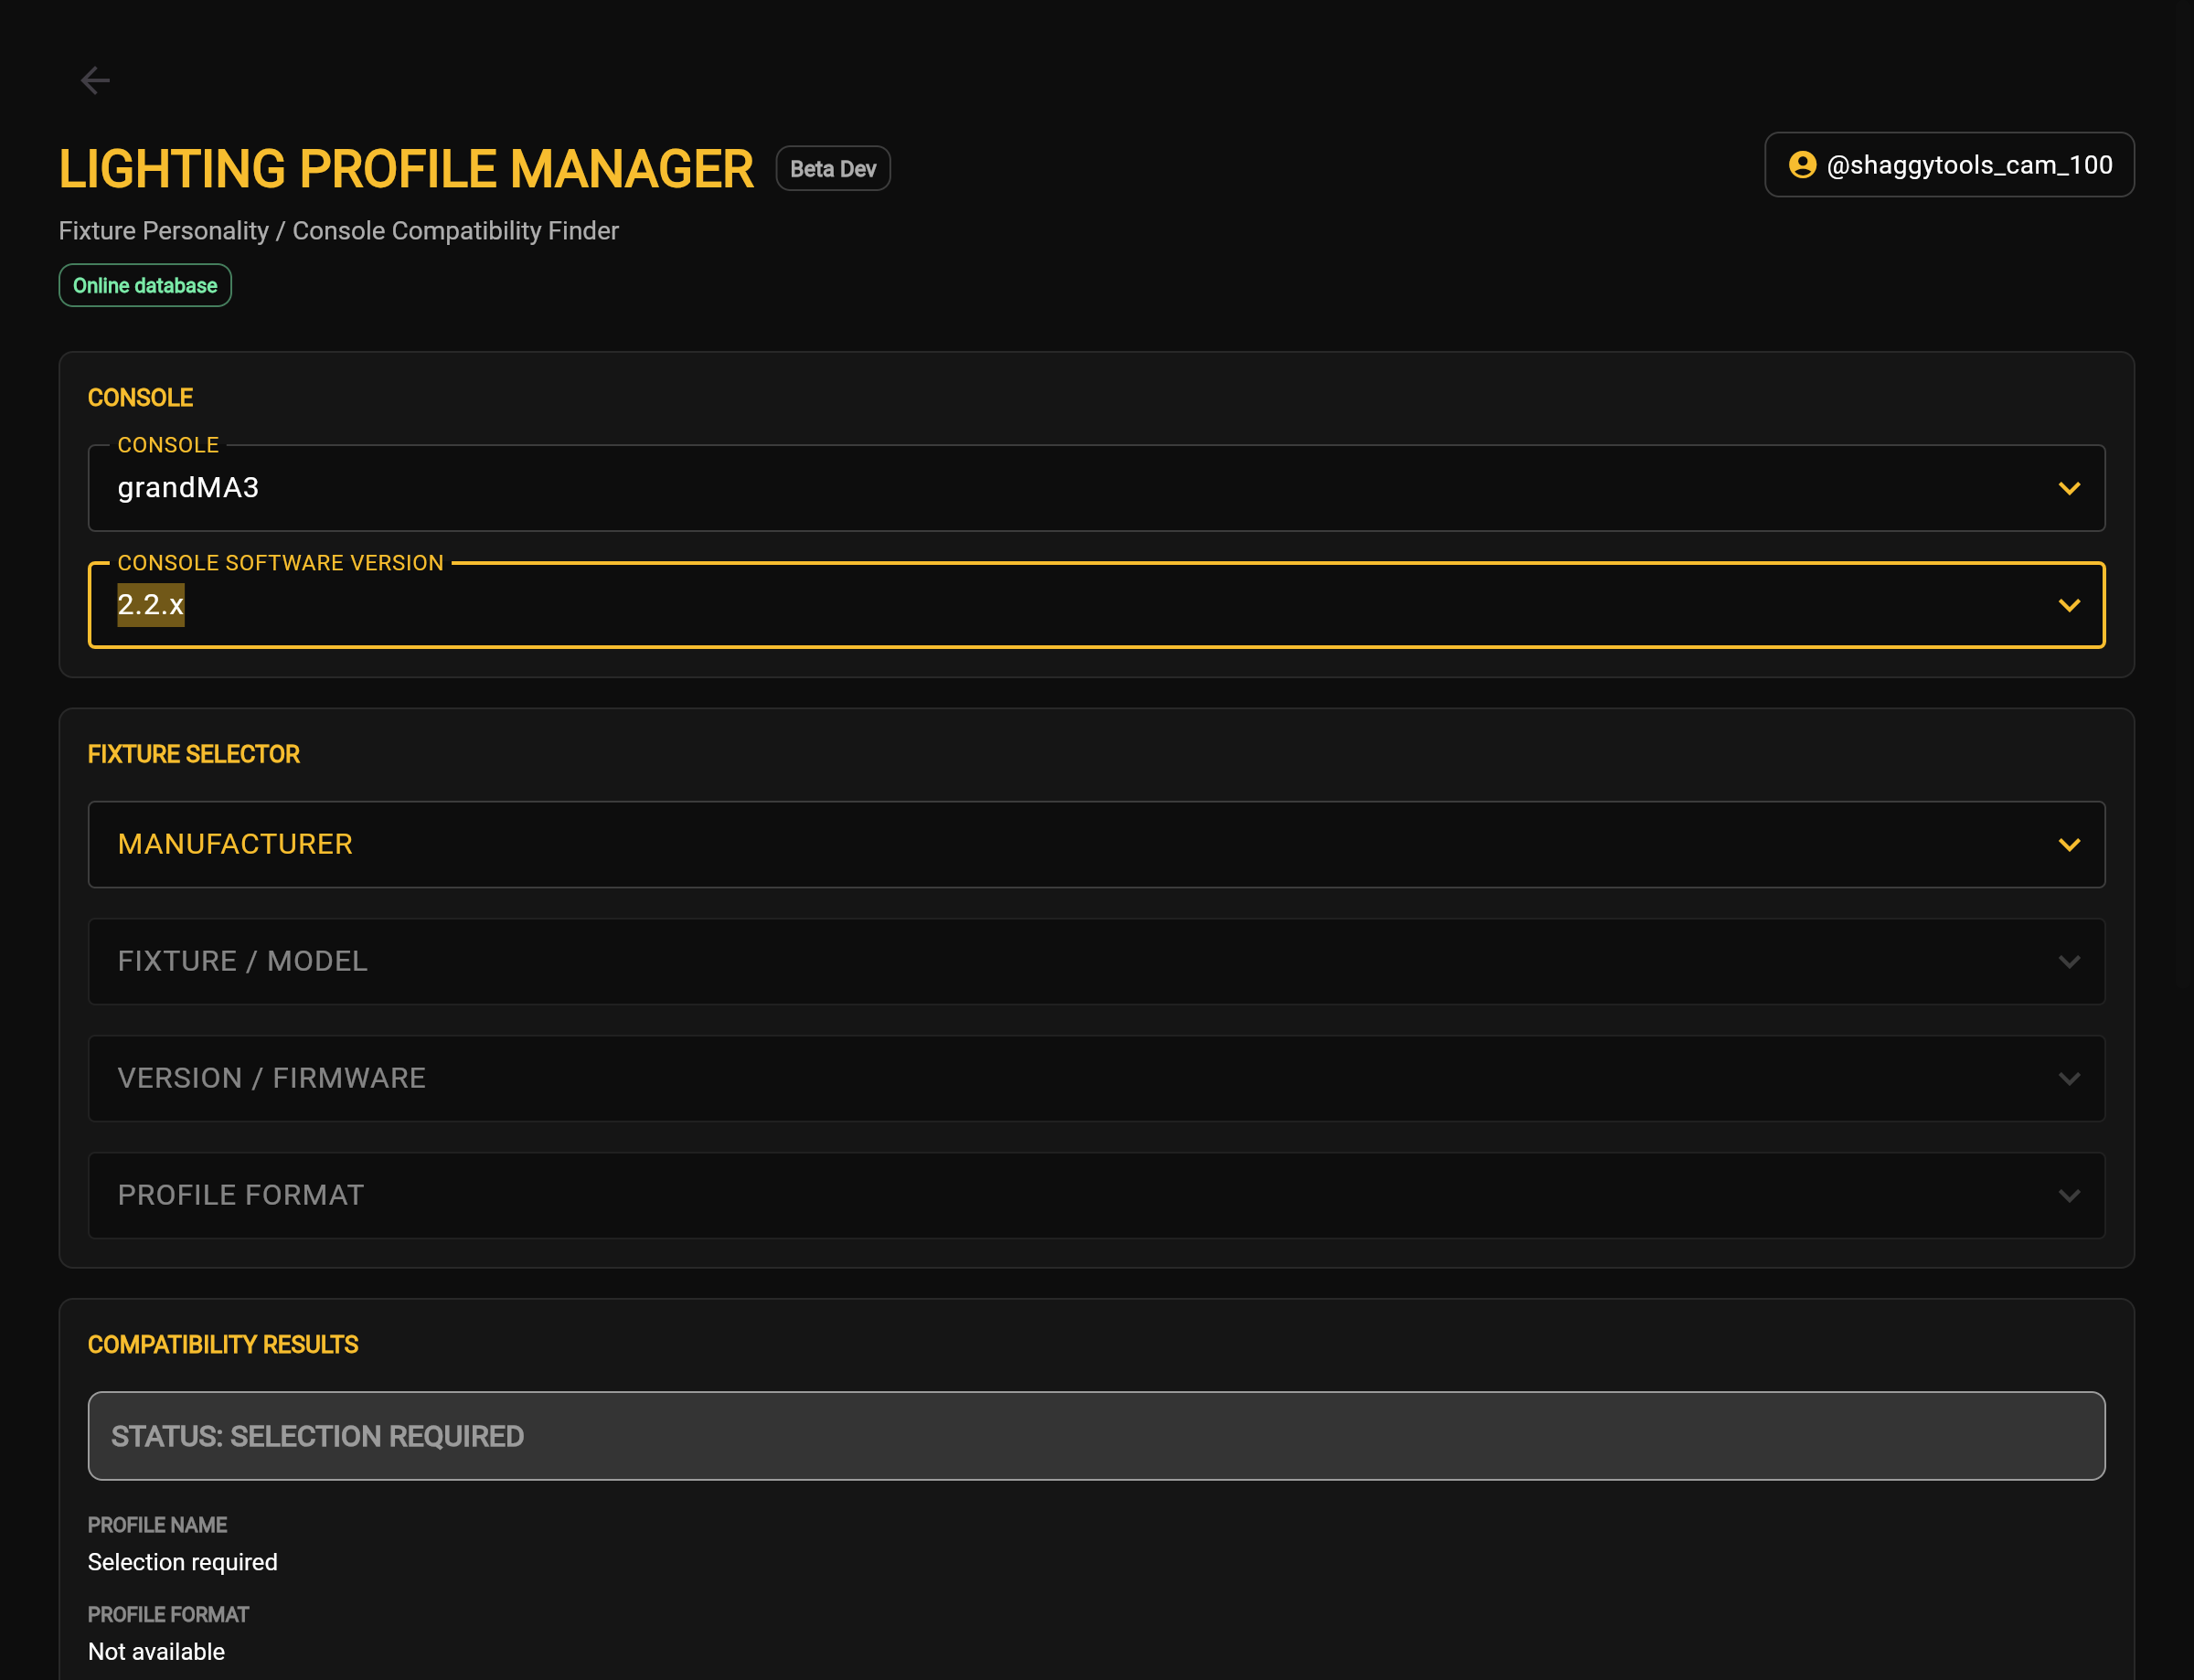
Select a Console

Select the lighting console that will use the profile.

Lighting console selected
Lighting console selected Application screenshot

Select the Console Software Version

Choose the software version running on that console.

Console Software Version selected
Console Software Version selected Application screenshot

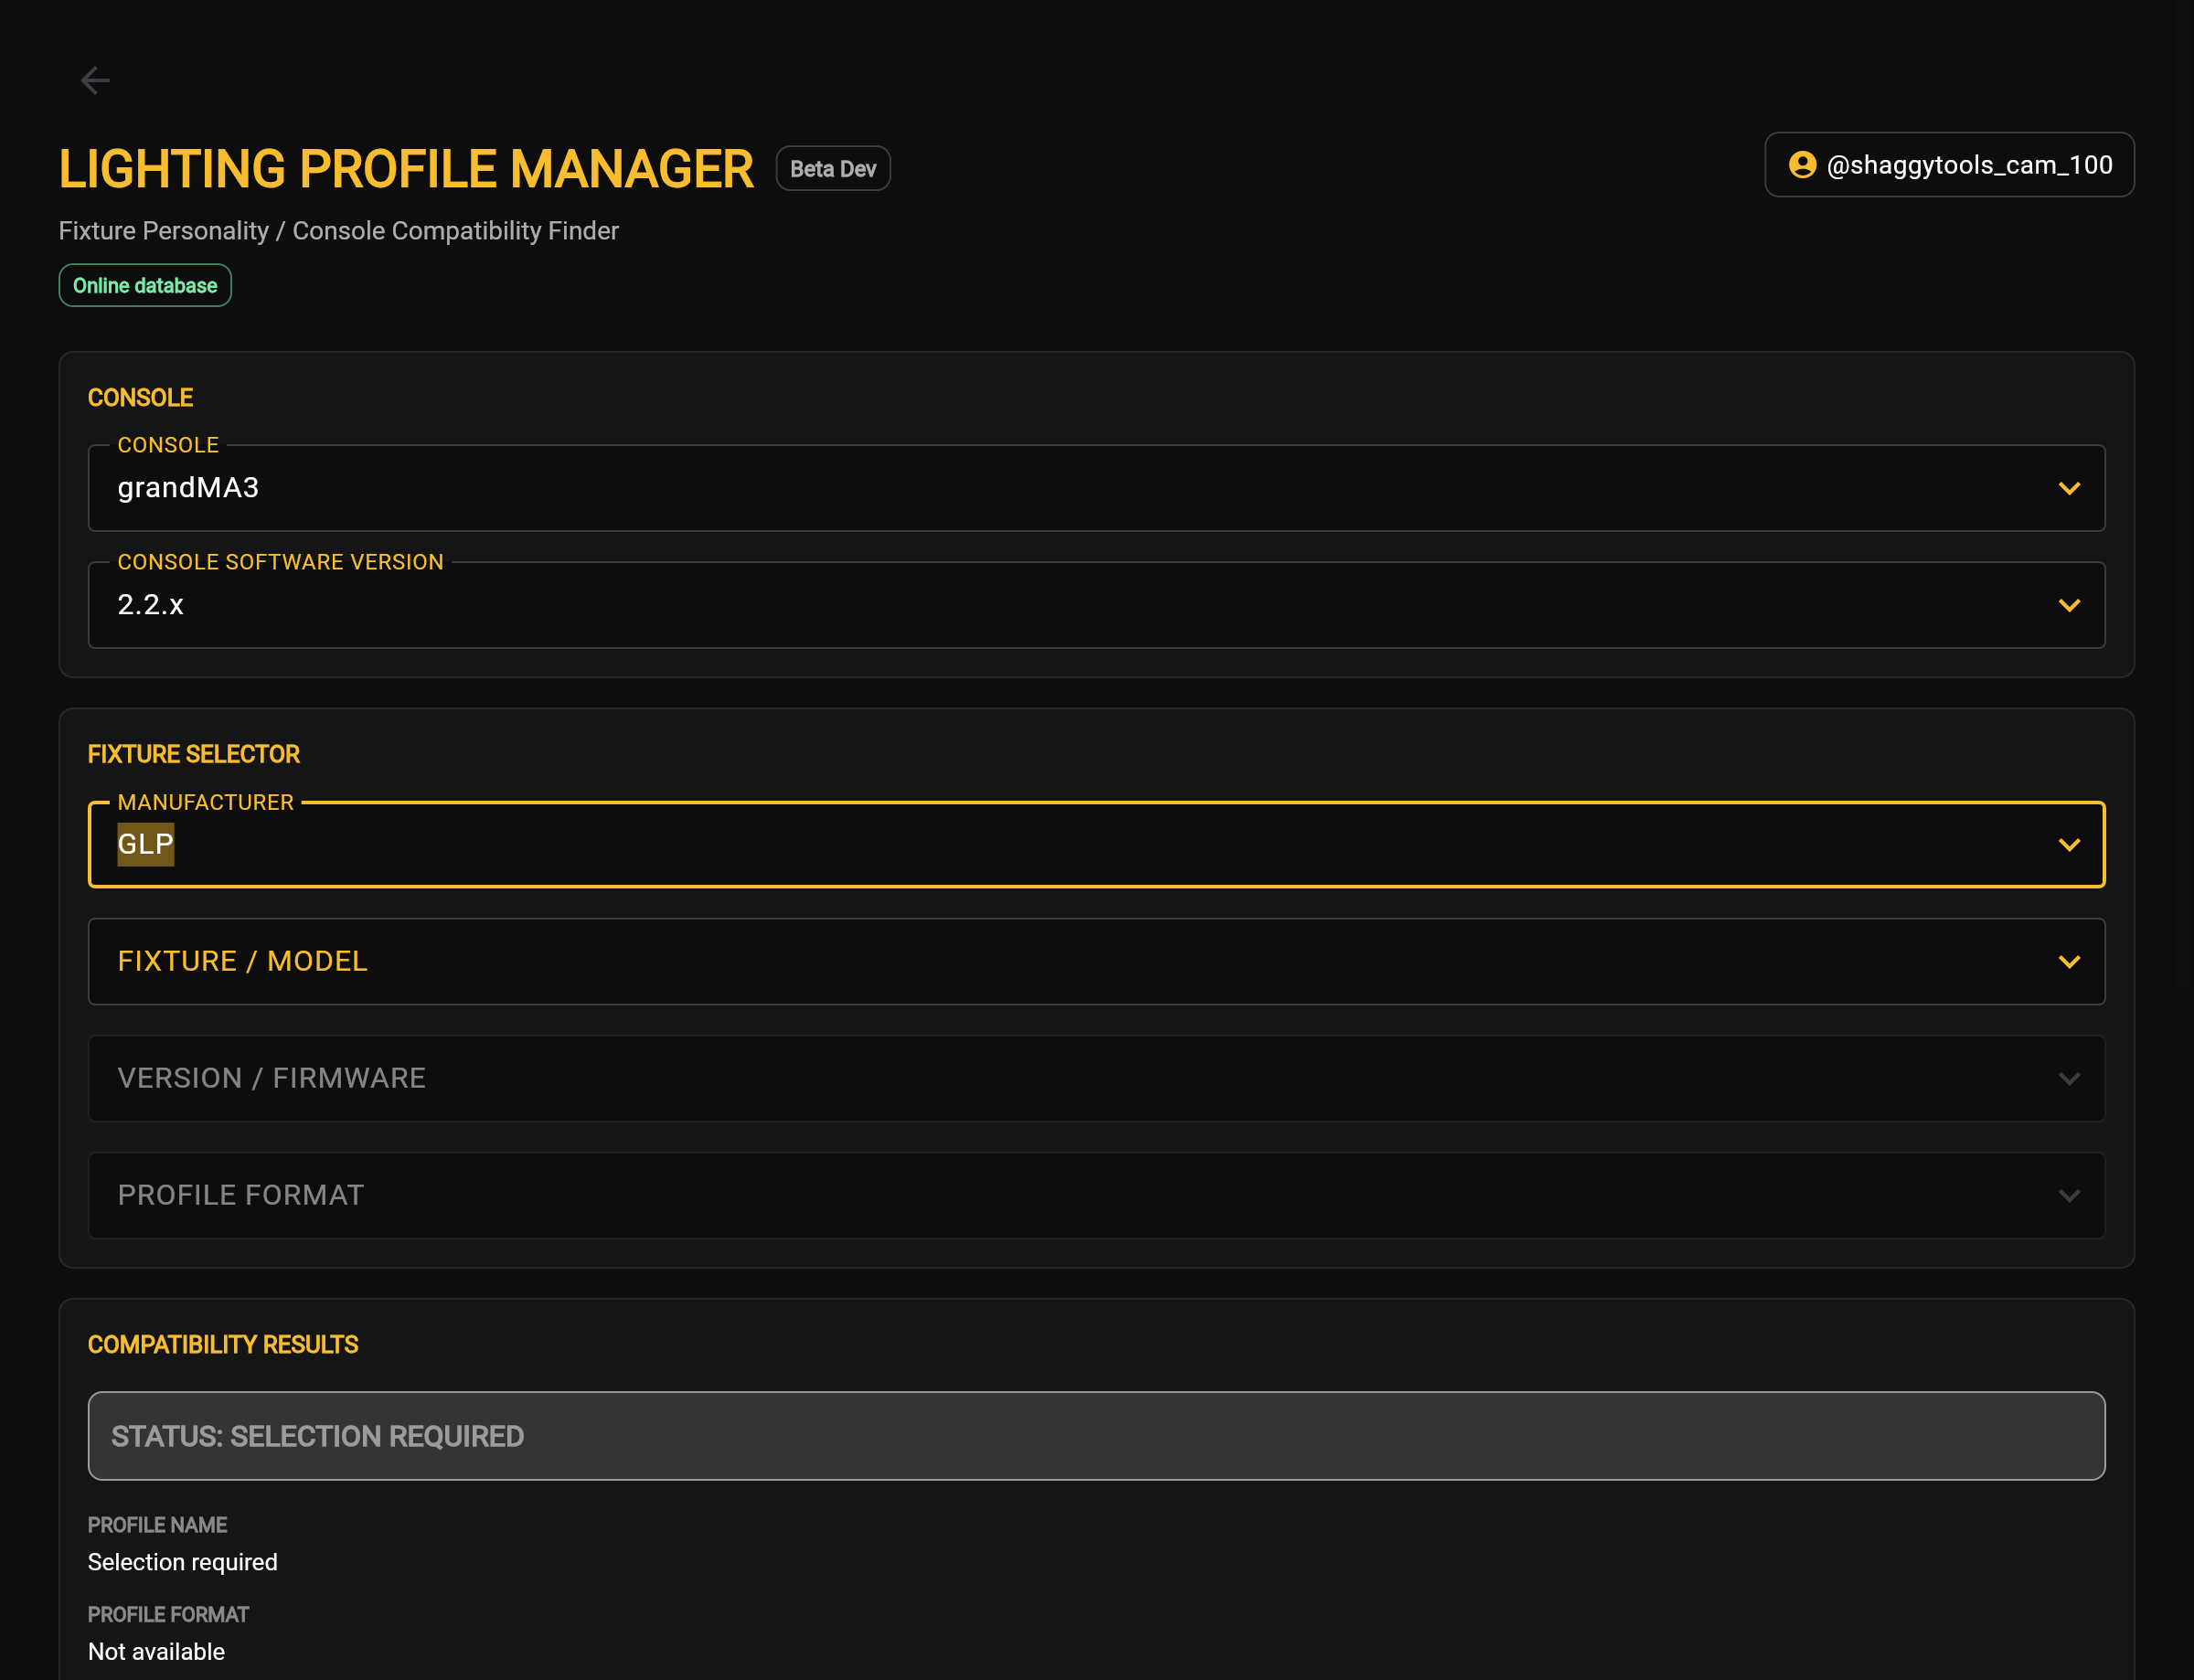
Select the Manufacturer

Select the fixture manufacturer.

Fixture manufacturer selected
Fixture manufacturer selected Application screenshot

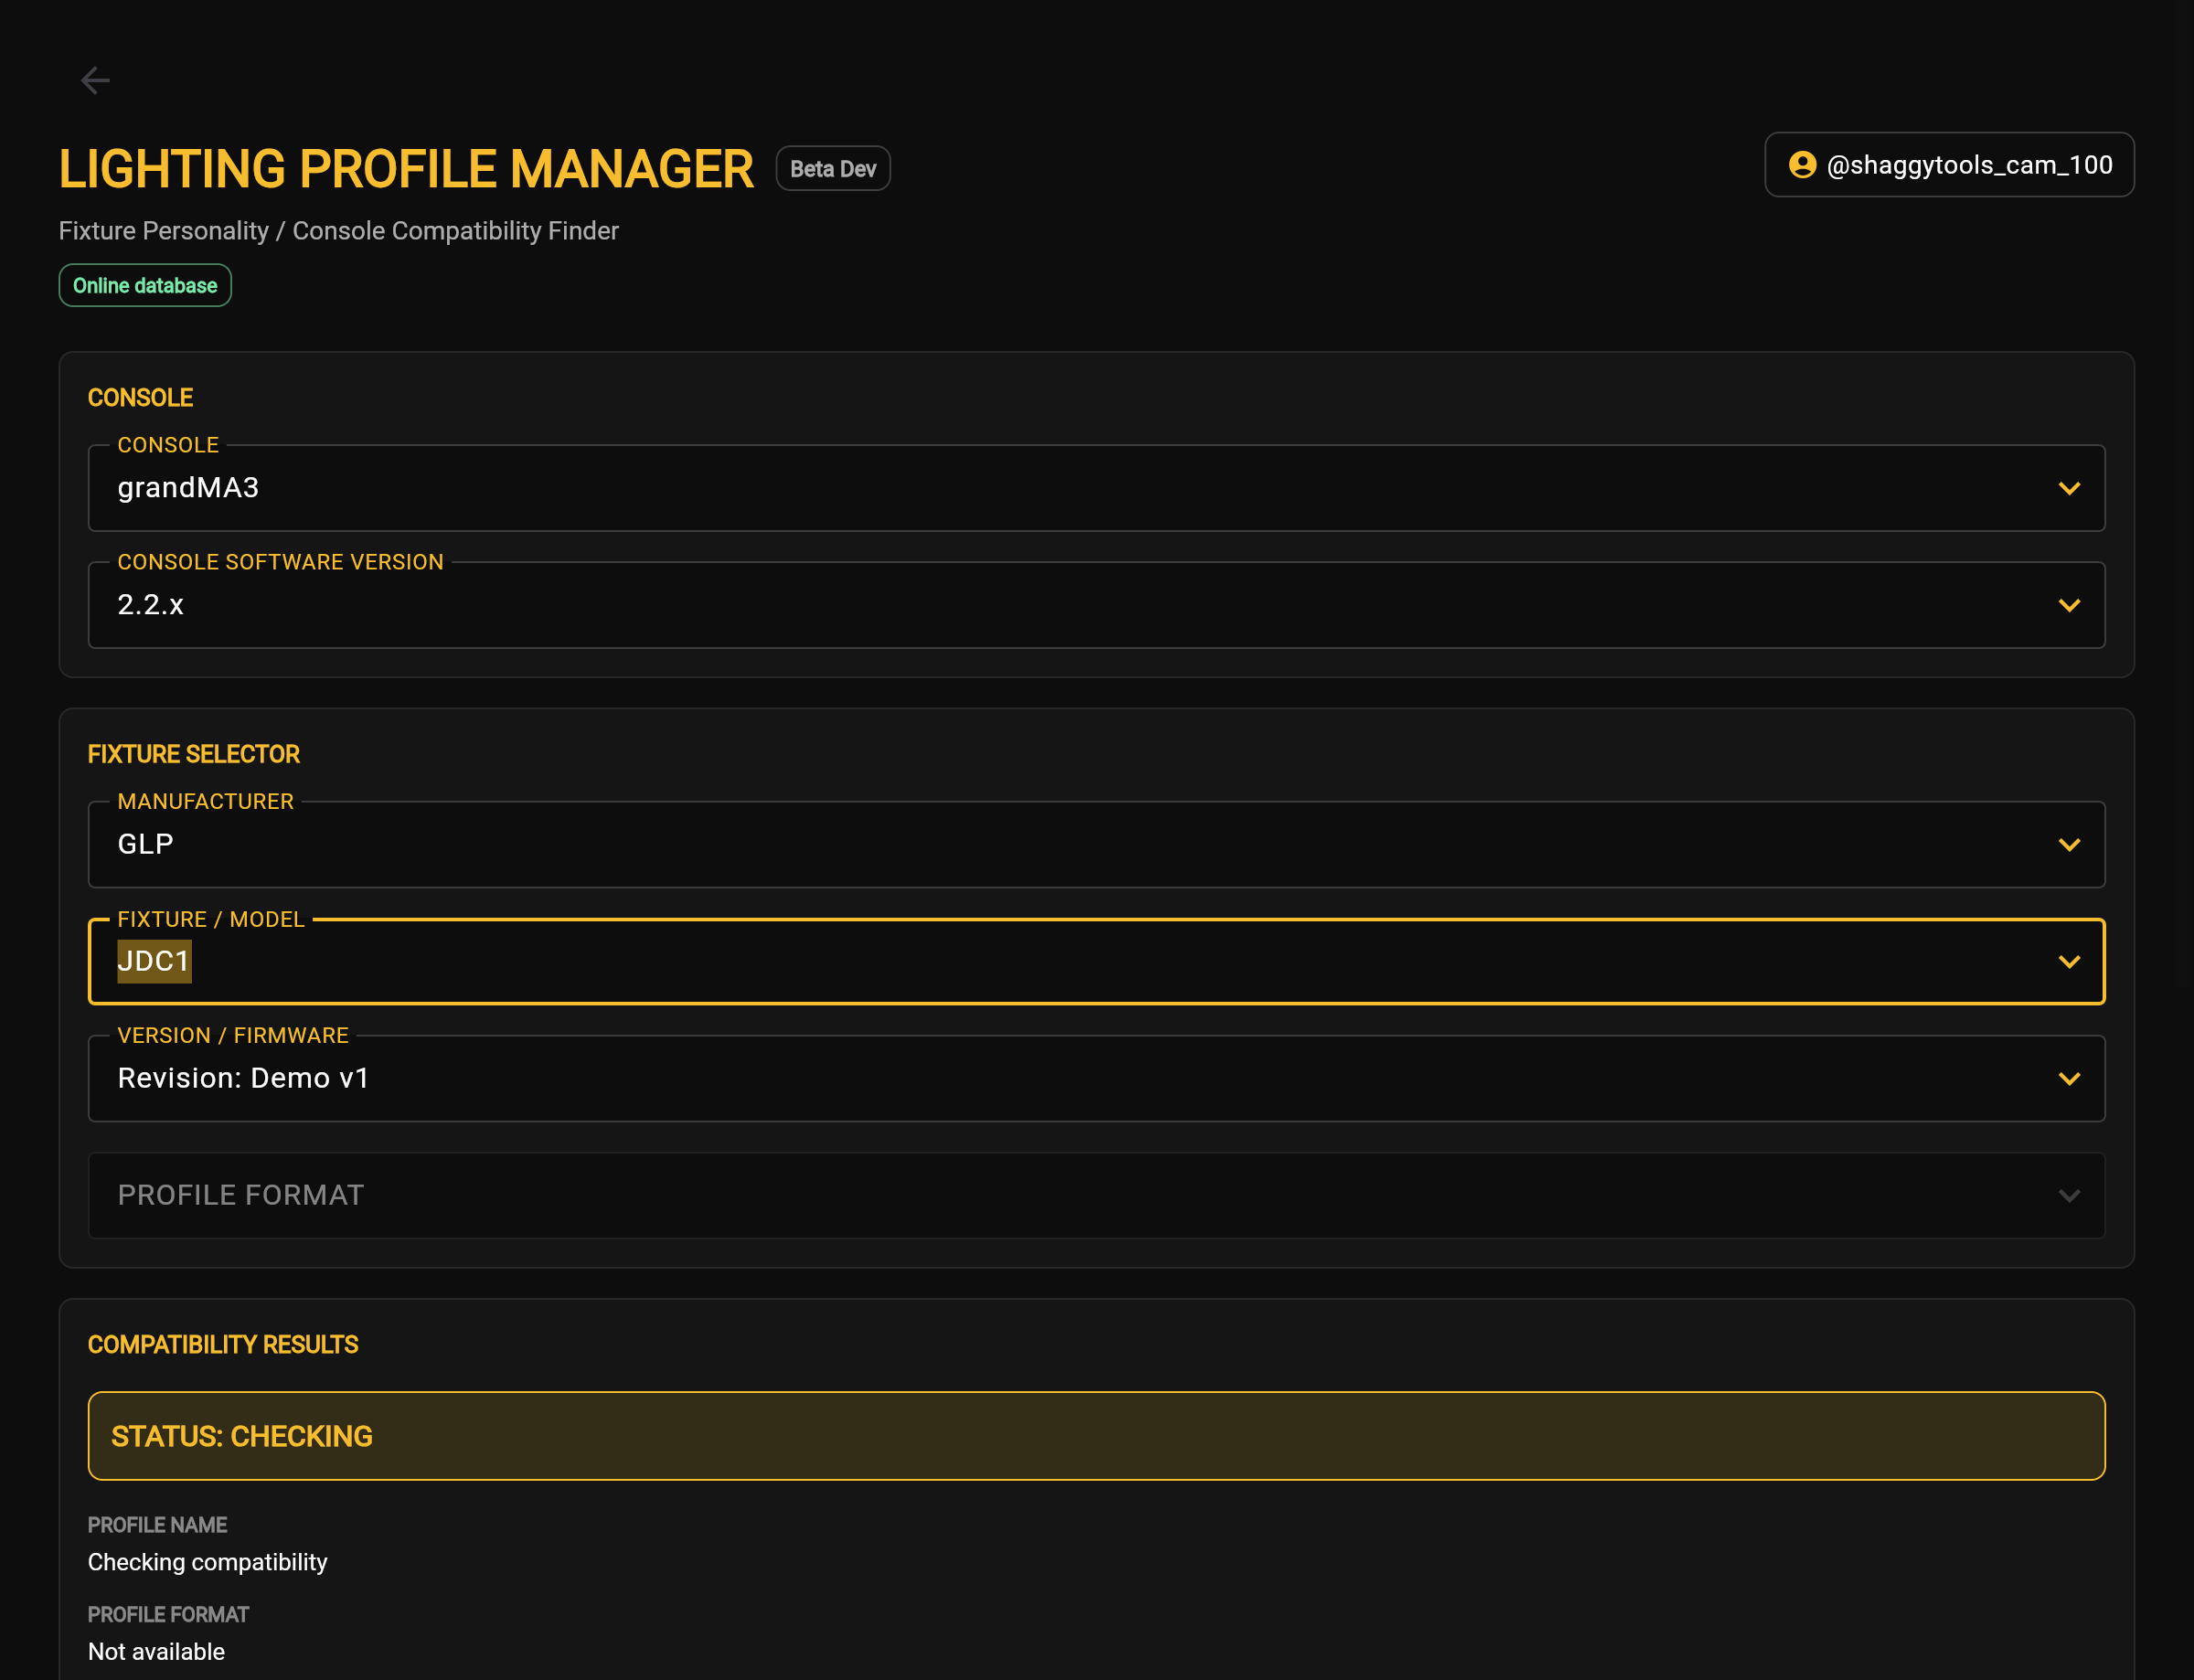
Select the Fixture / Model

Select the fixture model. The CHECKING state appears after this selection.

Fixture selected and CHECKING displayed
Fixture selected and CHECKING displayed Application screenshot

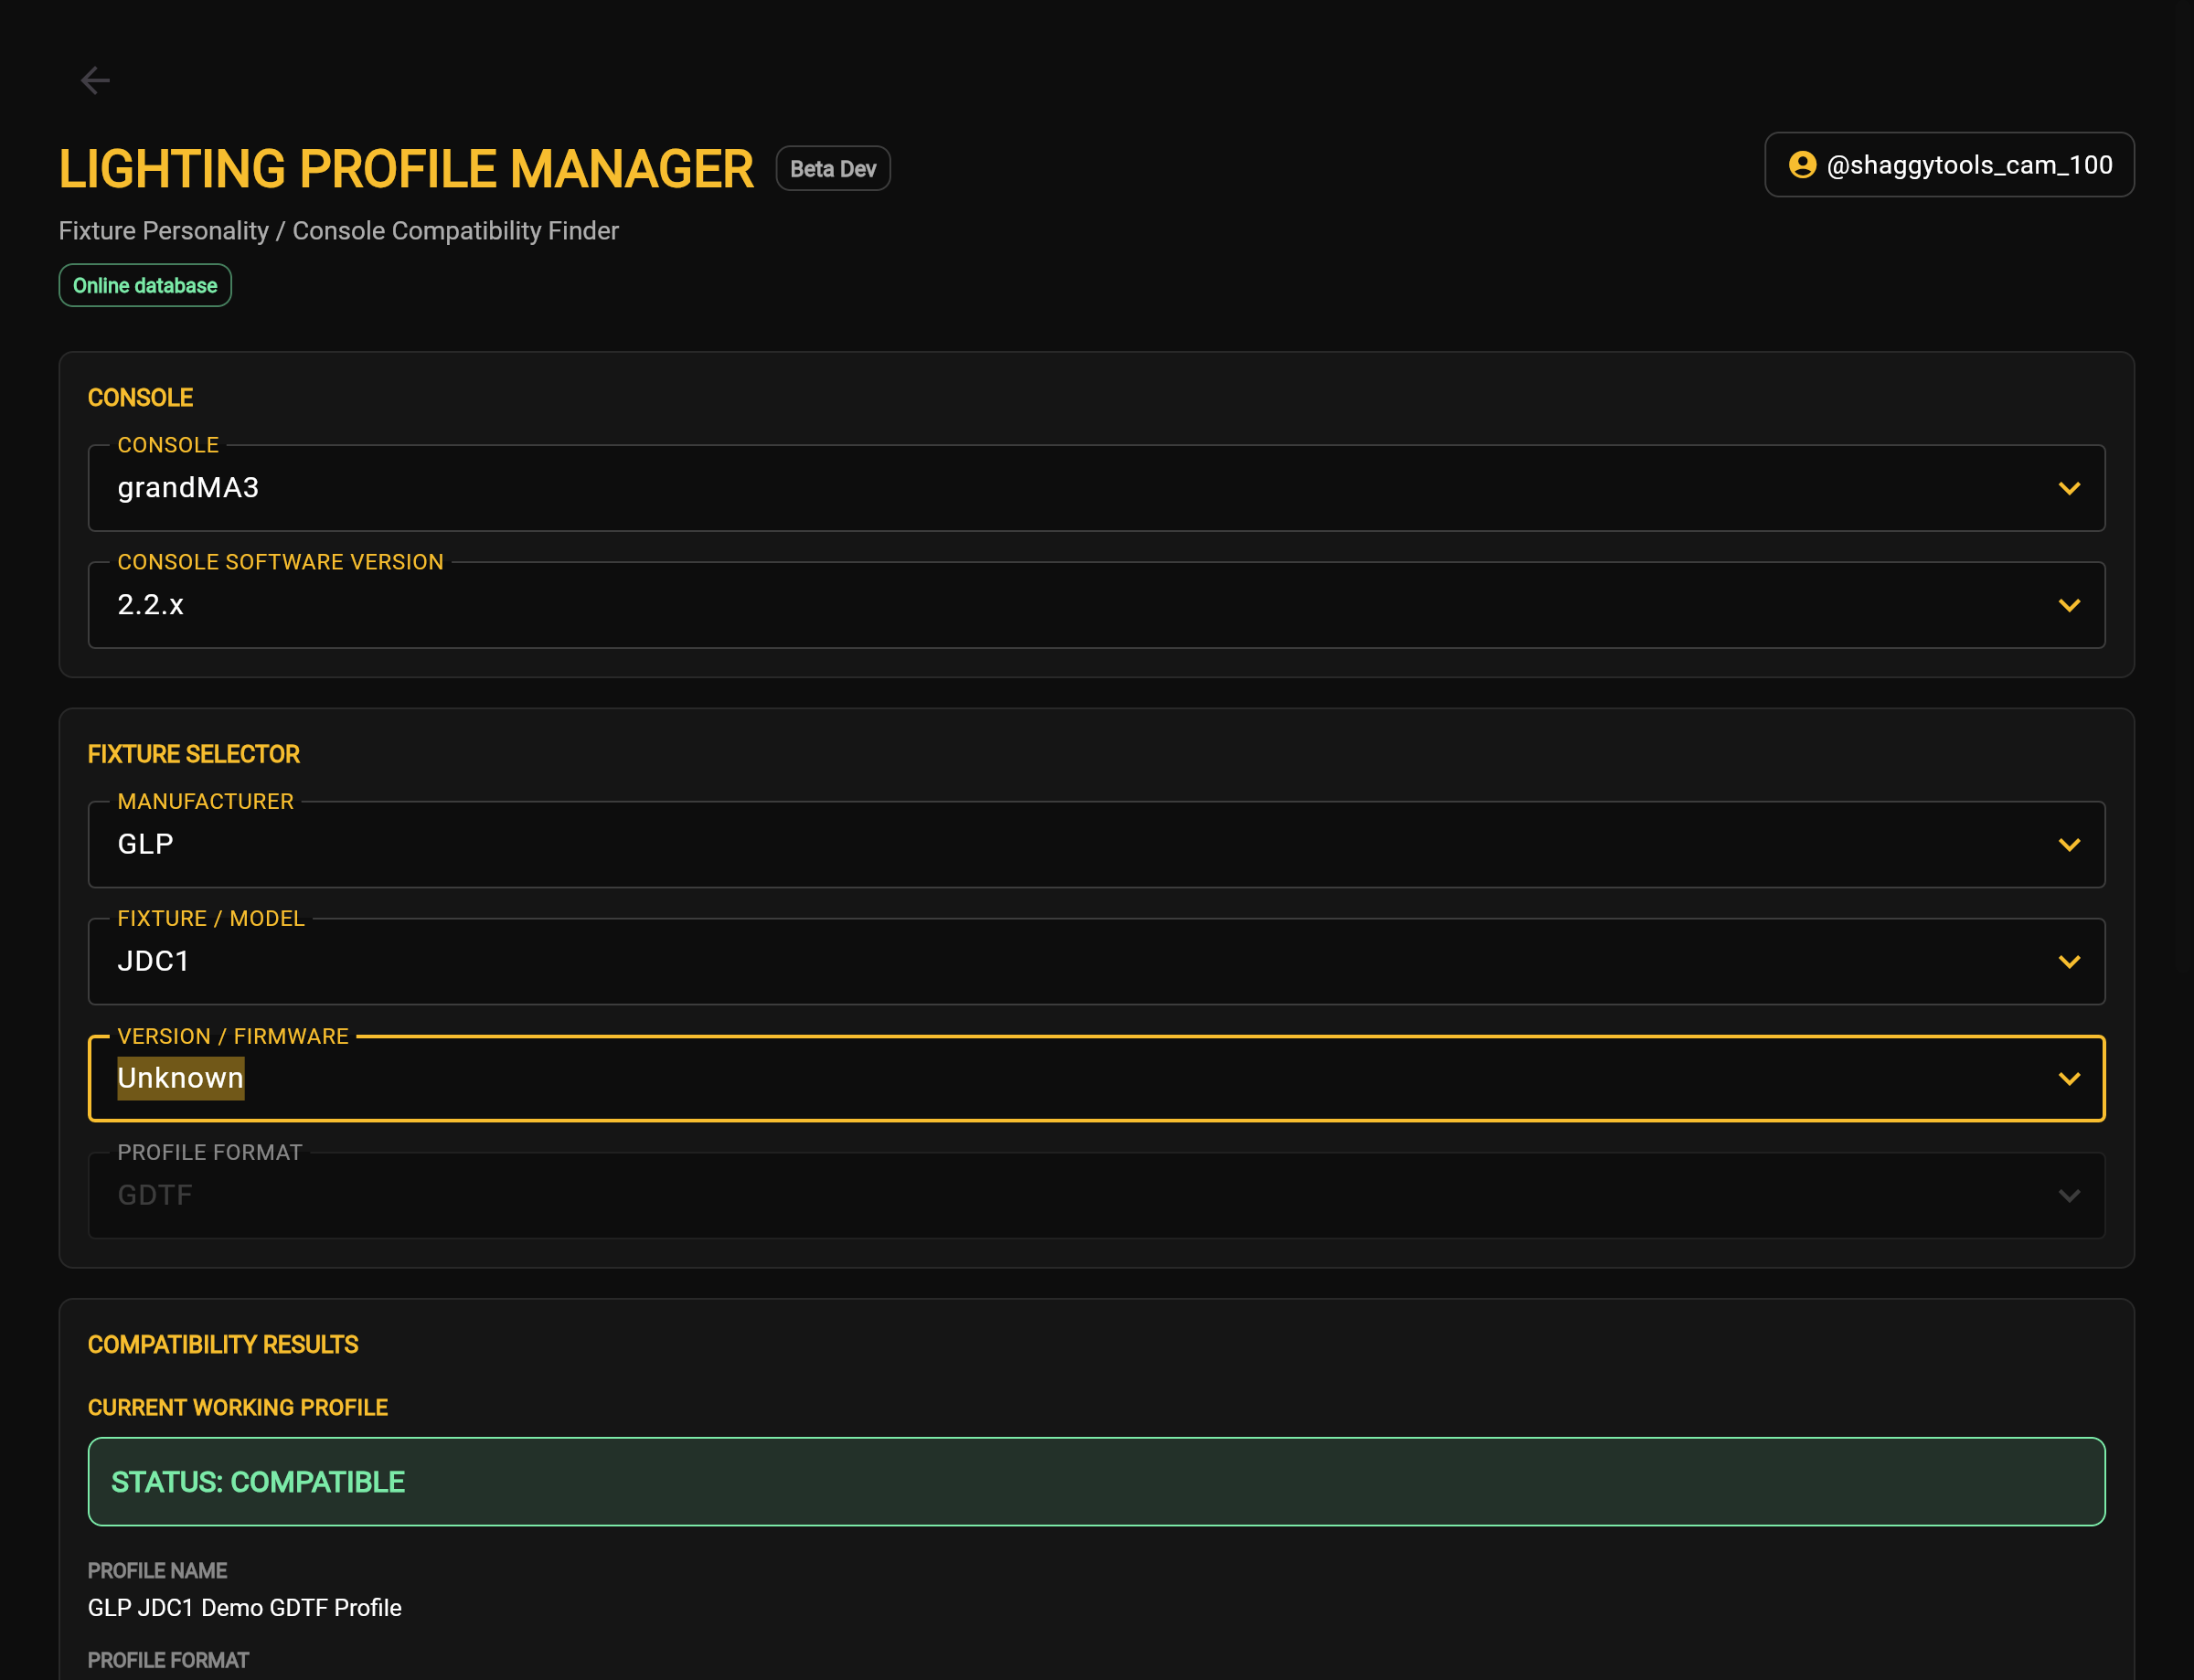
Select Version / Firmware

Select the firmware version installed on the fixture. Firmware is the software built into the fixture. If you do not know the version, use the option LPM provides for unknown firmware.

Version or Firmware selected
Version or Firmware selected Application screenshot

After the required selections are present, continue to Compatibility Checking.

Populated compatibility result
Populated compatibility result Application screenshot

Profile Selection Tips

  • Complete the selections in the order presented.
  • Review each selection before continuing.

Profile Selection Frequently Asked Questions

Can I skip directly to Fixture / Model?

No. Complete each selection in the order presented so LPM can provide the choices required for the next step.

Troubleshoot Profile Selection

  • Verify that each required selection is present.
  • Continue to Compatibility Checking when all five selections are complete.

Profile Selection Related Topics

Compatibility Checking

Understand Compatibility Checking

Compatibility Checking is the process LPM uses to look for a profile matching the Console, Console Software Version, Manufacturer, Fixture / Model, and Version / Firmware you selected.

The application evaluates the current selection combination as the selection workflow progresses. The CHECKING state appears after Fixture / Model selection, and evaluation continues after Version / Firmware is selected.

Check Lighting Profile Compatibility

Compatibility Checking in progress
Compatibility Checking in progress Application screenshot

After you select Version / Firmware, the evaluation continues using all five selections.

Evaluation after Version or Firmware selection
Evaluation after Version or Firmware selection Application screenshot

When evaluation completes, LPM displays the compatibility information.

Completed compatibility evaluation
Completed compatibility evaluation Application screenshot

Compatibility Checking Tips

  • Complete the required selections before interpreting the result.
  • Wait for CHECKING to be replaced by the compatibility result before continuing.

Compatibility Checking Frequently Asked Questions

What does CHECKING mean?

CHECKING indicates that LPM is evaluating the current Lighting Profile selections.

Troubleshoot Compatibility Checking

  • Verify that the required selections are present.
  • Wait for the compatibility evaluation to finish.

Compatibility Checking Related Topics

Populated Compatibility Results

Understand Compatibility Results

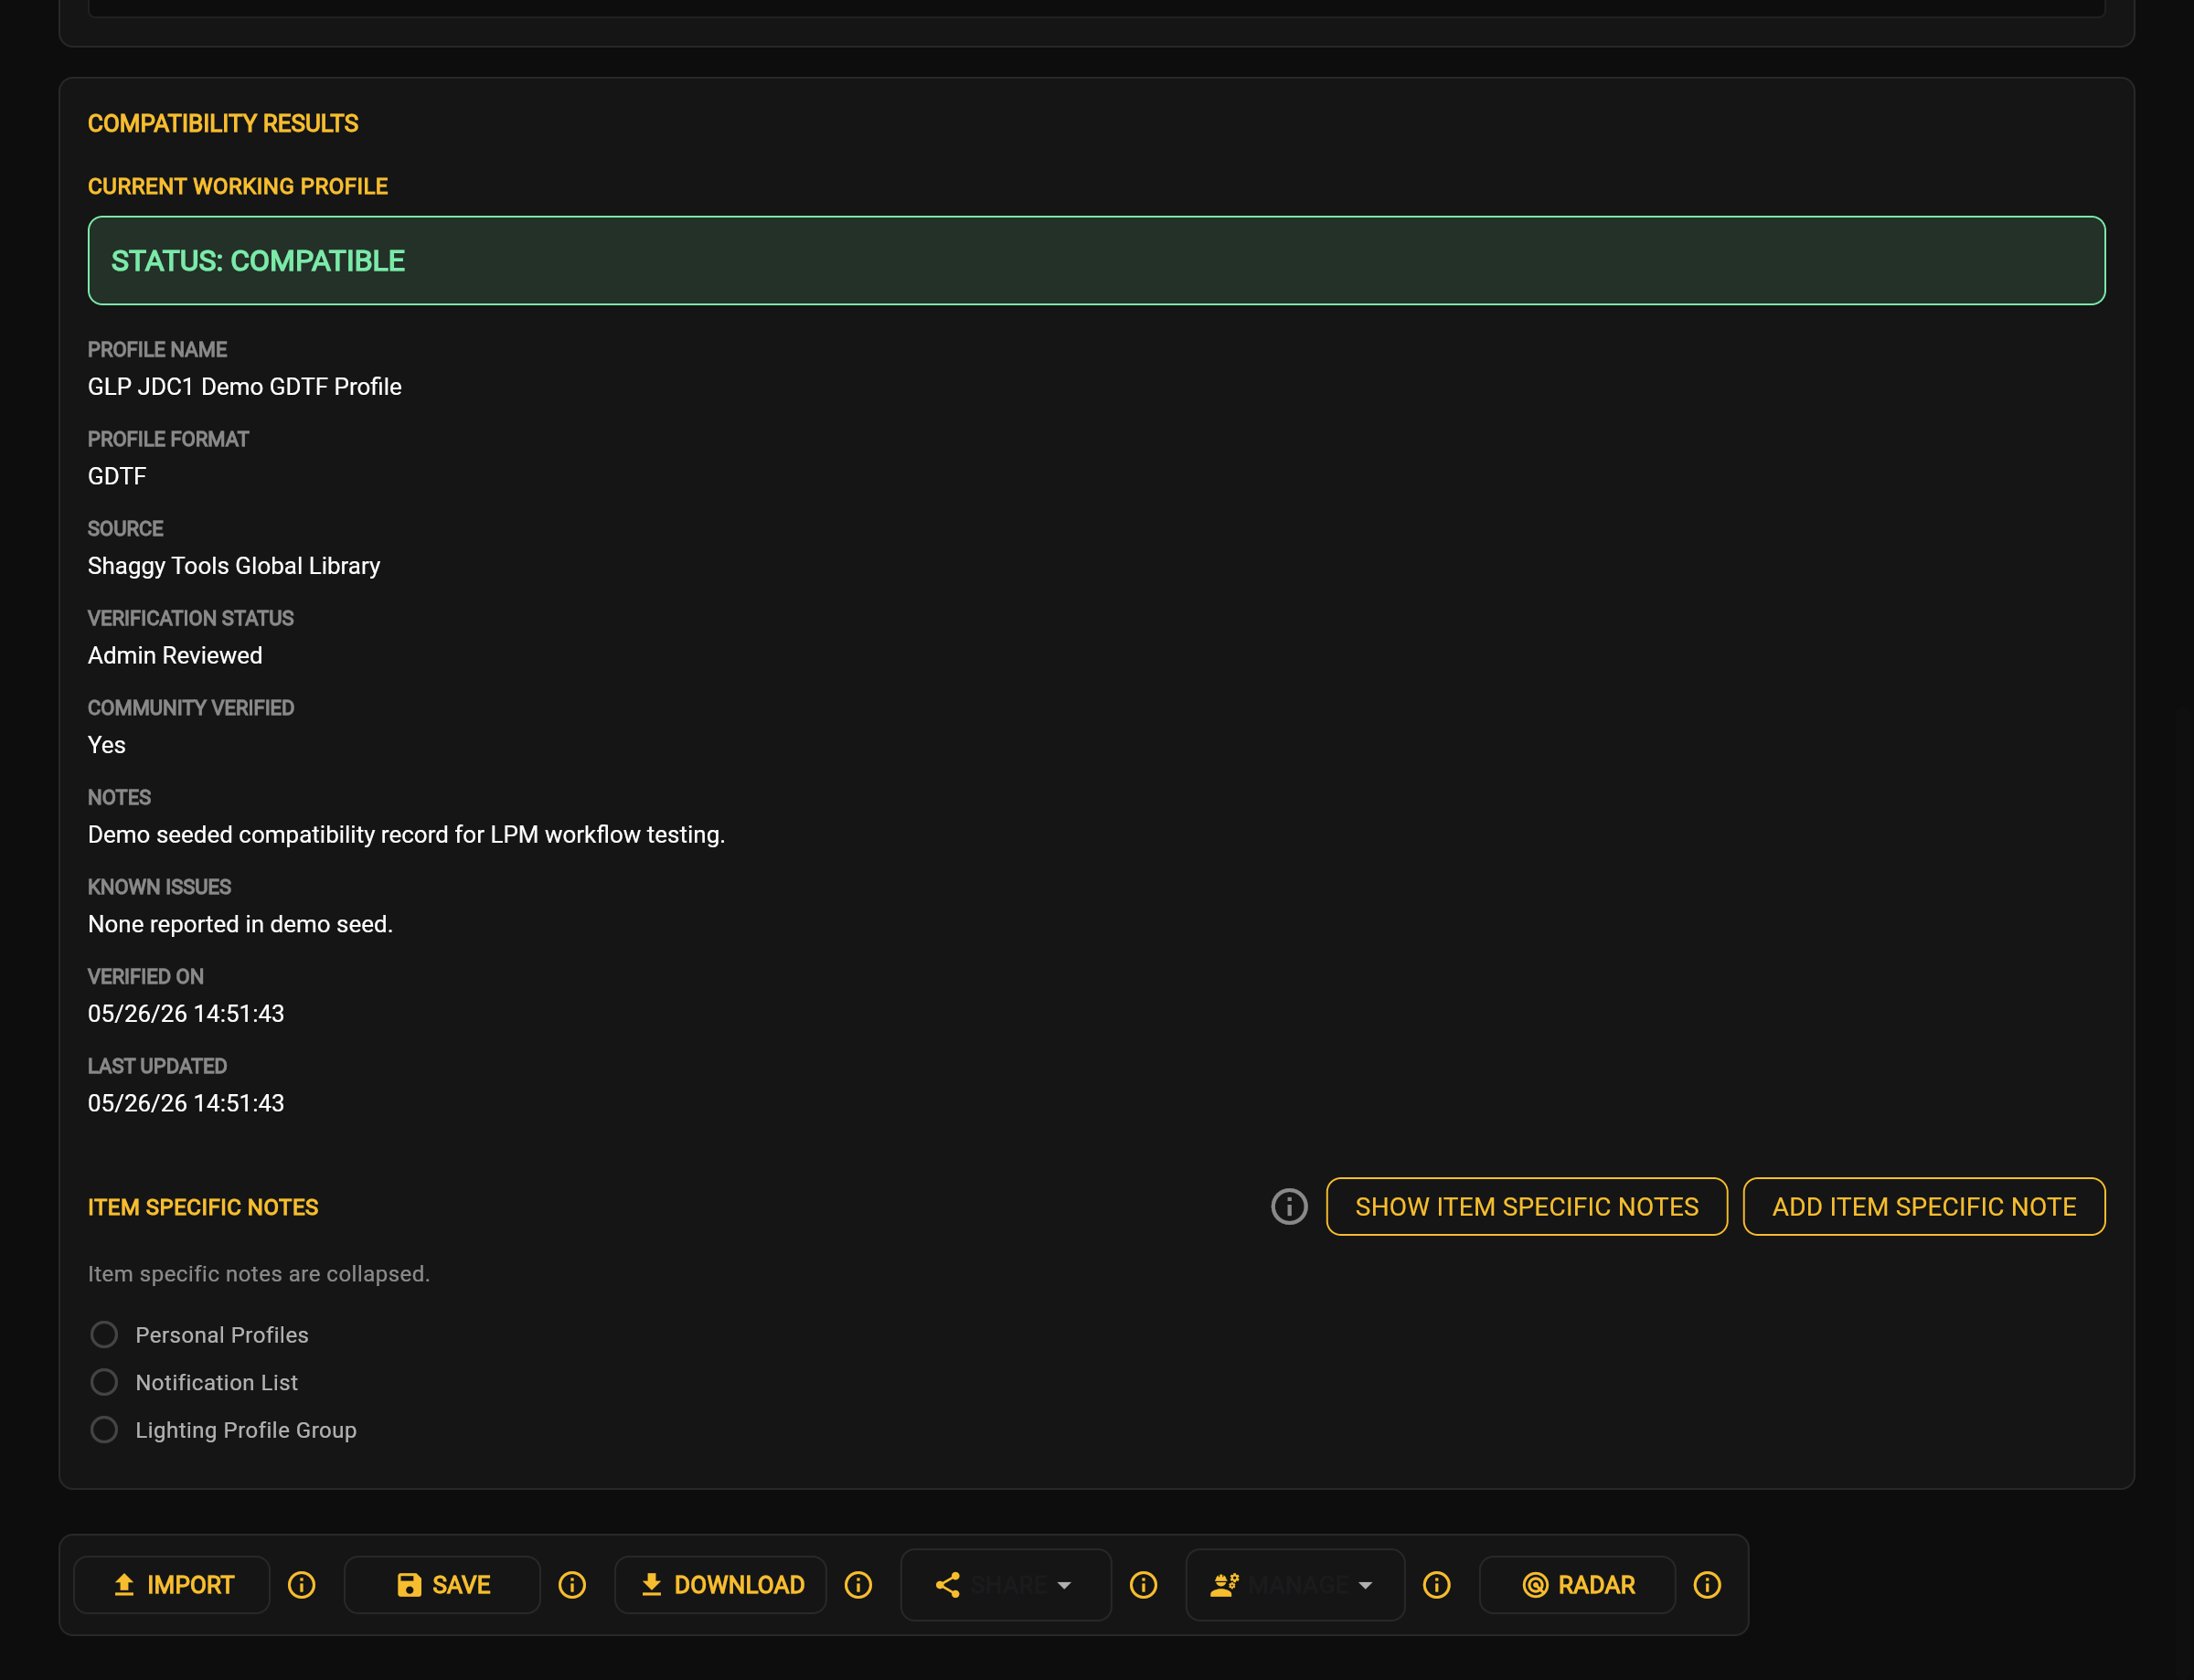
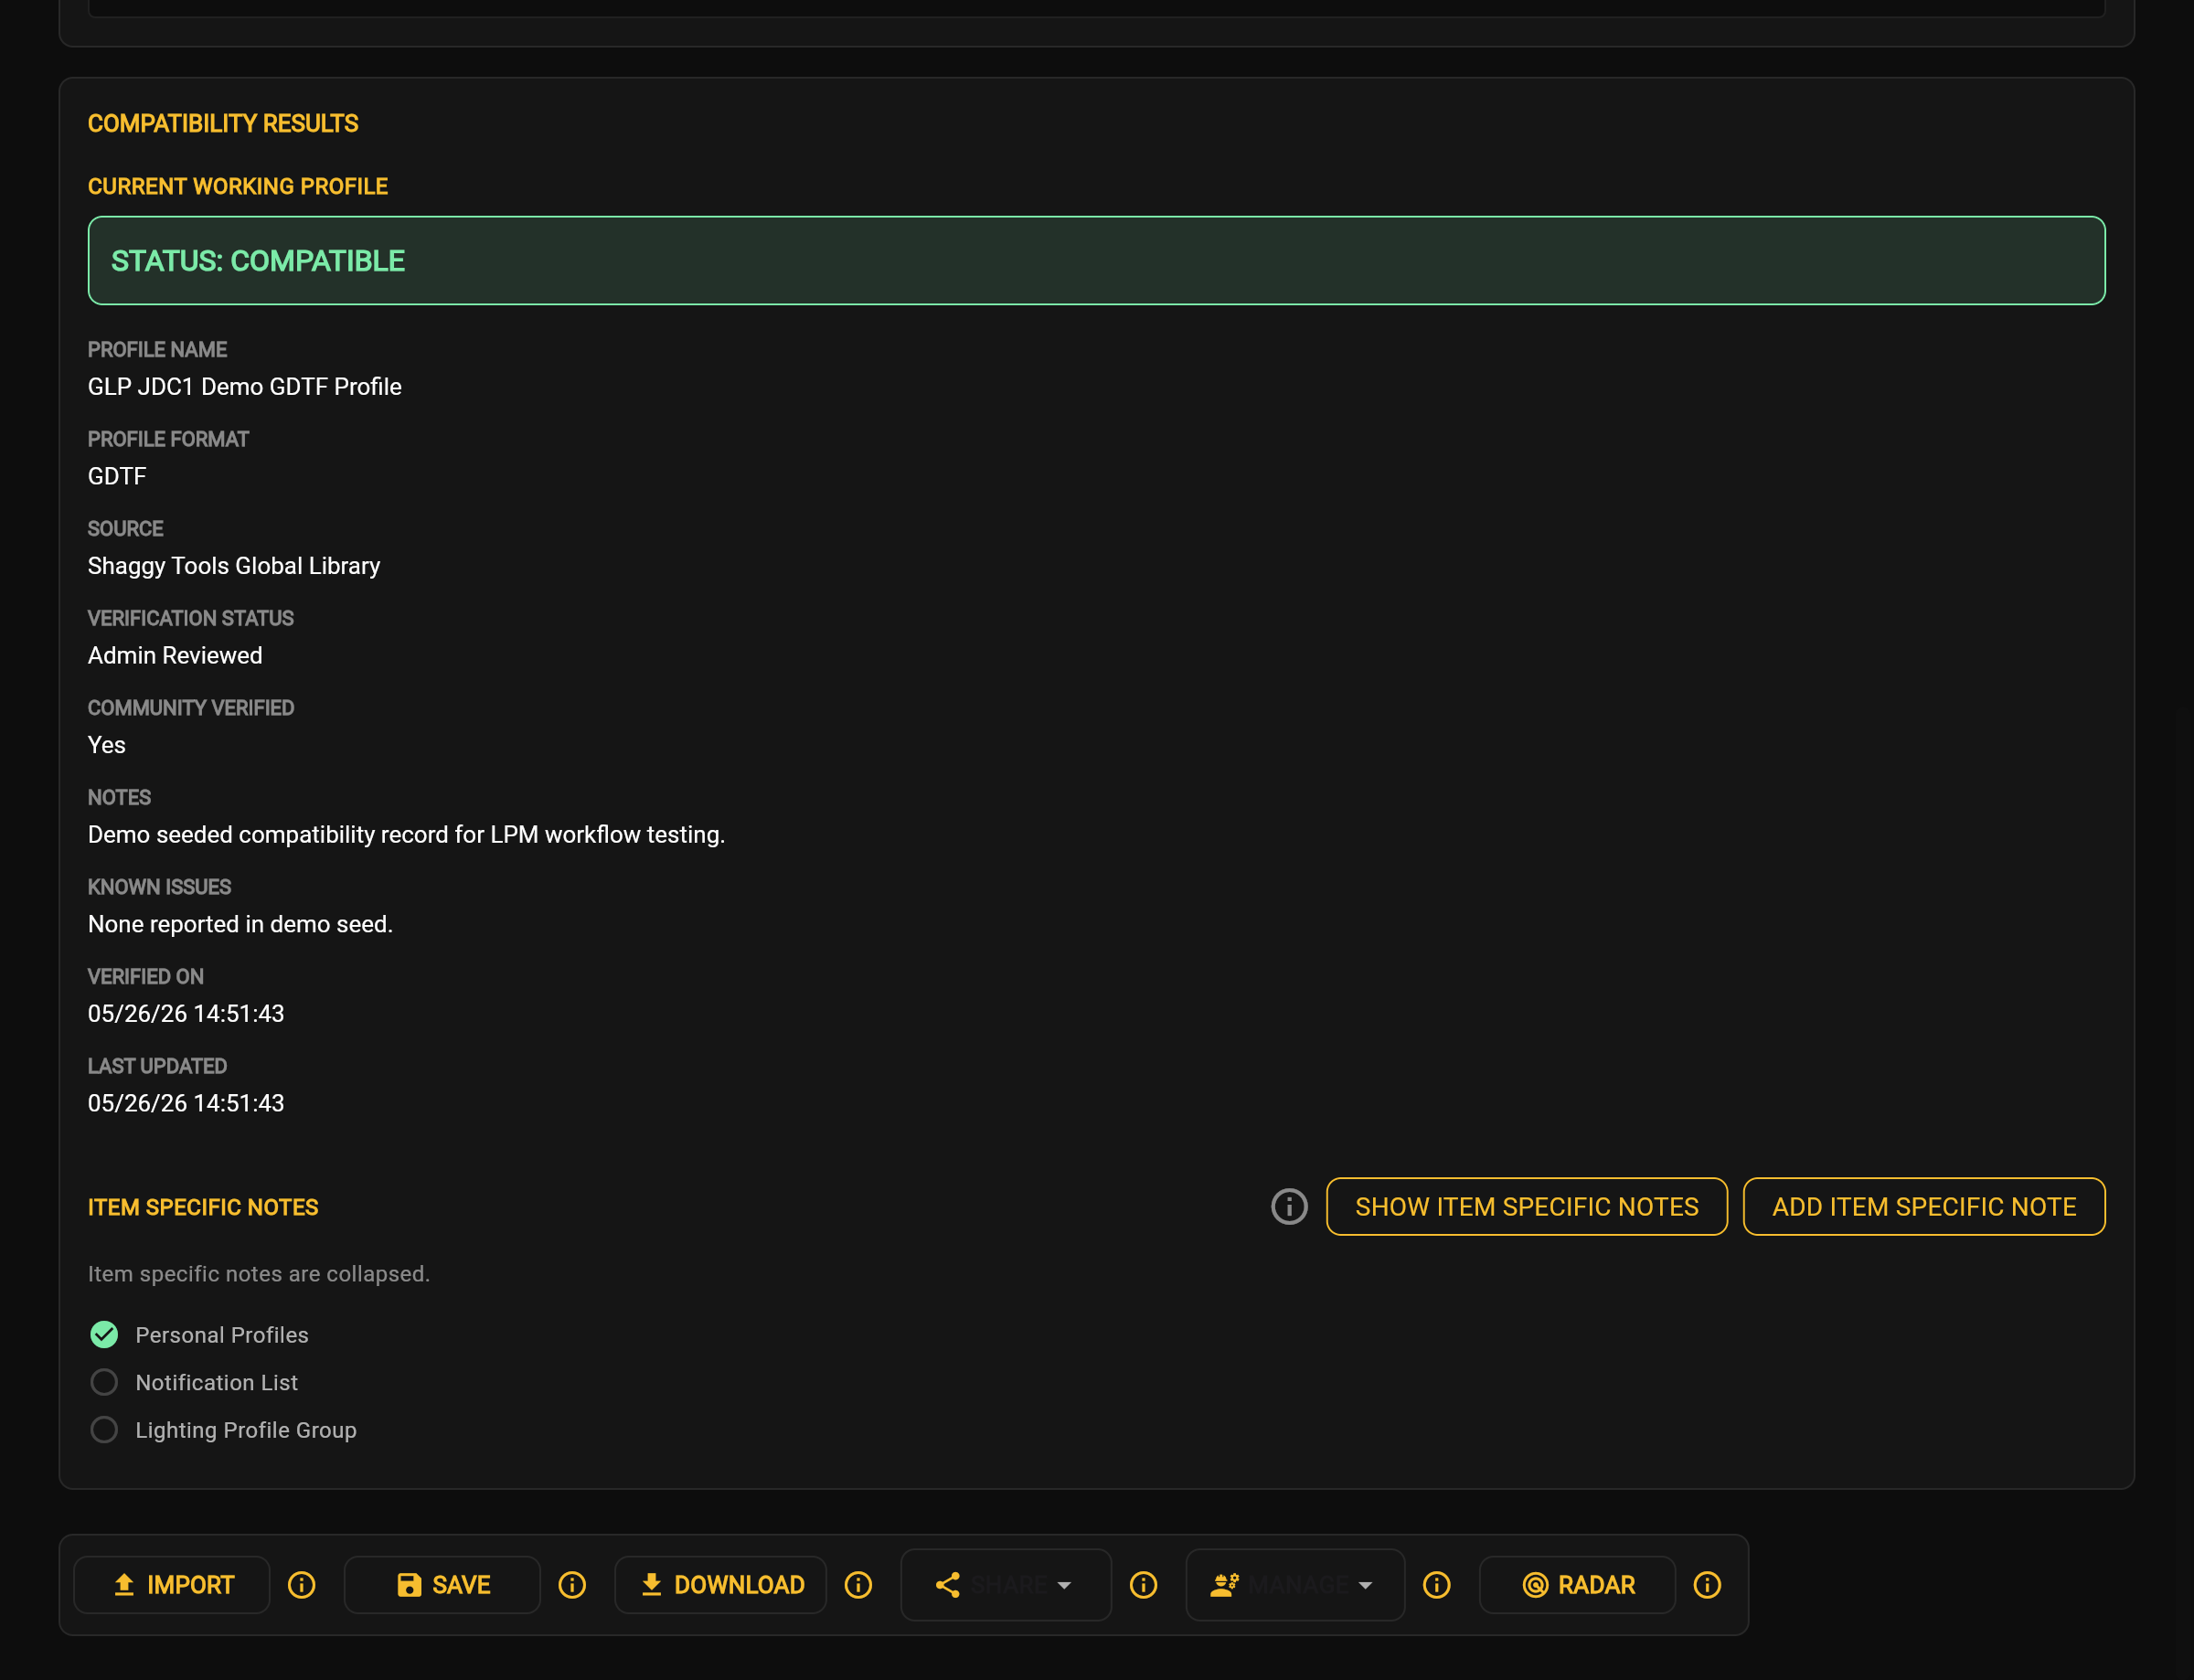
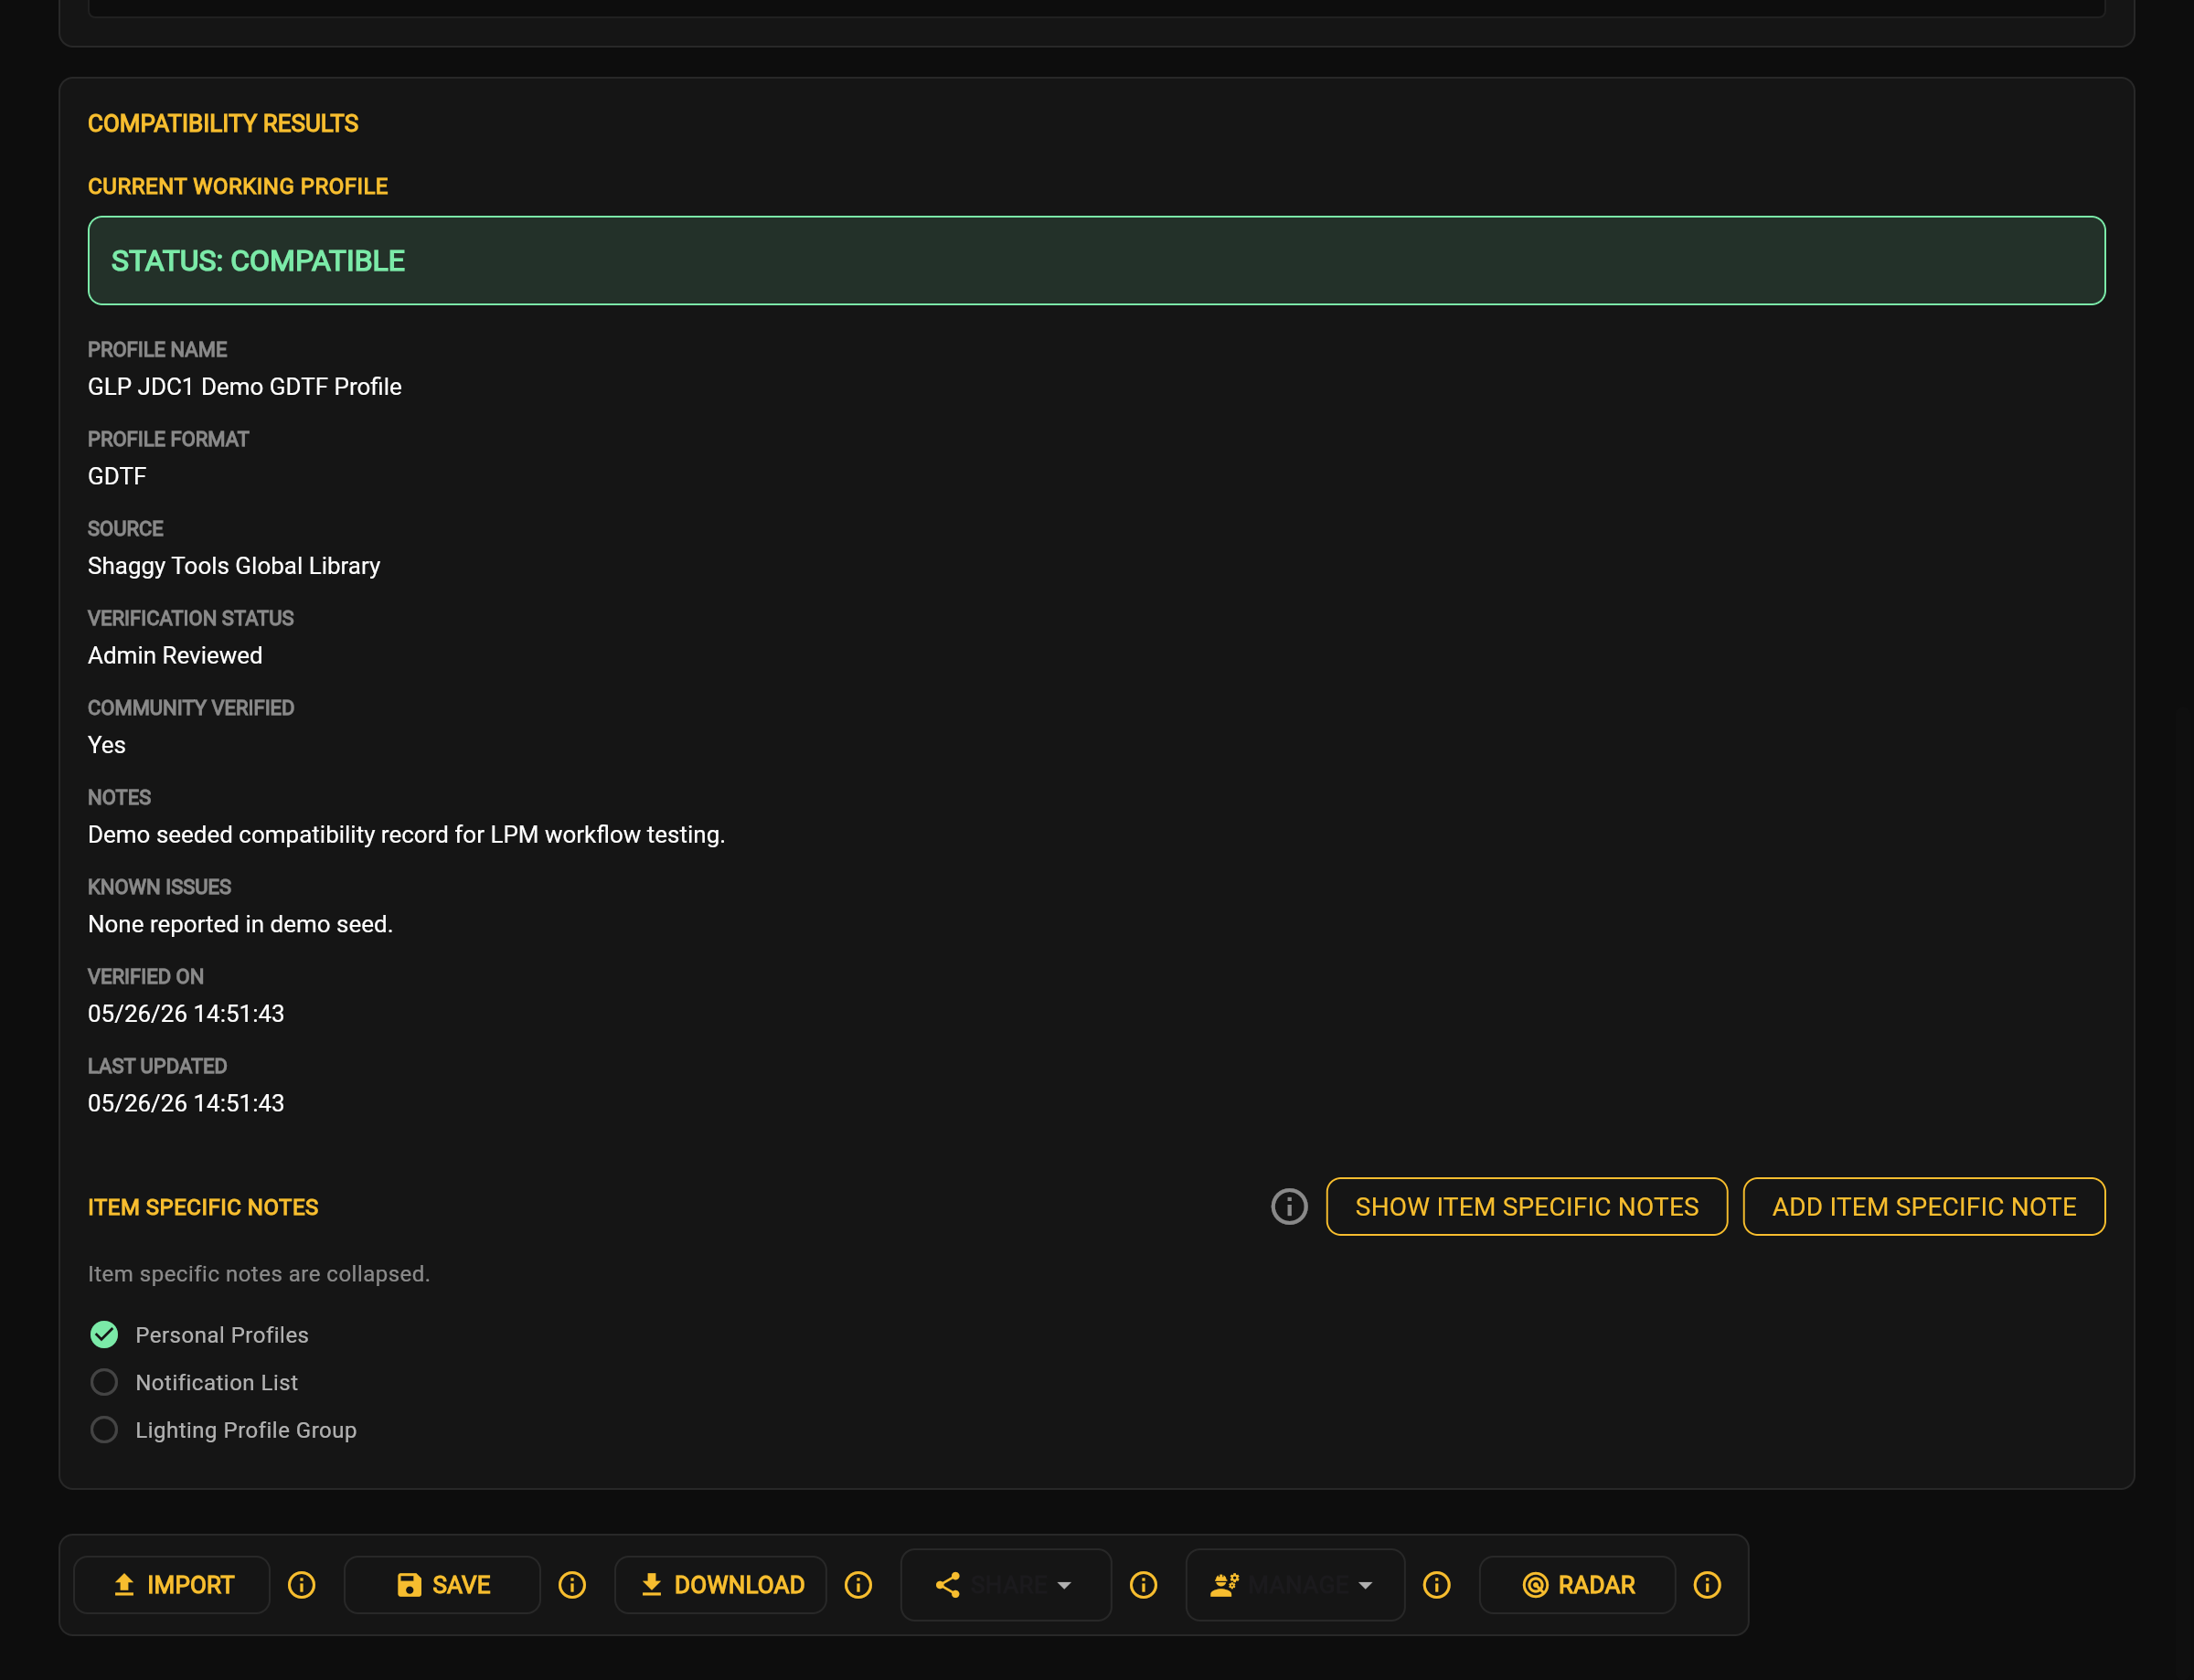
After Compatibility Checking completes, LPM displays whether it found a matching profile for the selected combination and shows information about that profile.

Completed Compatibility Result
Completed Compatibility Result Application screenshot

Read the Compatibility Result

The Compatibility Results panel can display:

FieldDisplayed value
StatusCOMPATIBLE
ProfileGLP JDC1 Demo GDTF Profile
FormatGDTF
SourceShaggy Tools Global Library
VerificationAdmin Reviewed
Community VerifiedYes

The example result shown here uses a GLP JDC1 fixture and a grandMA3 console. Your values depend on your selections.

Status shows LPM's compatibility label. Profile identifies the matching profile. Format names the profile file format; in this example, LPM displays GDTF. Source, Verification, and Community Verified show the source and review labels for the profile.

To keep the matching profile in your account, select Save, then continue to Save a Profile.

Compatibility Result Tips

  • Review the result before continuing.
  • Verify that the displayed profile information matches the intended selection.

Compatibility Results Frequently Asked Questions

Why does my compatibility result differ?

Compatibility Results depend on the selected Console, Console Software Version, Manufacturer, Fixture / Model, and Version / Firmware combination.

What does COMPATIBLE mean?

COMPATIBLE is the status LPM displays with the matched profile information for this example. Review the complete result to confirm that it corresponds to your console and fixture selections.

Troubleshoot Compatibility Results

  • Review the completed selections.
  • Repeat the selection workflow if necessary.

Compatibility Results Related Topics

Save a Profile

Save a Lighting Profile

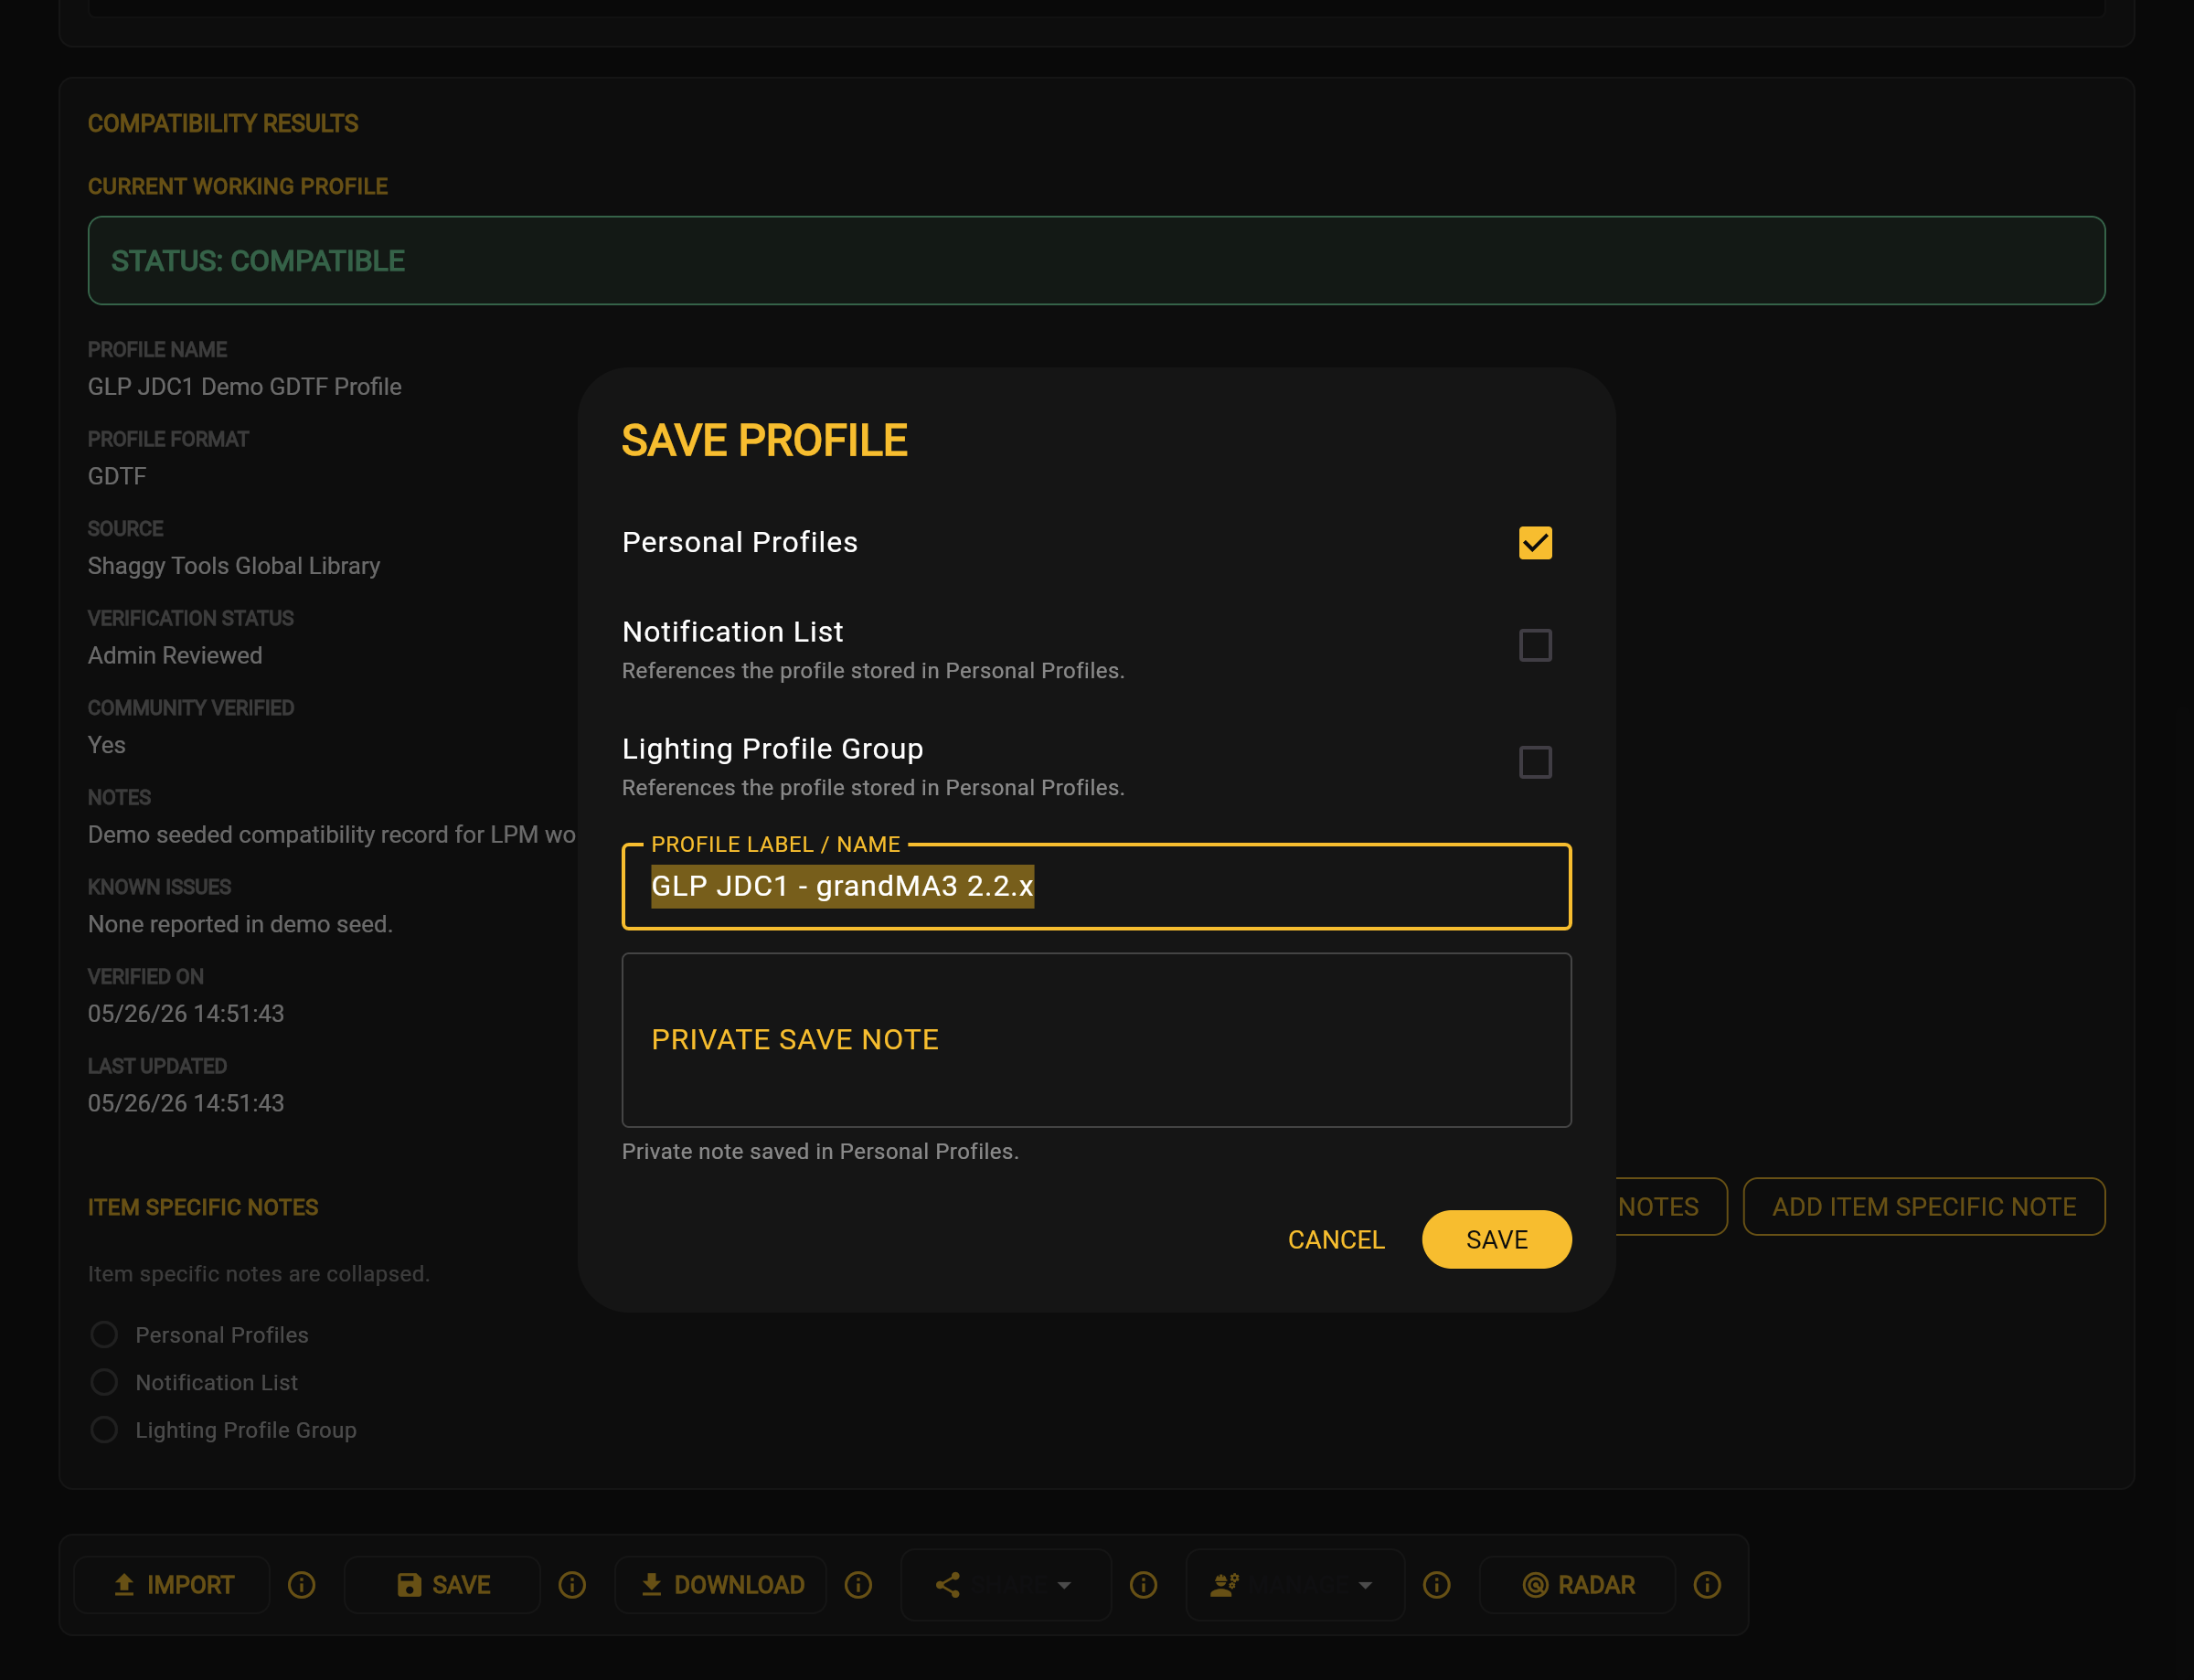
The Save Profile dialog lets you name the selected profile, add a private note, and choose where LPM saves it. To add the profile to your saved-profile list, select Personal Profiles.

Open the Save Profile Dialog

After a compatible Lighting Profile is selected, choose Save.

Save Profile dialog immediately after opening, before user entry
Save Profile dialog immediately after opening, before user entry Application screenshot

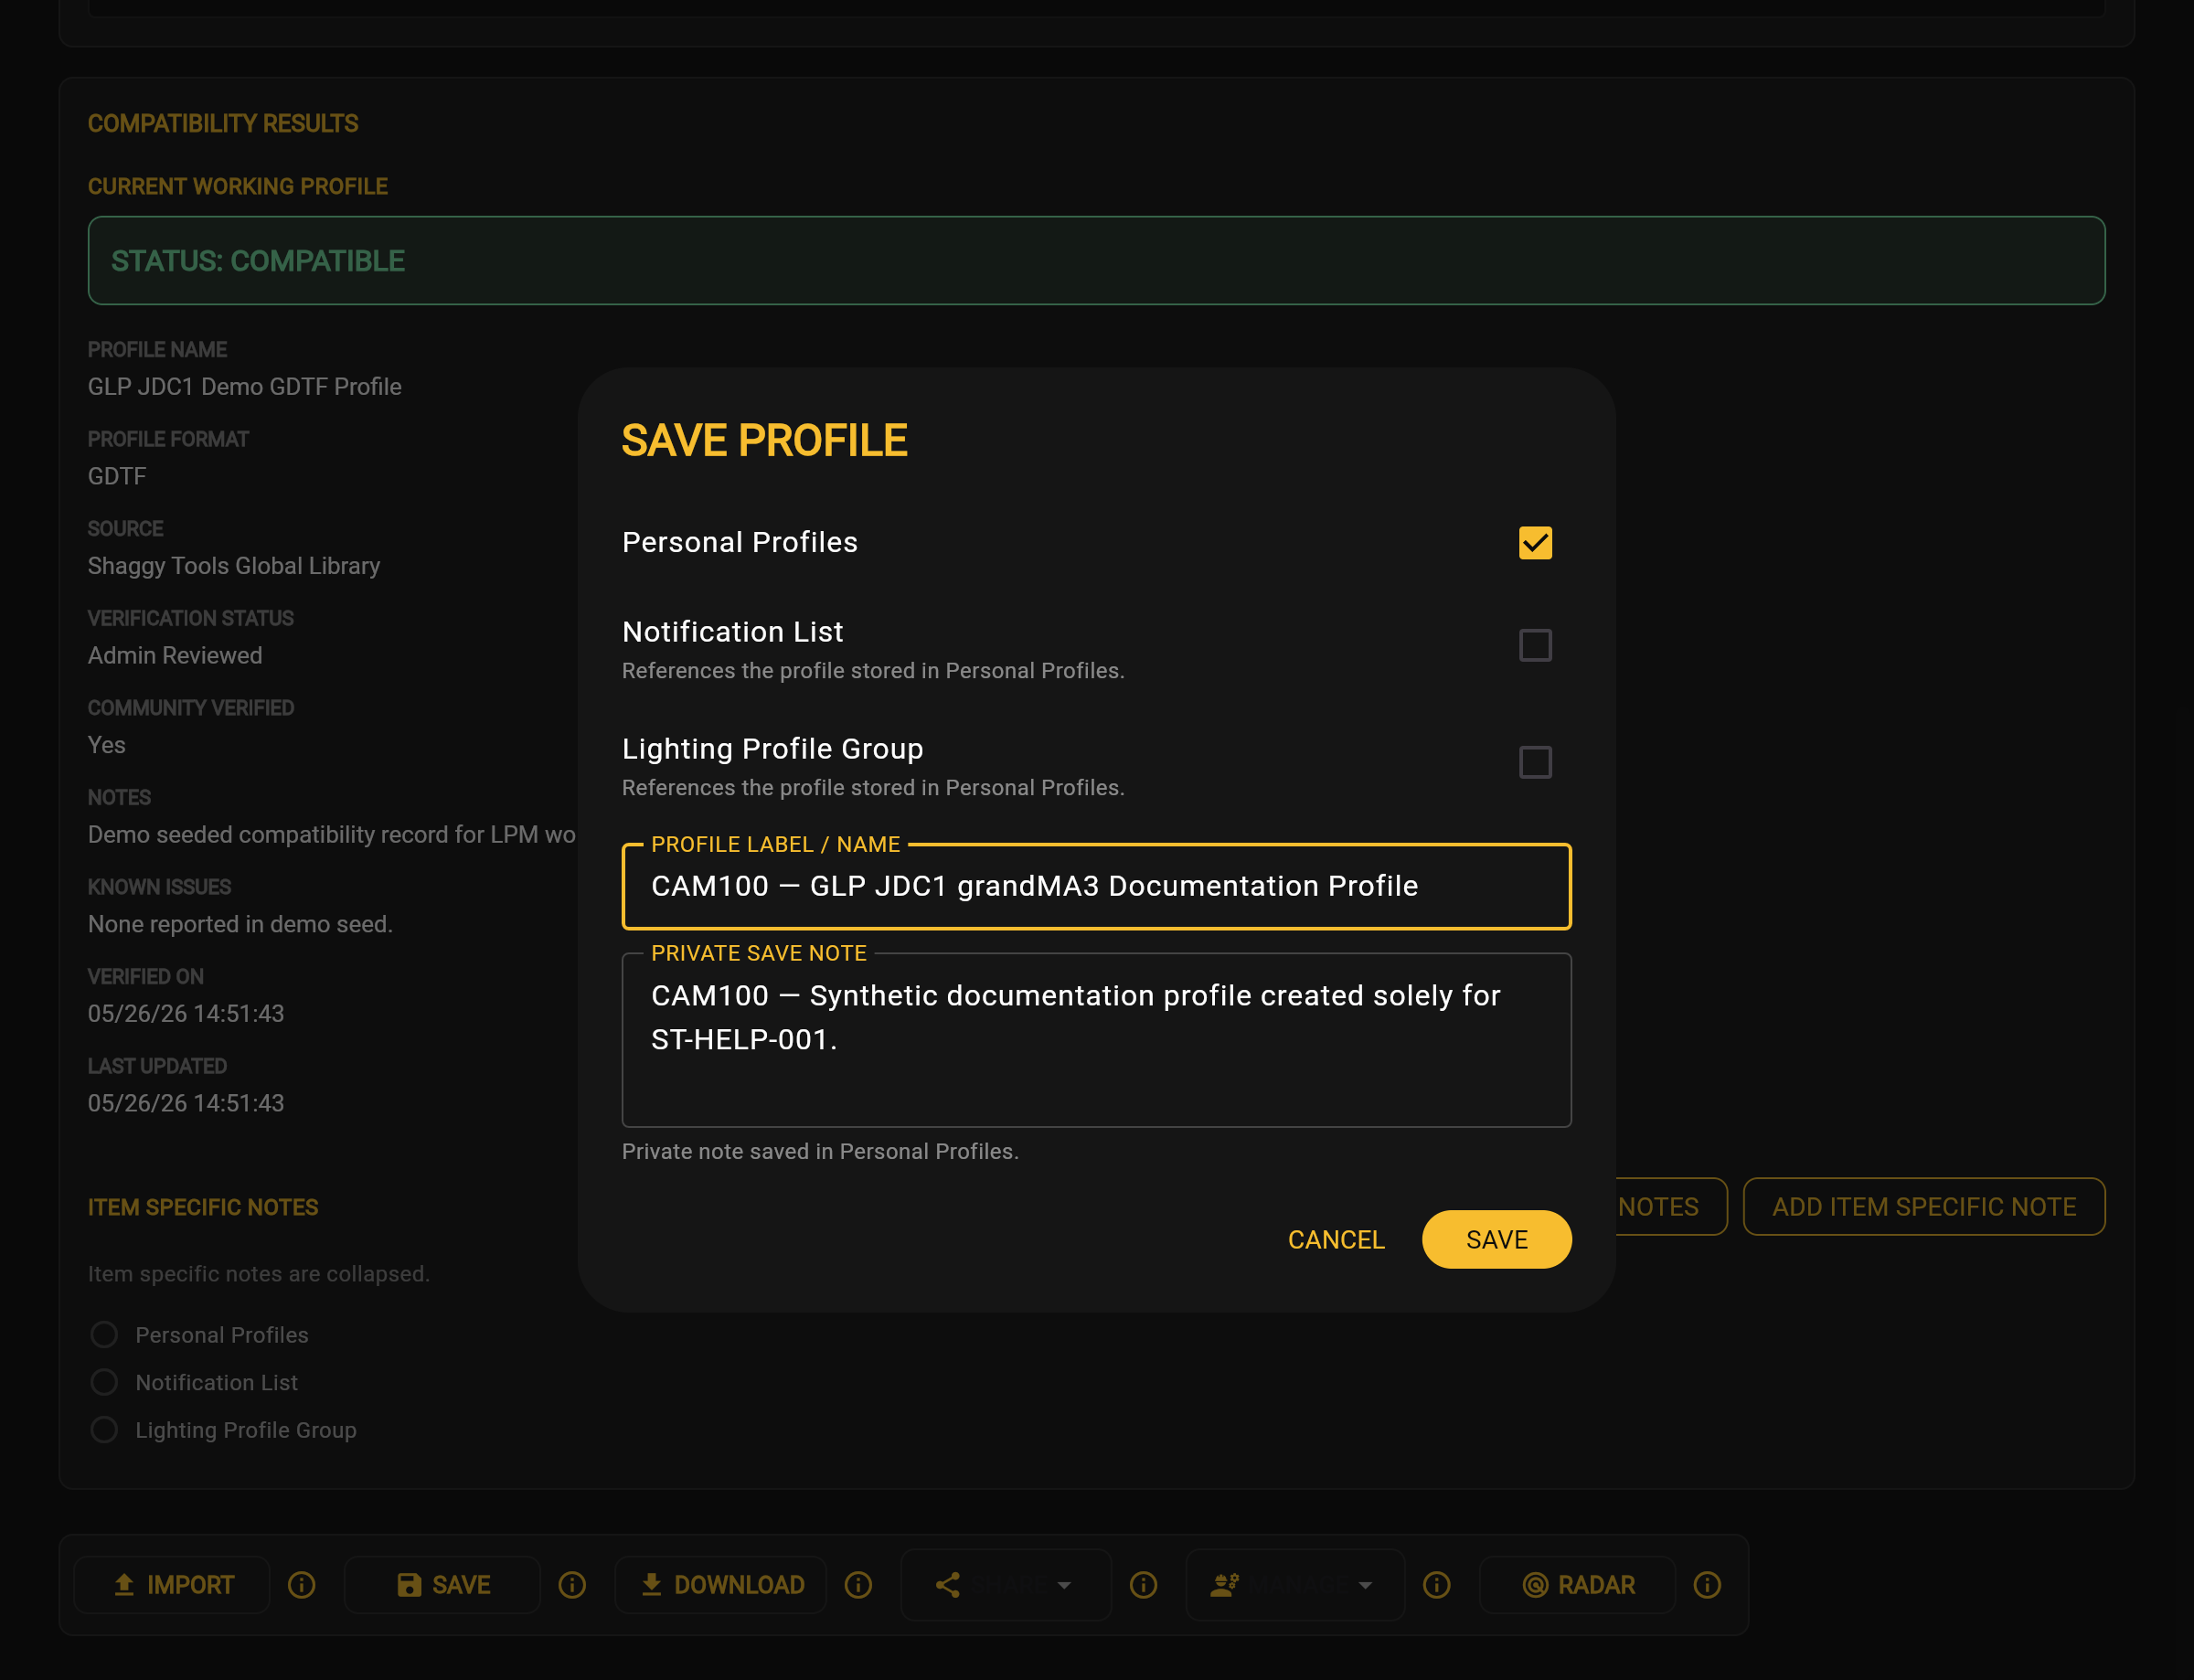
Complete the Save Profile Form

Enter a recognizable Profile Label. Add a Private Note if you want to keep information with the saved profile. Then choose where to add the saved profile.

Completed Save Profile form before submission
Completed Save Profile form before submission Application screenshot

The Save Profile dialog displays:

Select Personal Profiles. Leave Notification List and Lighting Profile Group unselected for this example. Nothing is saved until you submit the dialog.

Tips for Saving a Profile

  • Review the entered information before saving.
  • Select only the places where you want the saved profile to appear.

Saving a Profile Frequently Asked Questions

Has the profile been saved yet?

No. Nothing is saved until you submit the dialog. Continue to Confirm a Saved Profile.

Troubleshoot Saving a Profile

  • Review the selected Lighting Profile.
  • Verify the label, private note, and selected save locations before continuing.

Saving a Profile Related Topics

Confirm a Saved Profile

Confirm a Profile Was Saved

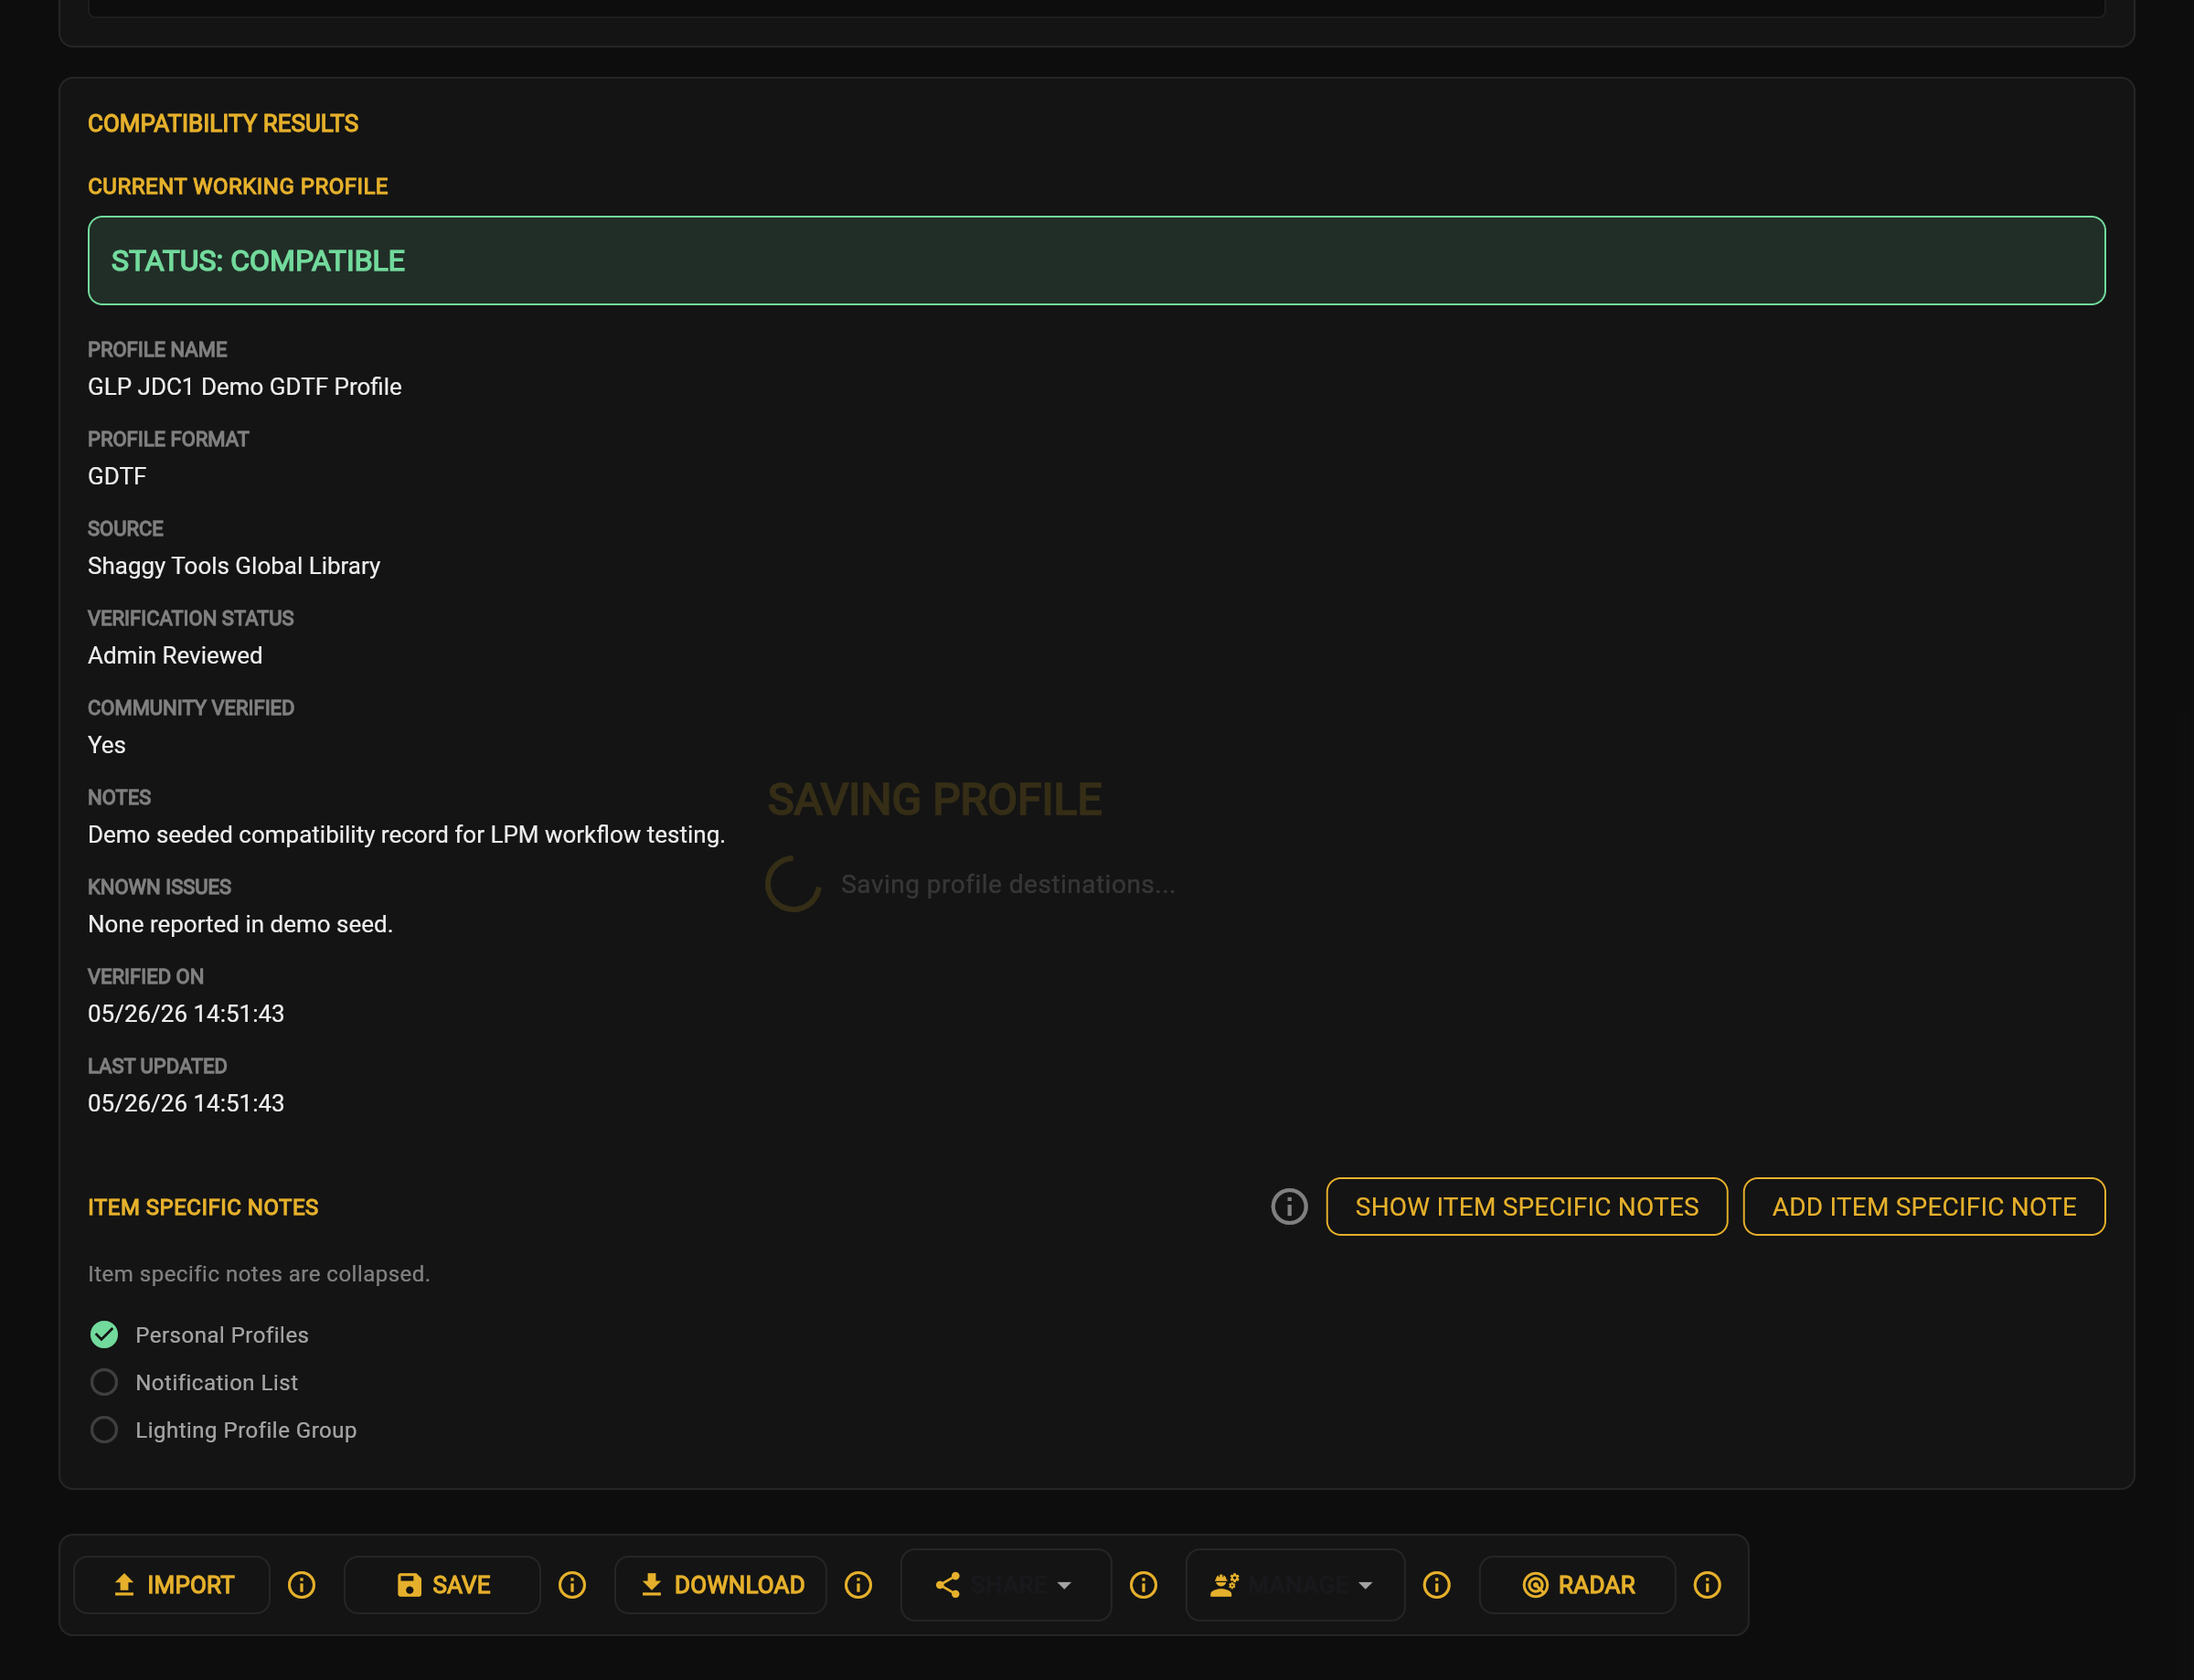
Submit the Save Profile dialog, wait for saving to finish, and then verify the new entry in Personal Profiles.

Start Saving the Profile

Saving Profile intermediate state
Saving Profile intermediate state Application screenshot

Confirm the Profile Was Saved

When saving finishes, look for the green Personal Profiles indicator. Then open Personal Profiles and confirm that the saved entry appears in the list.

Green Personal Profiles indicator after saving
Green Personal Profiles indicator after saving Application screenshot

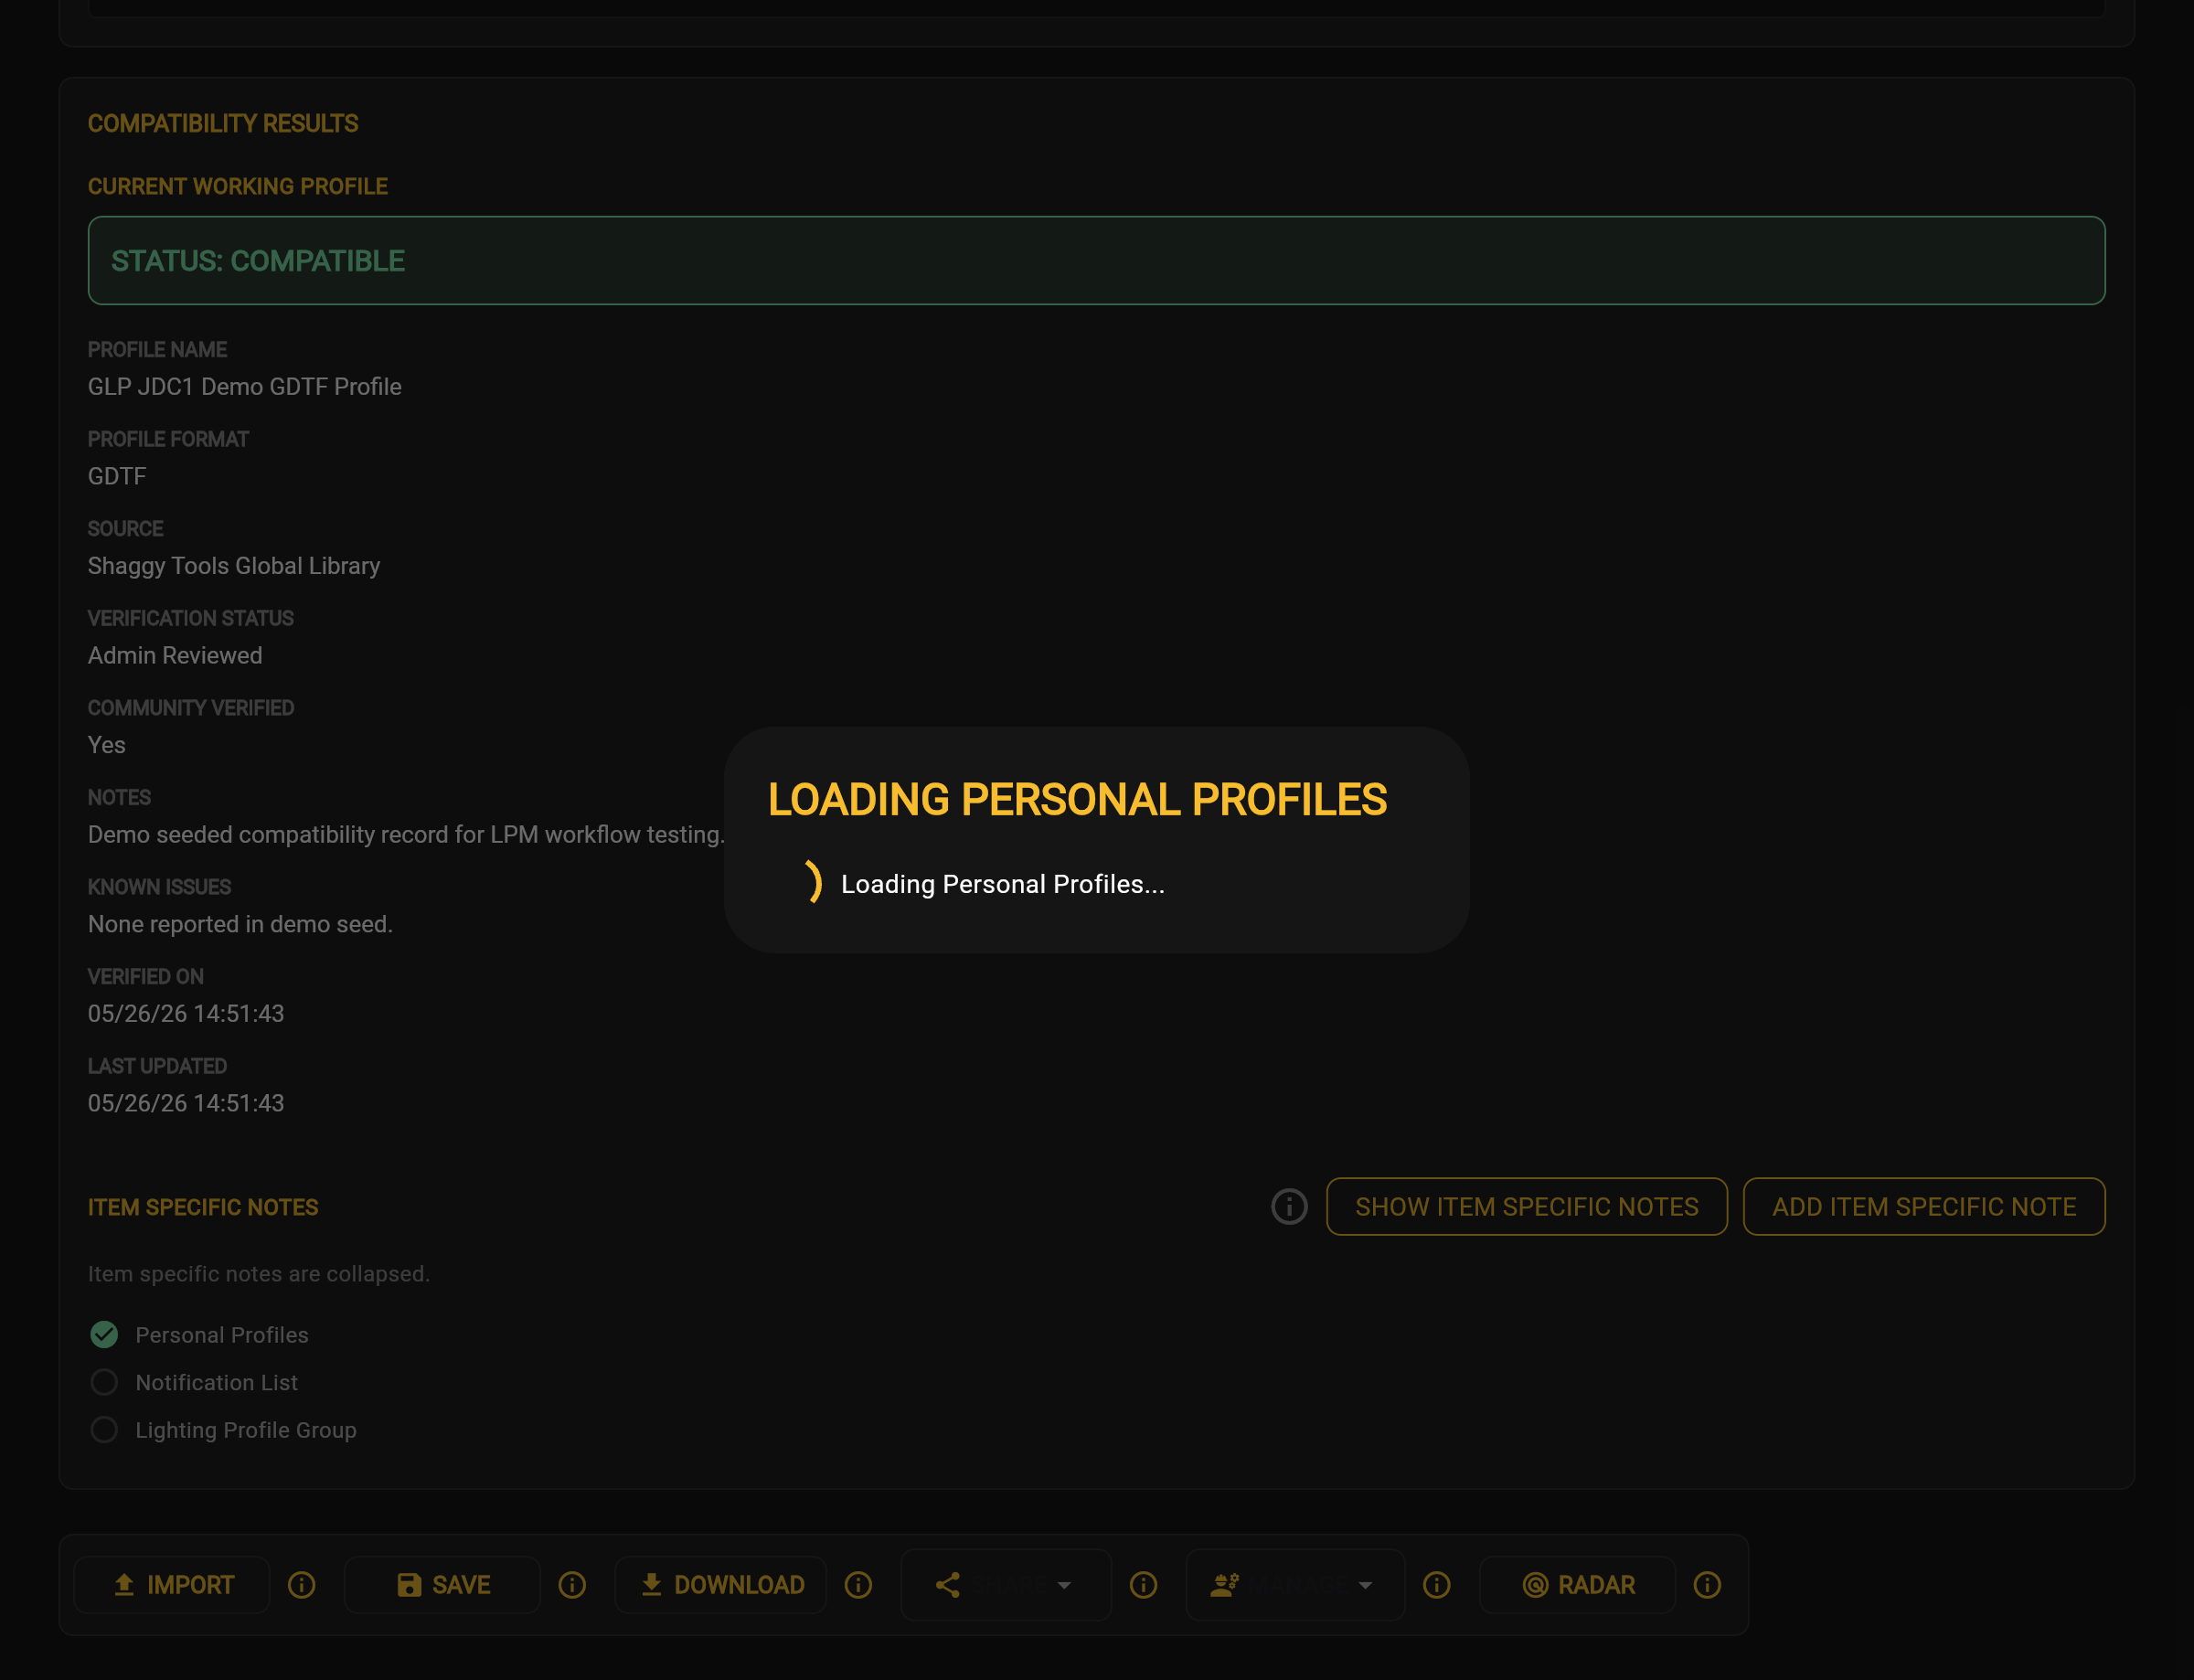
When you open Personal Profiles after the save completes, LPM briefly displays Loading Personal Profiles.

Loading Personal Profiles
Loading Personal Profiles Application screenshot

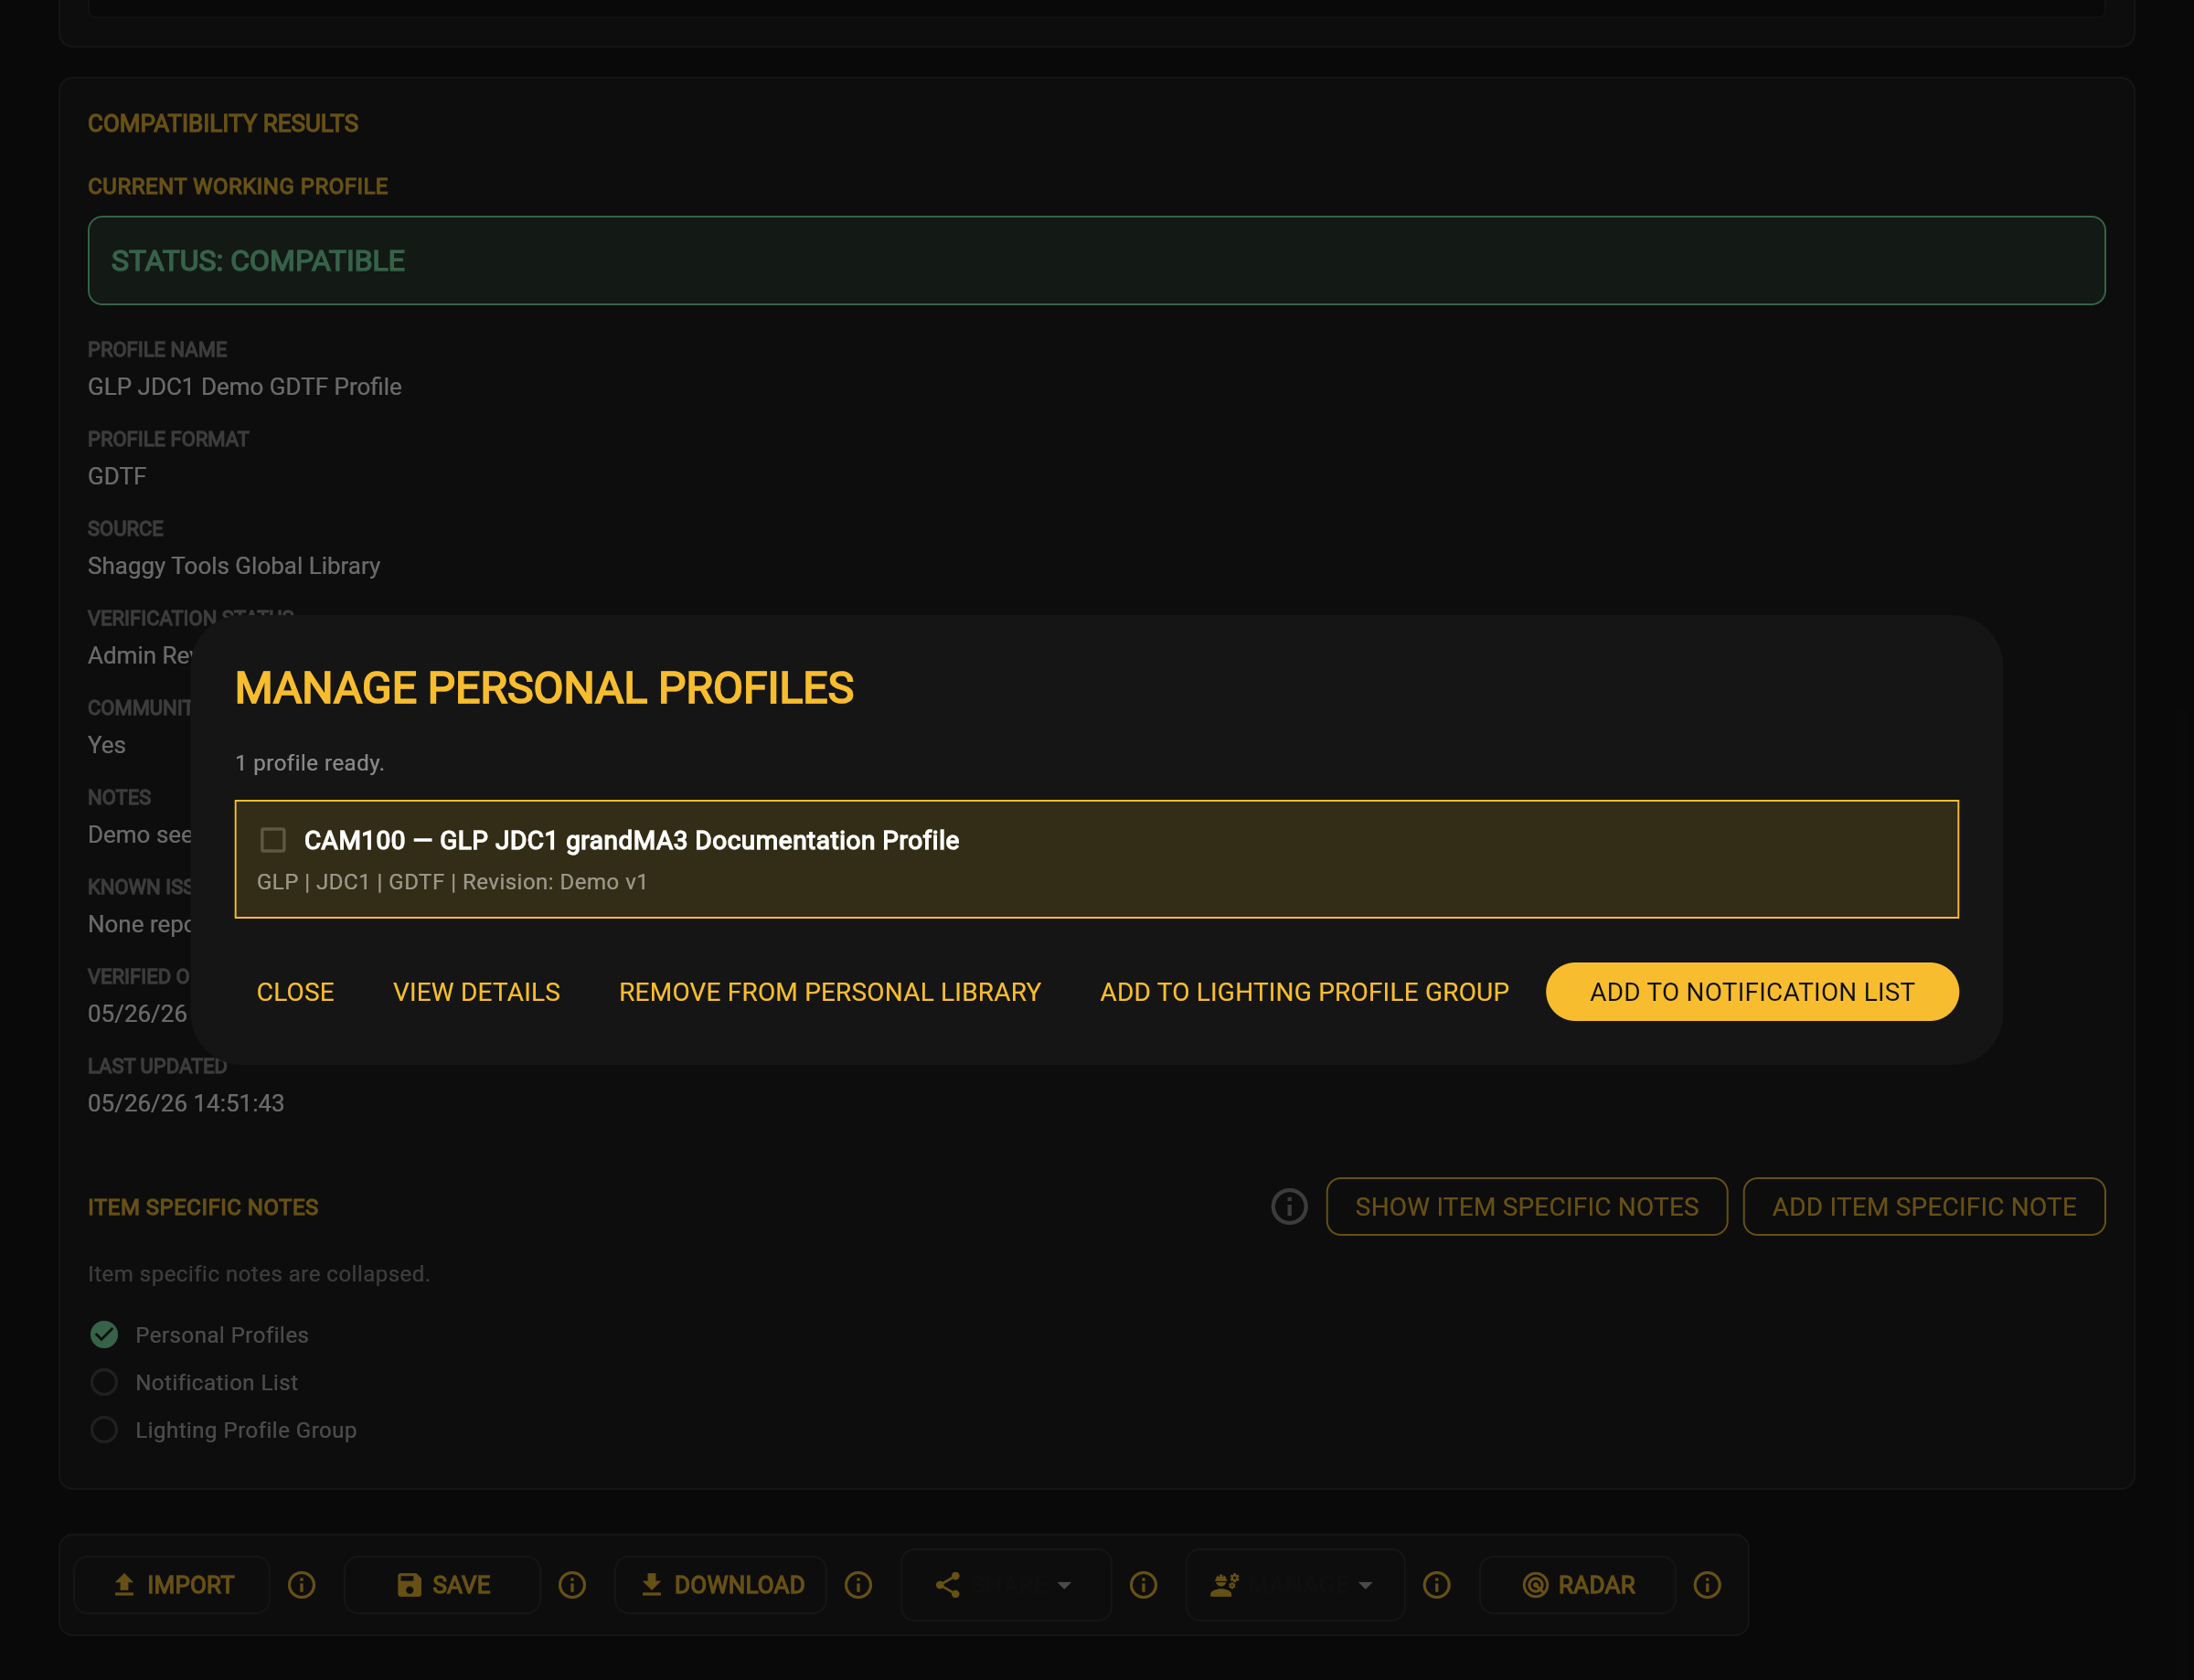
After loading completes, the created entry appears.

Created Personal Profile
Created Personal Profile Application screenshot

Saved Profile Verification Tips

  • Wait for saving to finish, then open Personal Profiles to verify the saved entry.
  • Verify that the created profile appears in the list.

Saved Profile Frequently Asked Questions

How do I know the save completed?

Look for the green Personal Profiles indicator, then open Personal Profiles and verify that the created entry appears.

Troubleshoot a Missing Saved Profile

  • Allow Personal Profiles to finish loading.
  • Verify that the expected entry appears.

Saved Profile Related Topics

Personal Profiles

Open and Use Personal Profiles

Personal Profiles is the list of Lighting Profiles saved to your ShaggyTools account. Use it to find a saved profile and open its details.

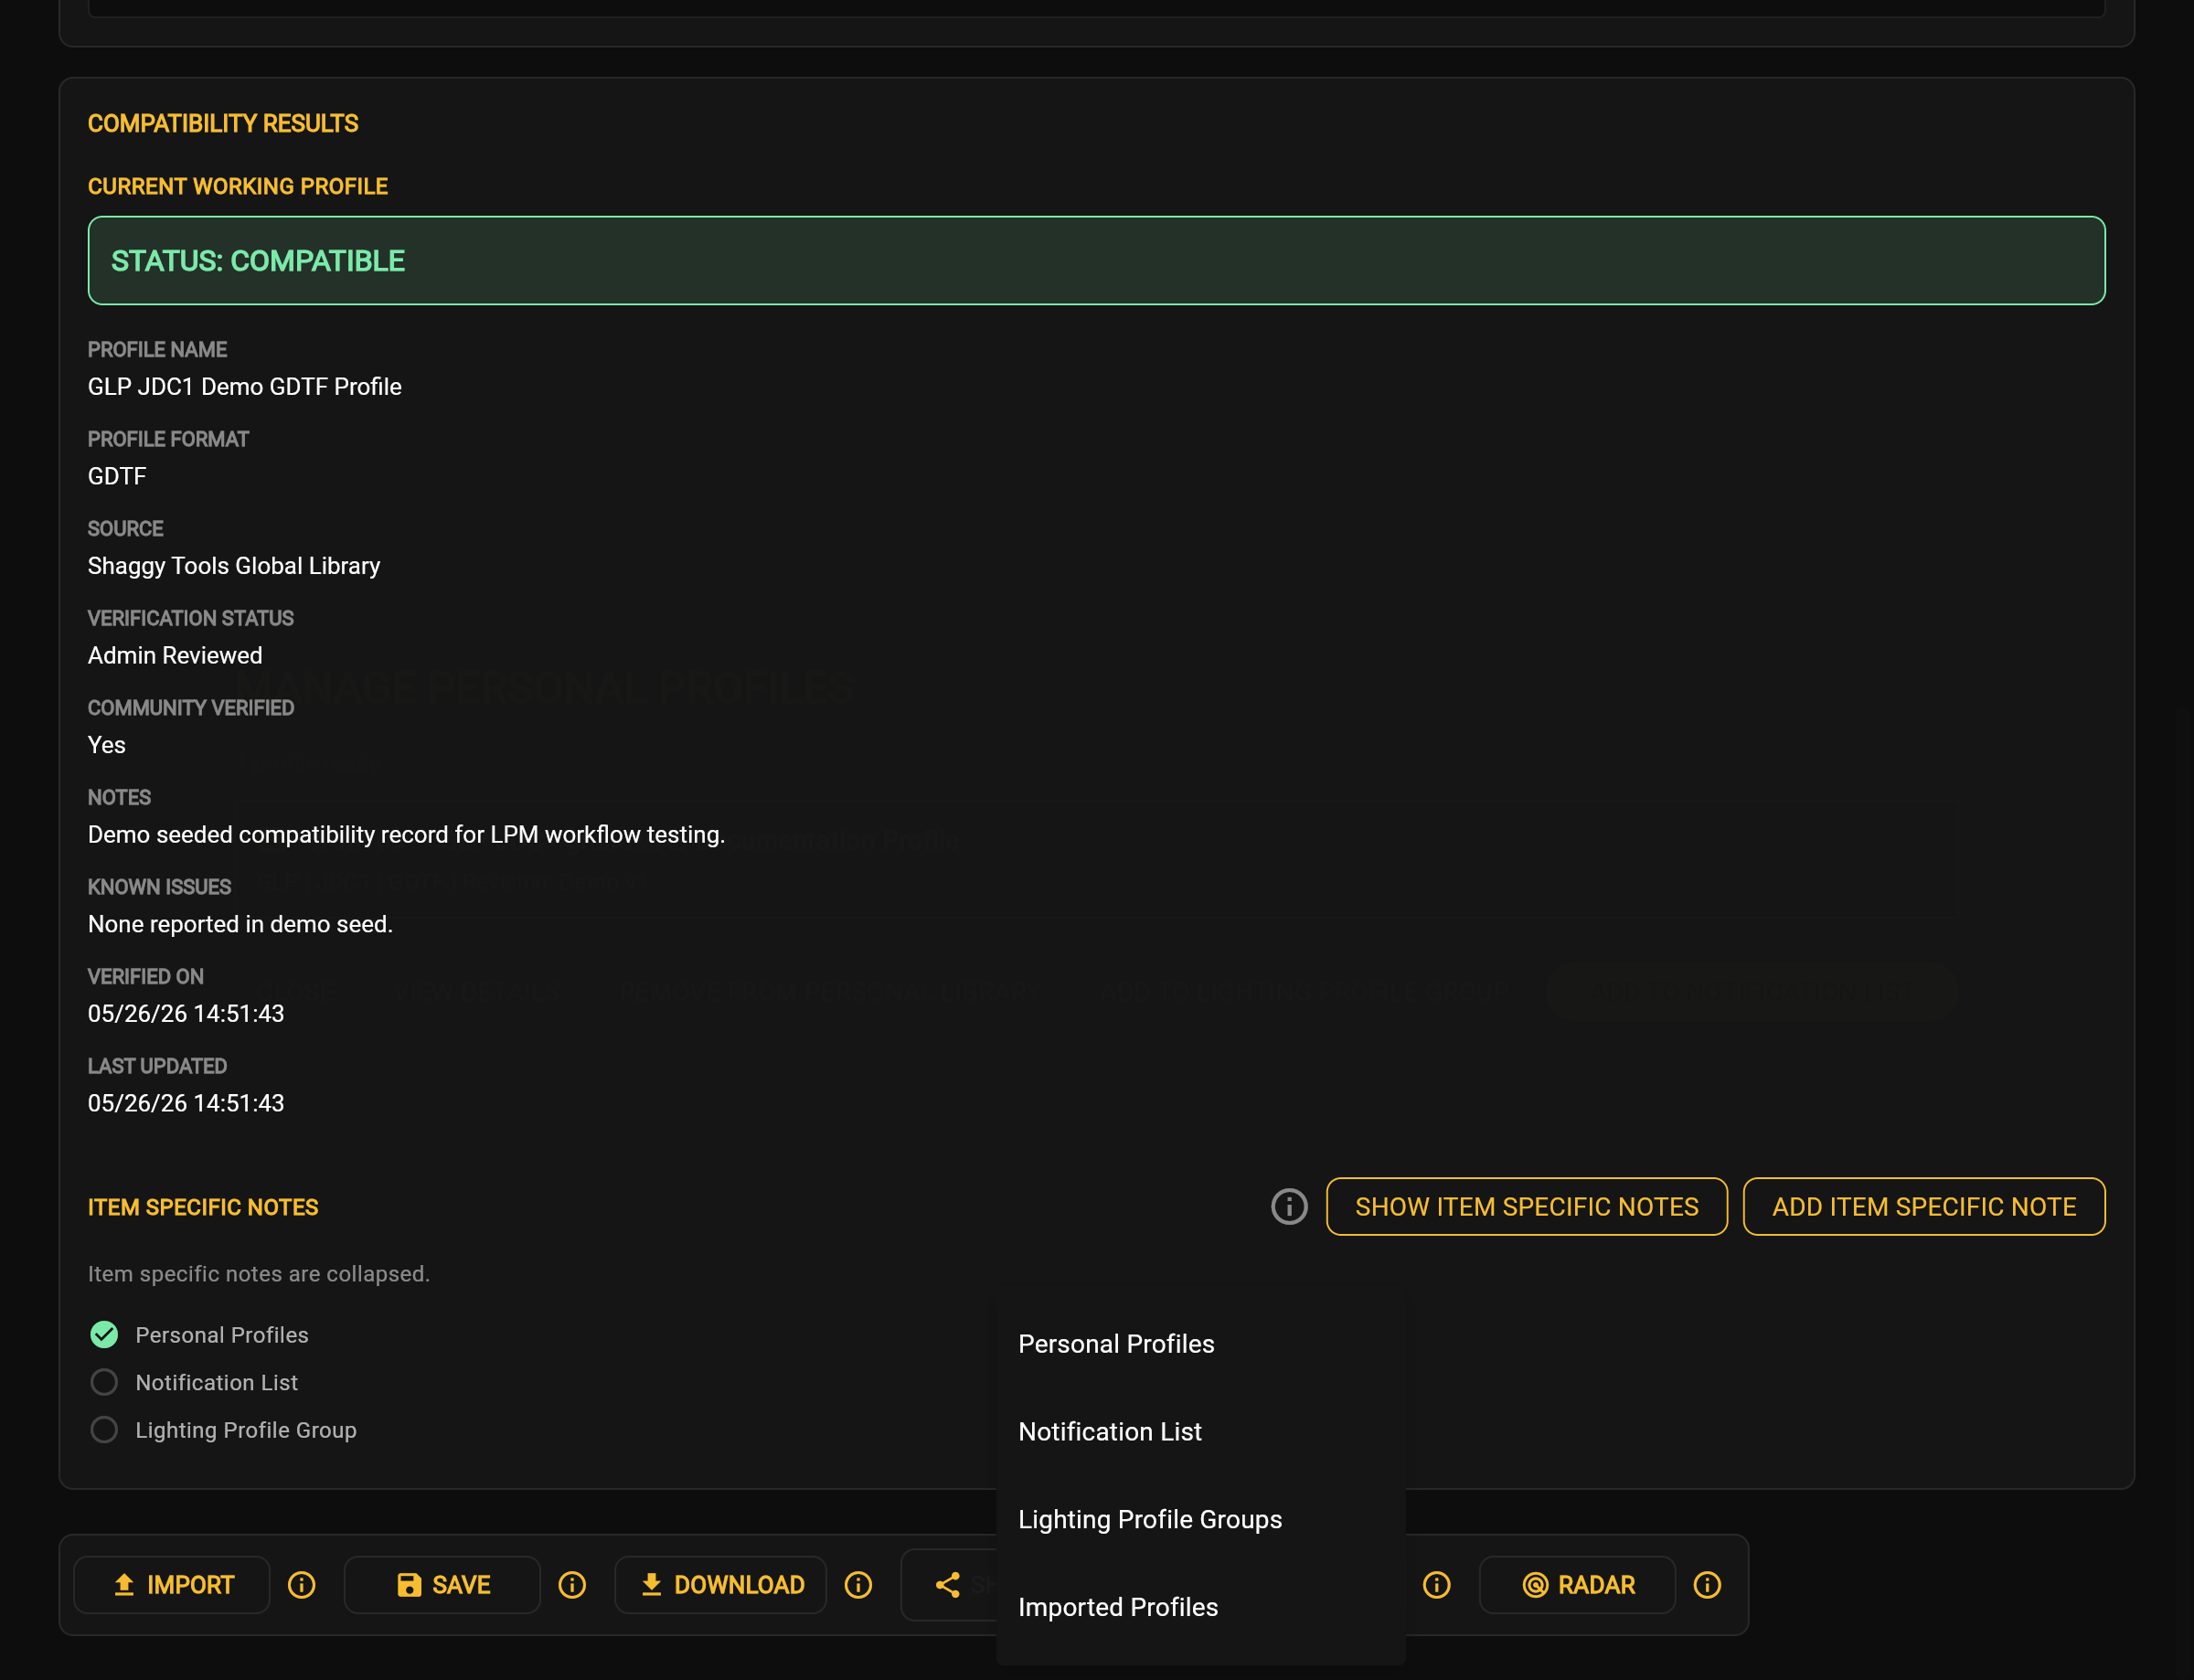
Open Personal Profiles from the Manage menu. LPM may briefly display a loading state.

Loading Personal Profiles
Loading Personal Profiles Application screenshot

After loading, the Personal Profiles list is displayed.

Personal Profiles list showing one saved profile
Personal Profiles list showing one saved profile Application screenshot

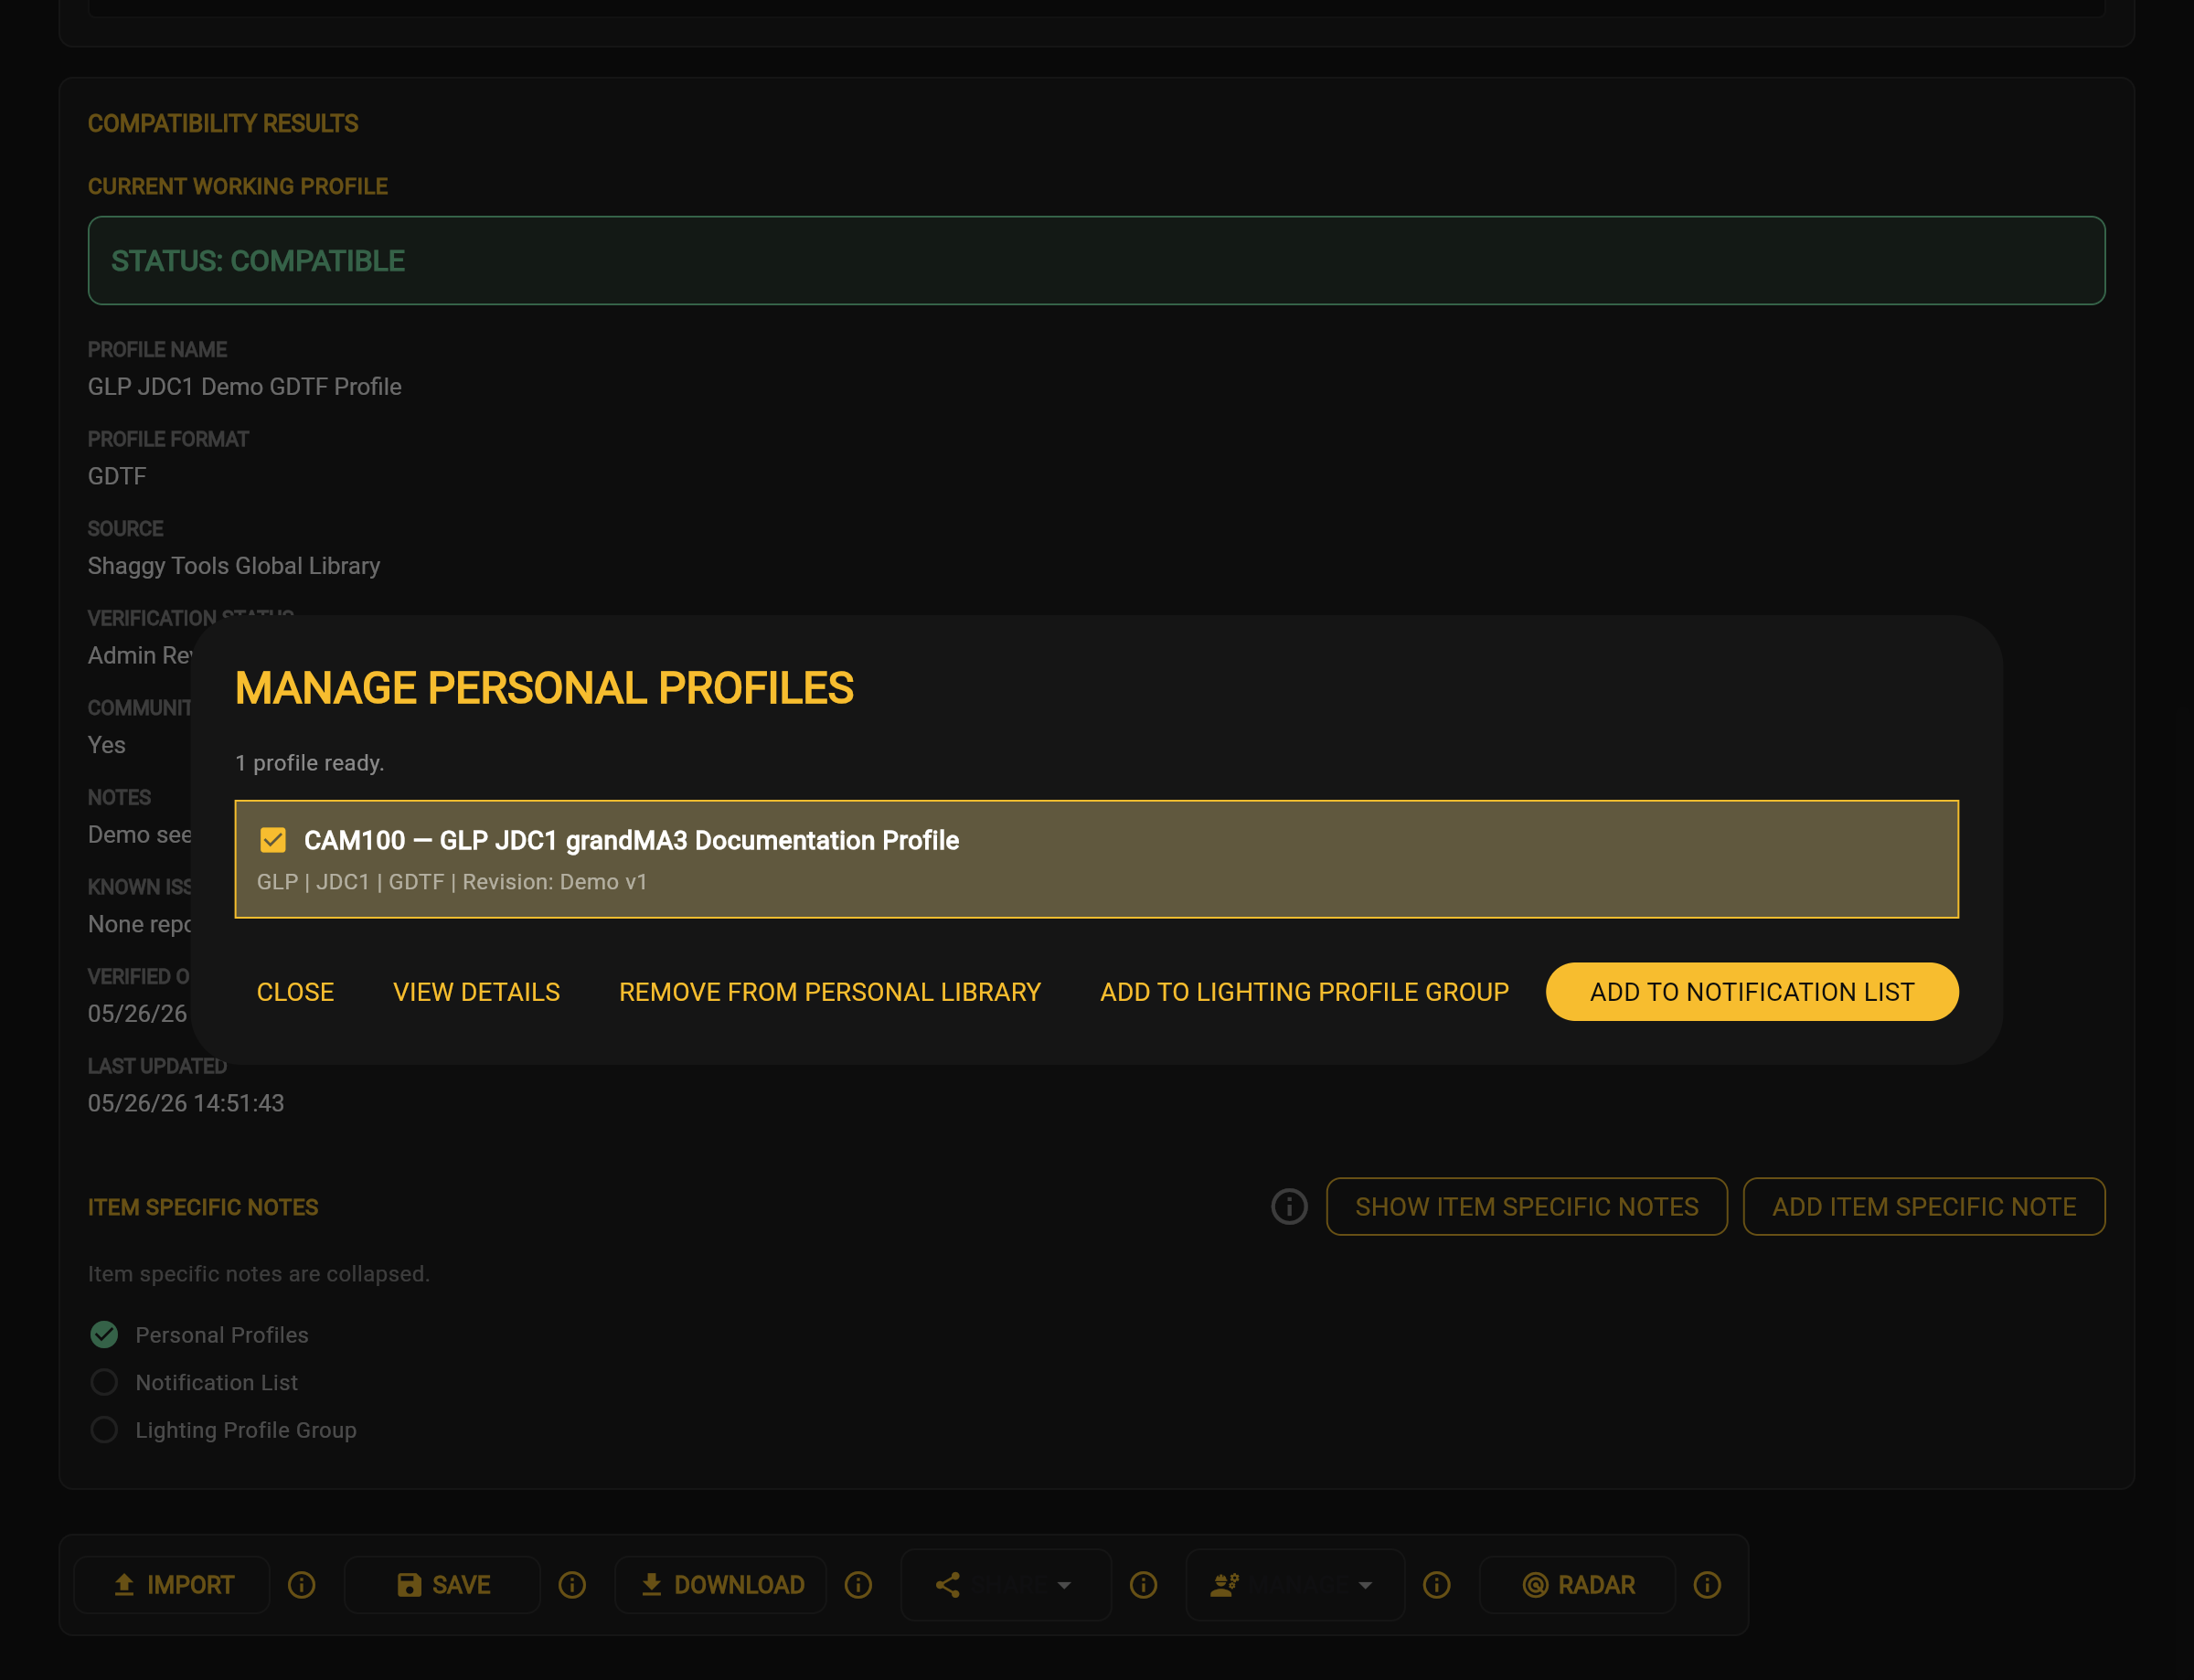
Select a Personal Profile to enable the buttons available for that profile.

Personal Profile selected
Personal Profile selected Application screenshot

After selecting a Personal Profile, choose View Details to open the available profile information.

Personal Profile Details
Personal Profile Details Application screenshot

Use the Help article named for another action when you want to continue beyond viewing the saved profile.

Personal Profiles Tips

  • Wait for the list to finish loading.
  • Select a profile, then choose View Details to review its available information.

Personal Profiles Frequently Asked Questions

Why don't I see my saved profile immediately?

Personal Profiles may briefly display Loading Personal Profiles before the list appears.

Troubleshoot Personal Profiles

  • Verify that Personal Profiles has finished loading.
  • Confirm that the expected profile appears before selecting it.

Personal Profiles Related Topics

Personal Profile Details

Open Personal Profile Details

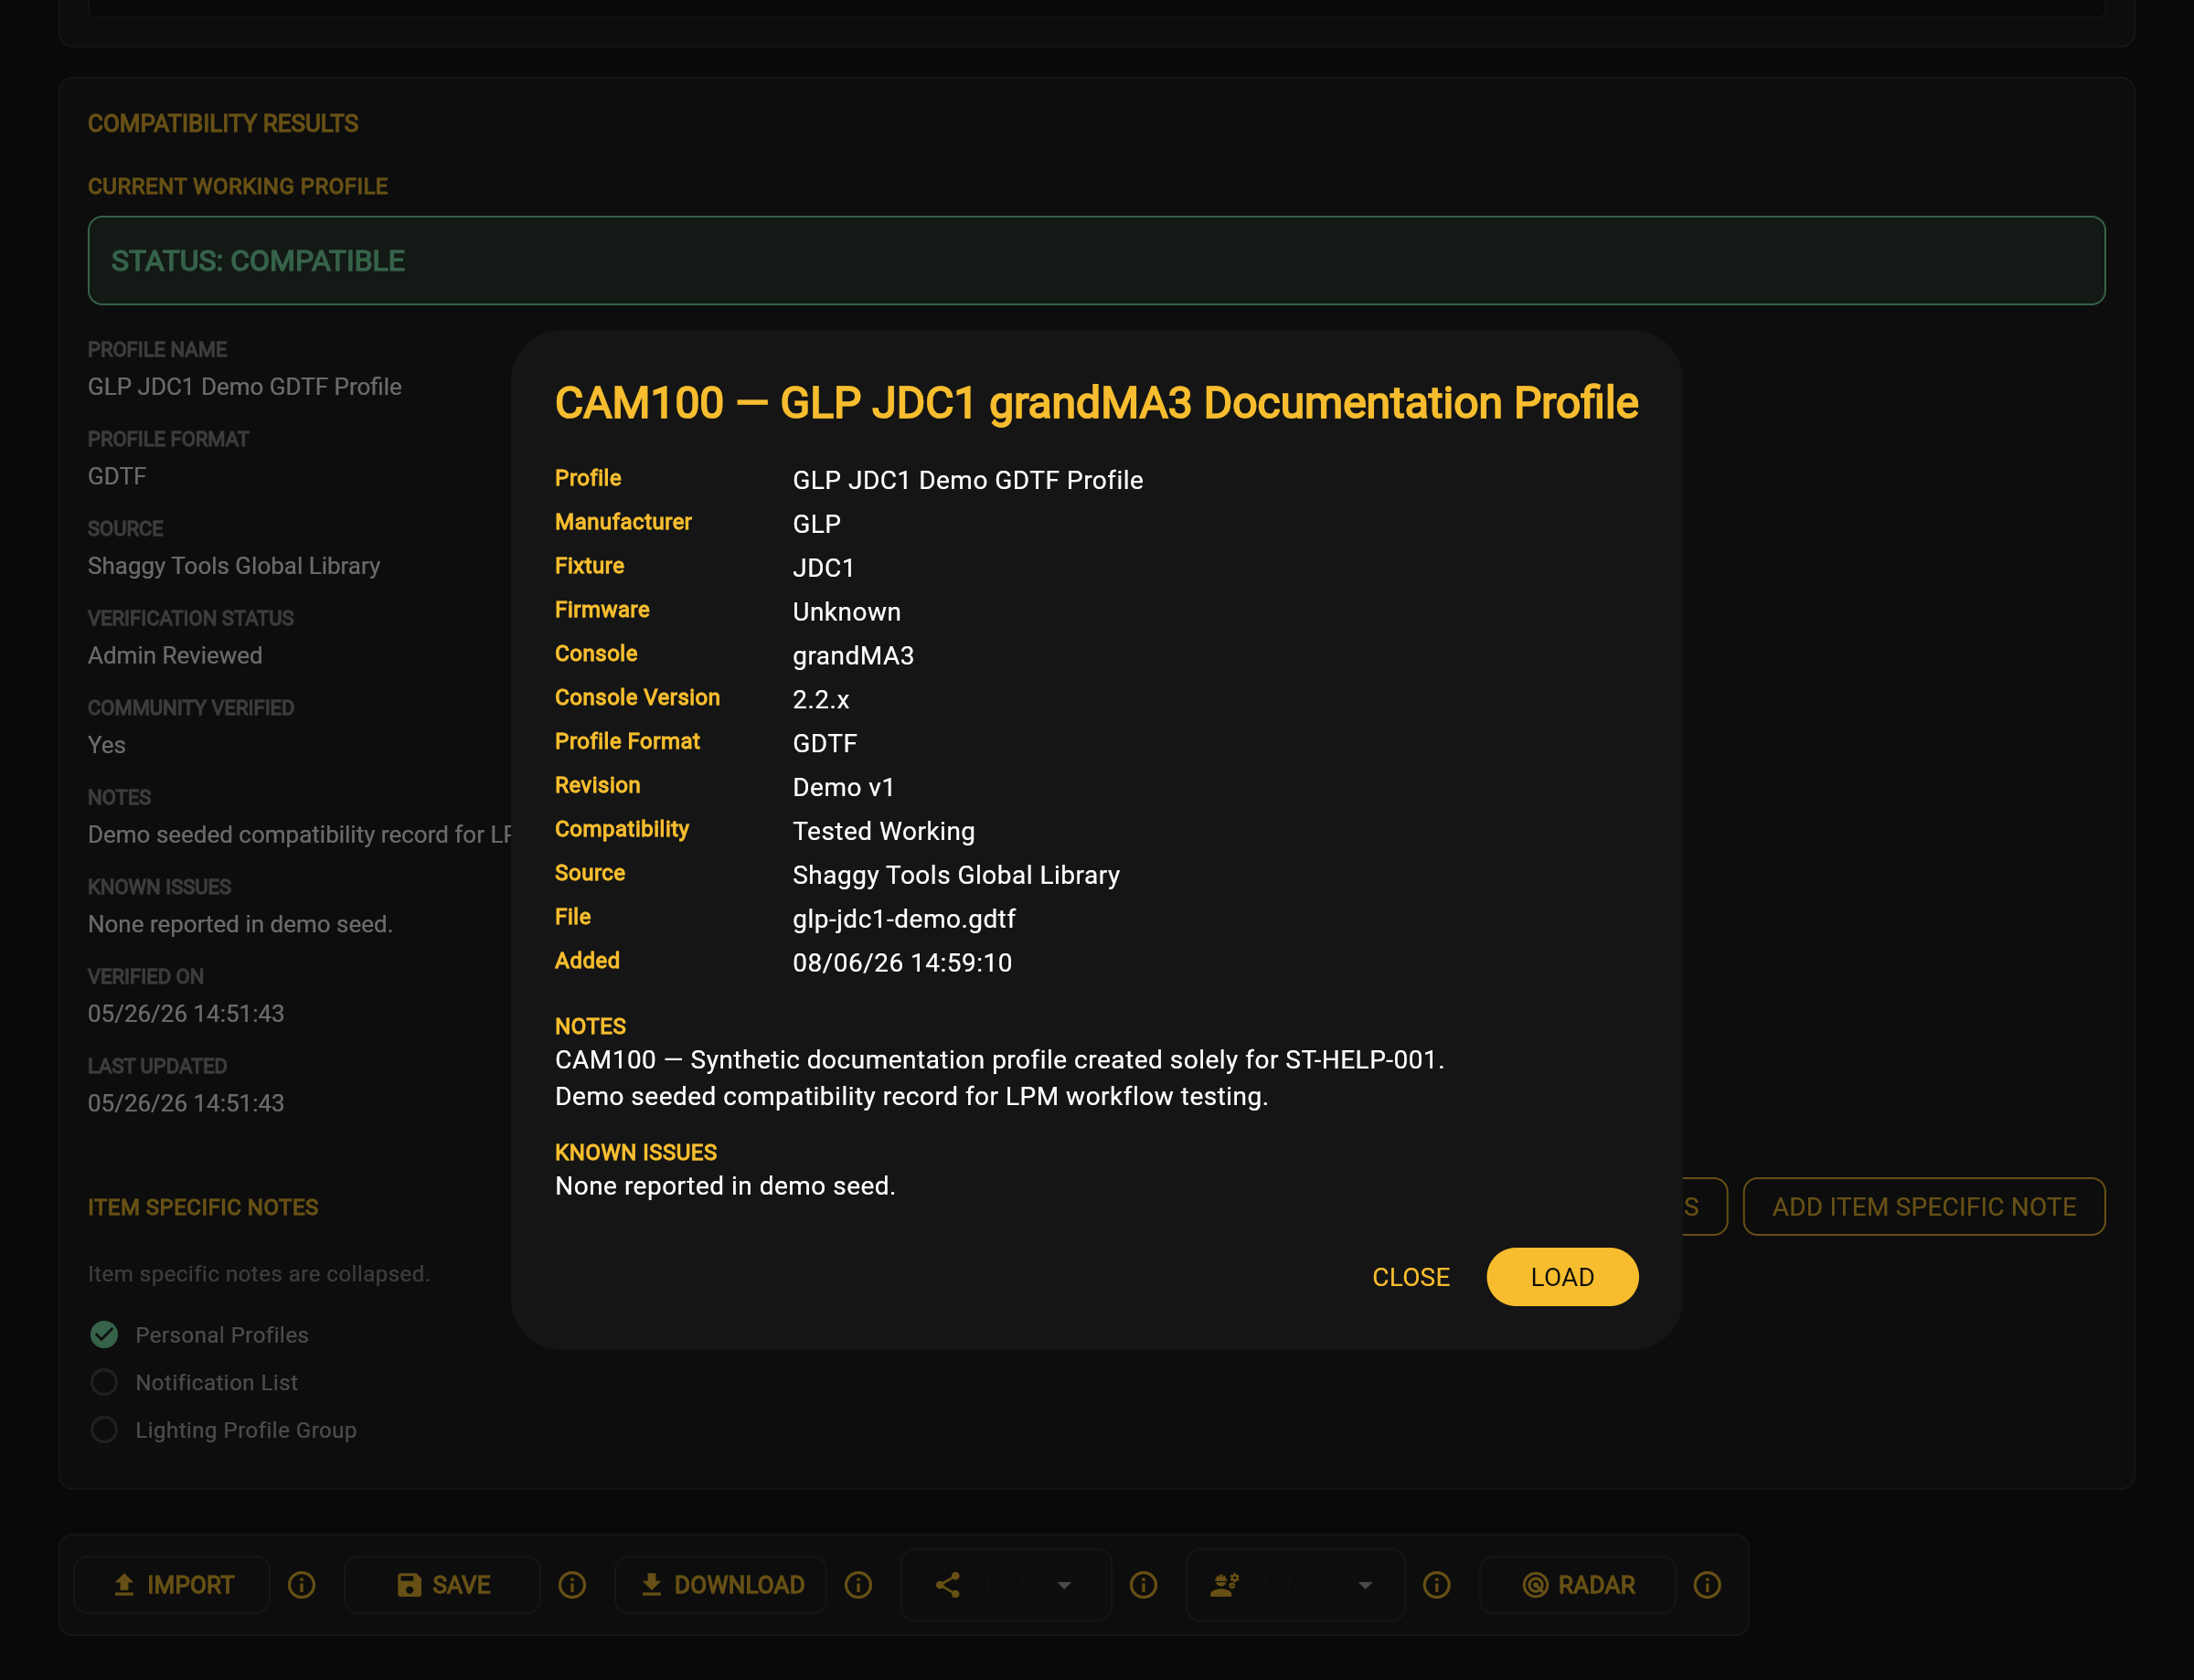
The Personal Profile Details screen shows the console, fixture, format, source, compatibility, and file information stored with a saved profile.

  1. Open Personal Profiles.
  2. Select the desired Personal Profile.
  3. Choose View Details.
Personal Profile Details
Personal Profile Details Application screenshot

Review Personal Profile Information

The screenshot uses an example profile. Your profile details depend on the profile you select.

FieldDisplayed Value
ProfileGLP JDC1 Demo GDTF Profile
ManufacturerGLP
FixtureJDC1
FirmwareUnknown
ConsolegrandMA3
Console Version2.2.x
Profile FormatGDTF
RevisionDemo v1
CompatibilityTested Working
SourceShaggy Tools Global Library
Fileglp-jdc1-demo.gdtf
Added08/06/26 14:59:10
NotesAn example private note
Known IssuesNone reported

For this example, the Details view displays Tested Working, while the Compatibility Results view displays COMPATIBLE. LPM shows these as separate labels in different views. Do not treat them as interchangeable.

Personal Profile Details Tips

  • Review the displayed information before performing another profile action.
  • Return to Personal Profiles to access other available actions.

Personal Profile Details Frequently Asked Questions

Can I edit the profile from this screen?

The steps above open the profile information for viewing. Editing steps are not available here.

Troubleshoot Personal Profile Details

  • Verify that a Personal Profile is selected before choosing View Details.
  • Return to Personal Profiles if another profile needs to be reviewed.

Personal Profile Details Related Topics

Add a Profile to the Notification List

Add a Profile to the Notification List

The Notification List is where LPM displays profiles you choose to watch. Follow these steps to add a saved profile and verify that it appears under Watched Profiles. These steps do not cover notification delivery.

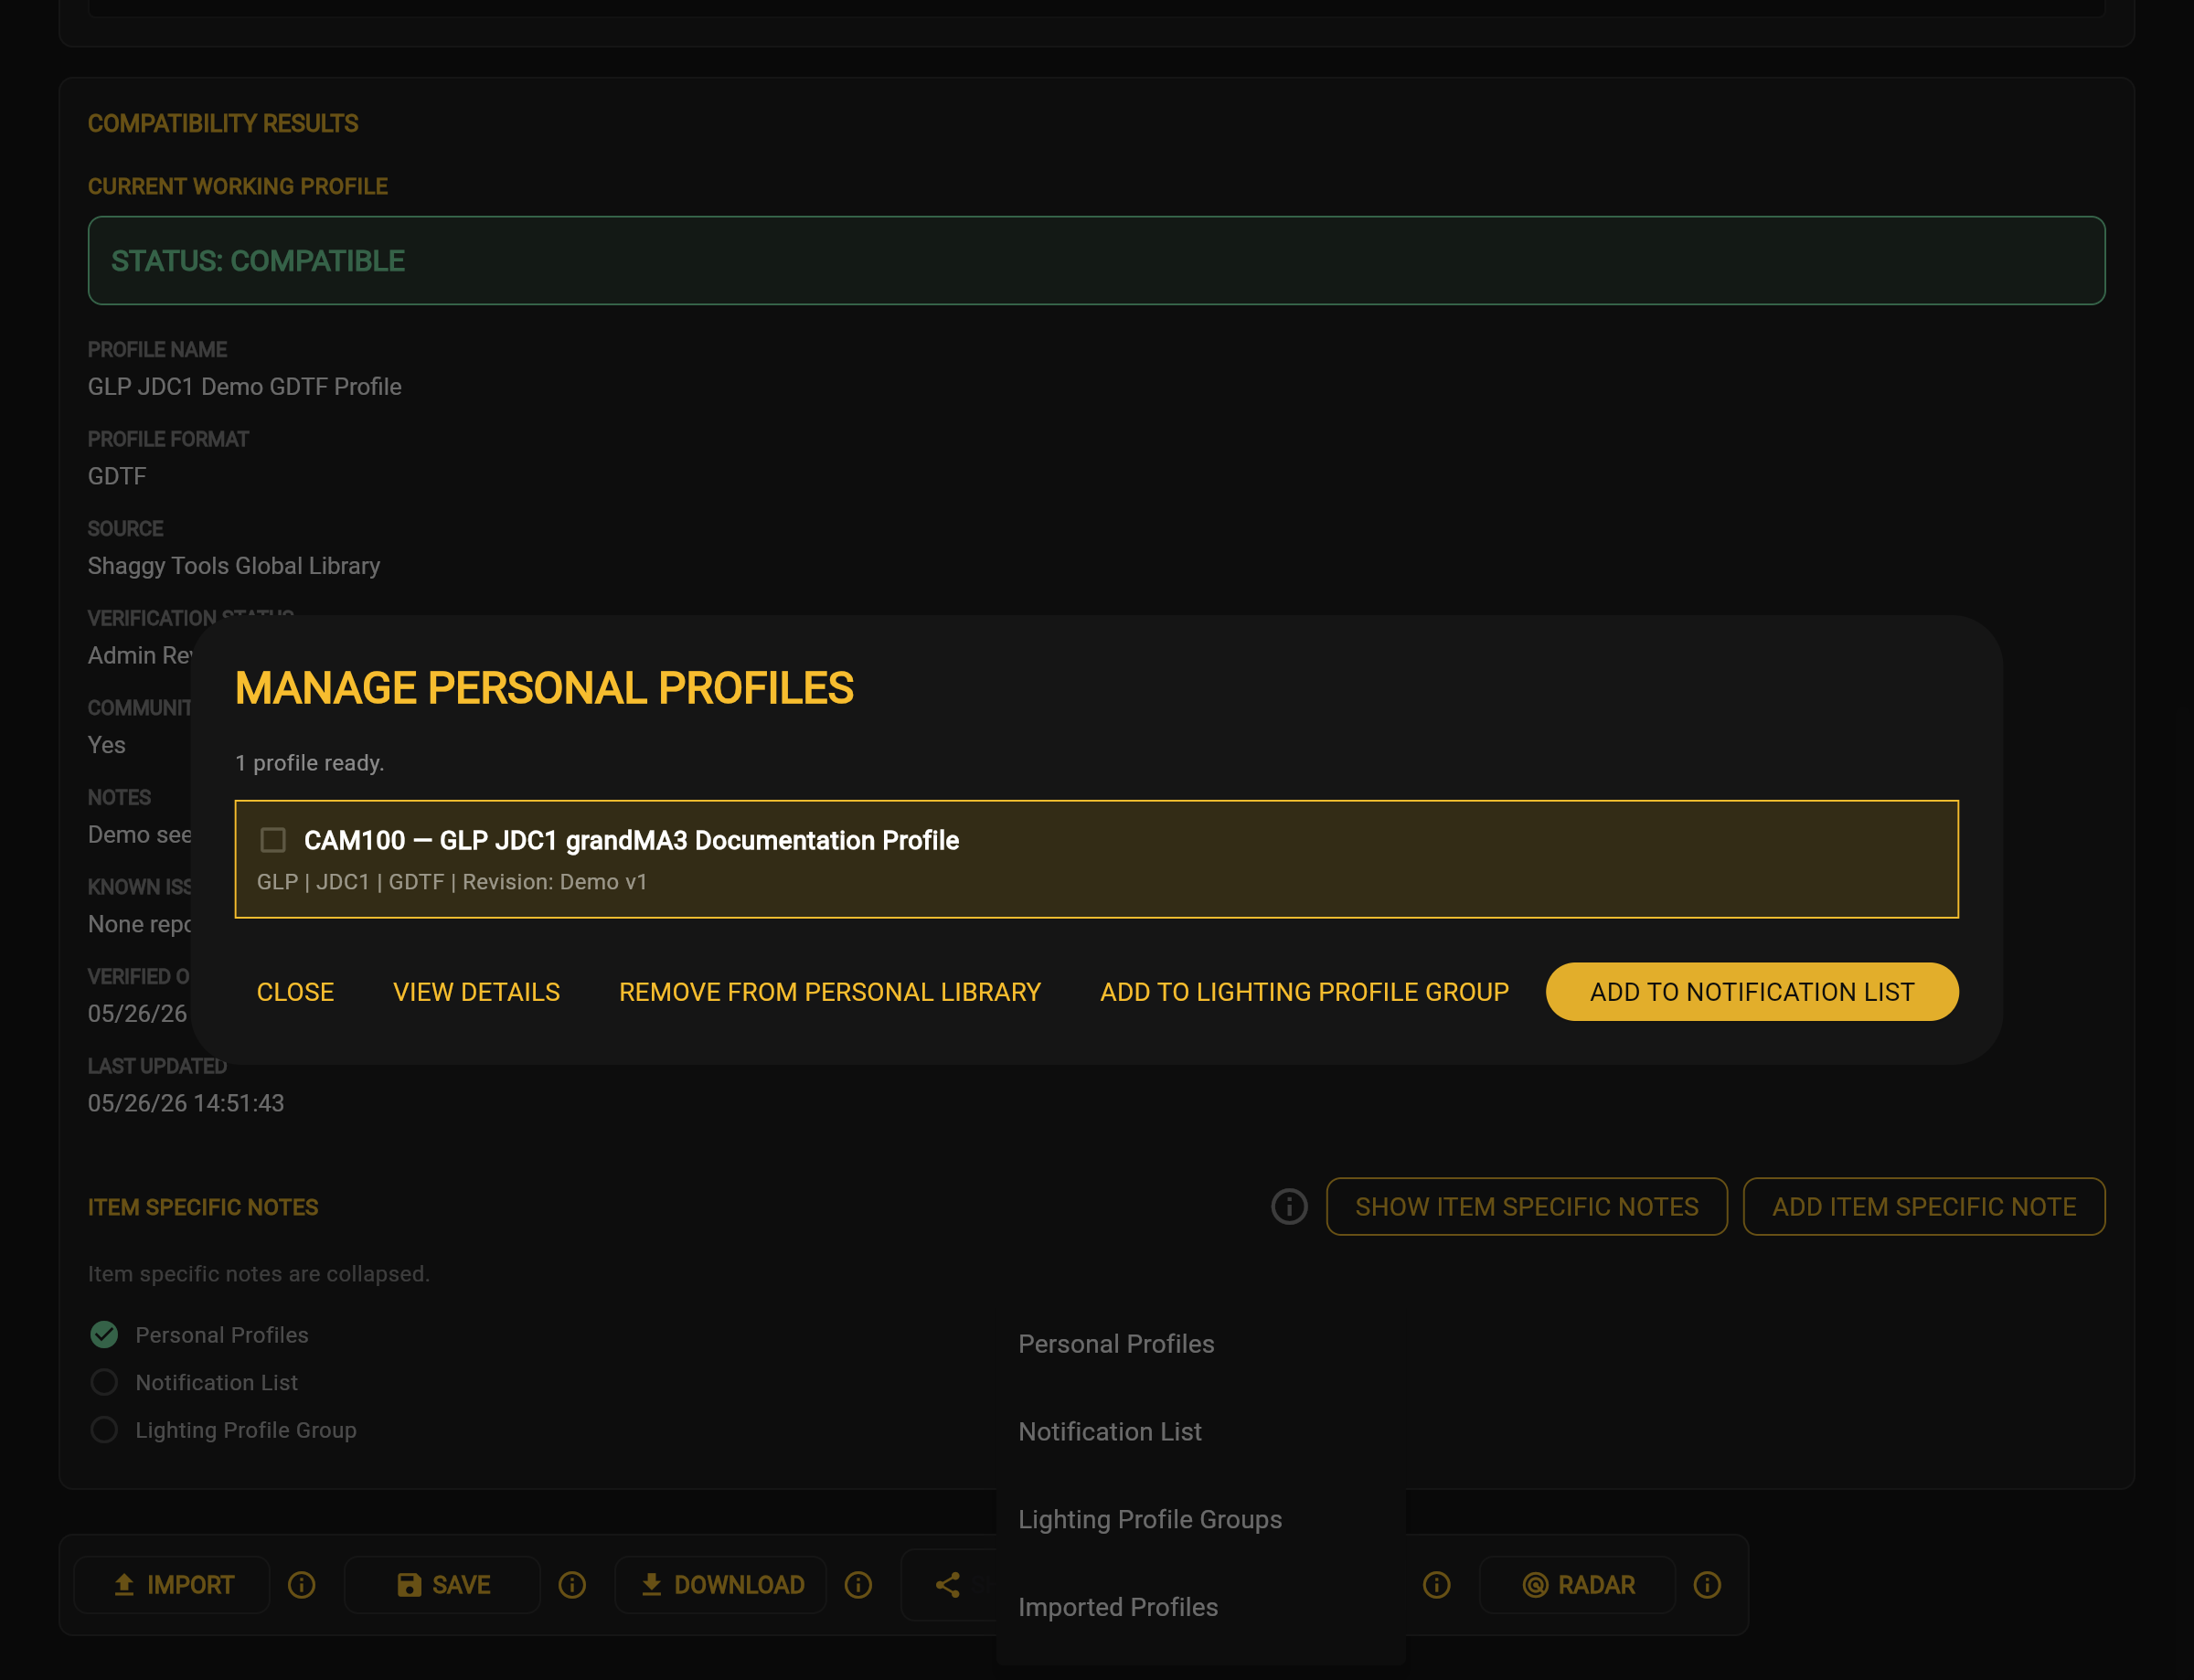
  1. Open Personal Profiles.
  2. Select the desired Personal Profile.
  3. Choose Add to Notification List.
Beginning the Add to Notification List workflow
Beginning the Add to Notification List workflow Application screenshot

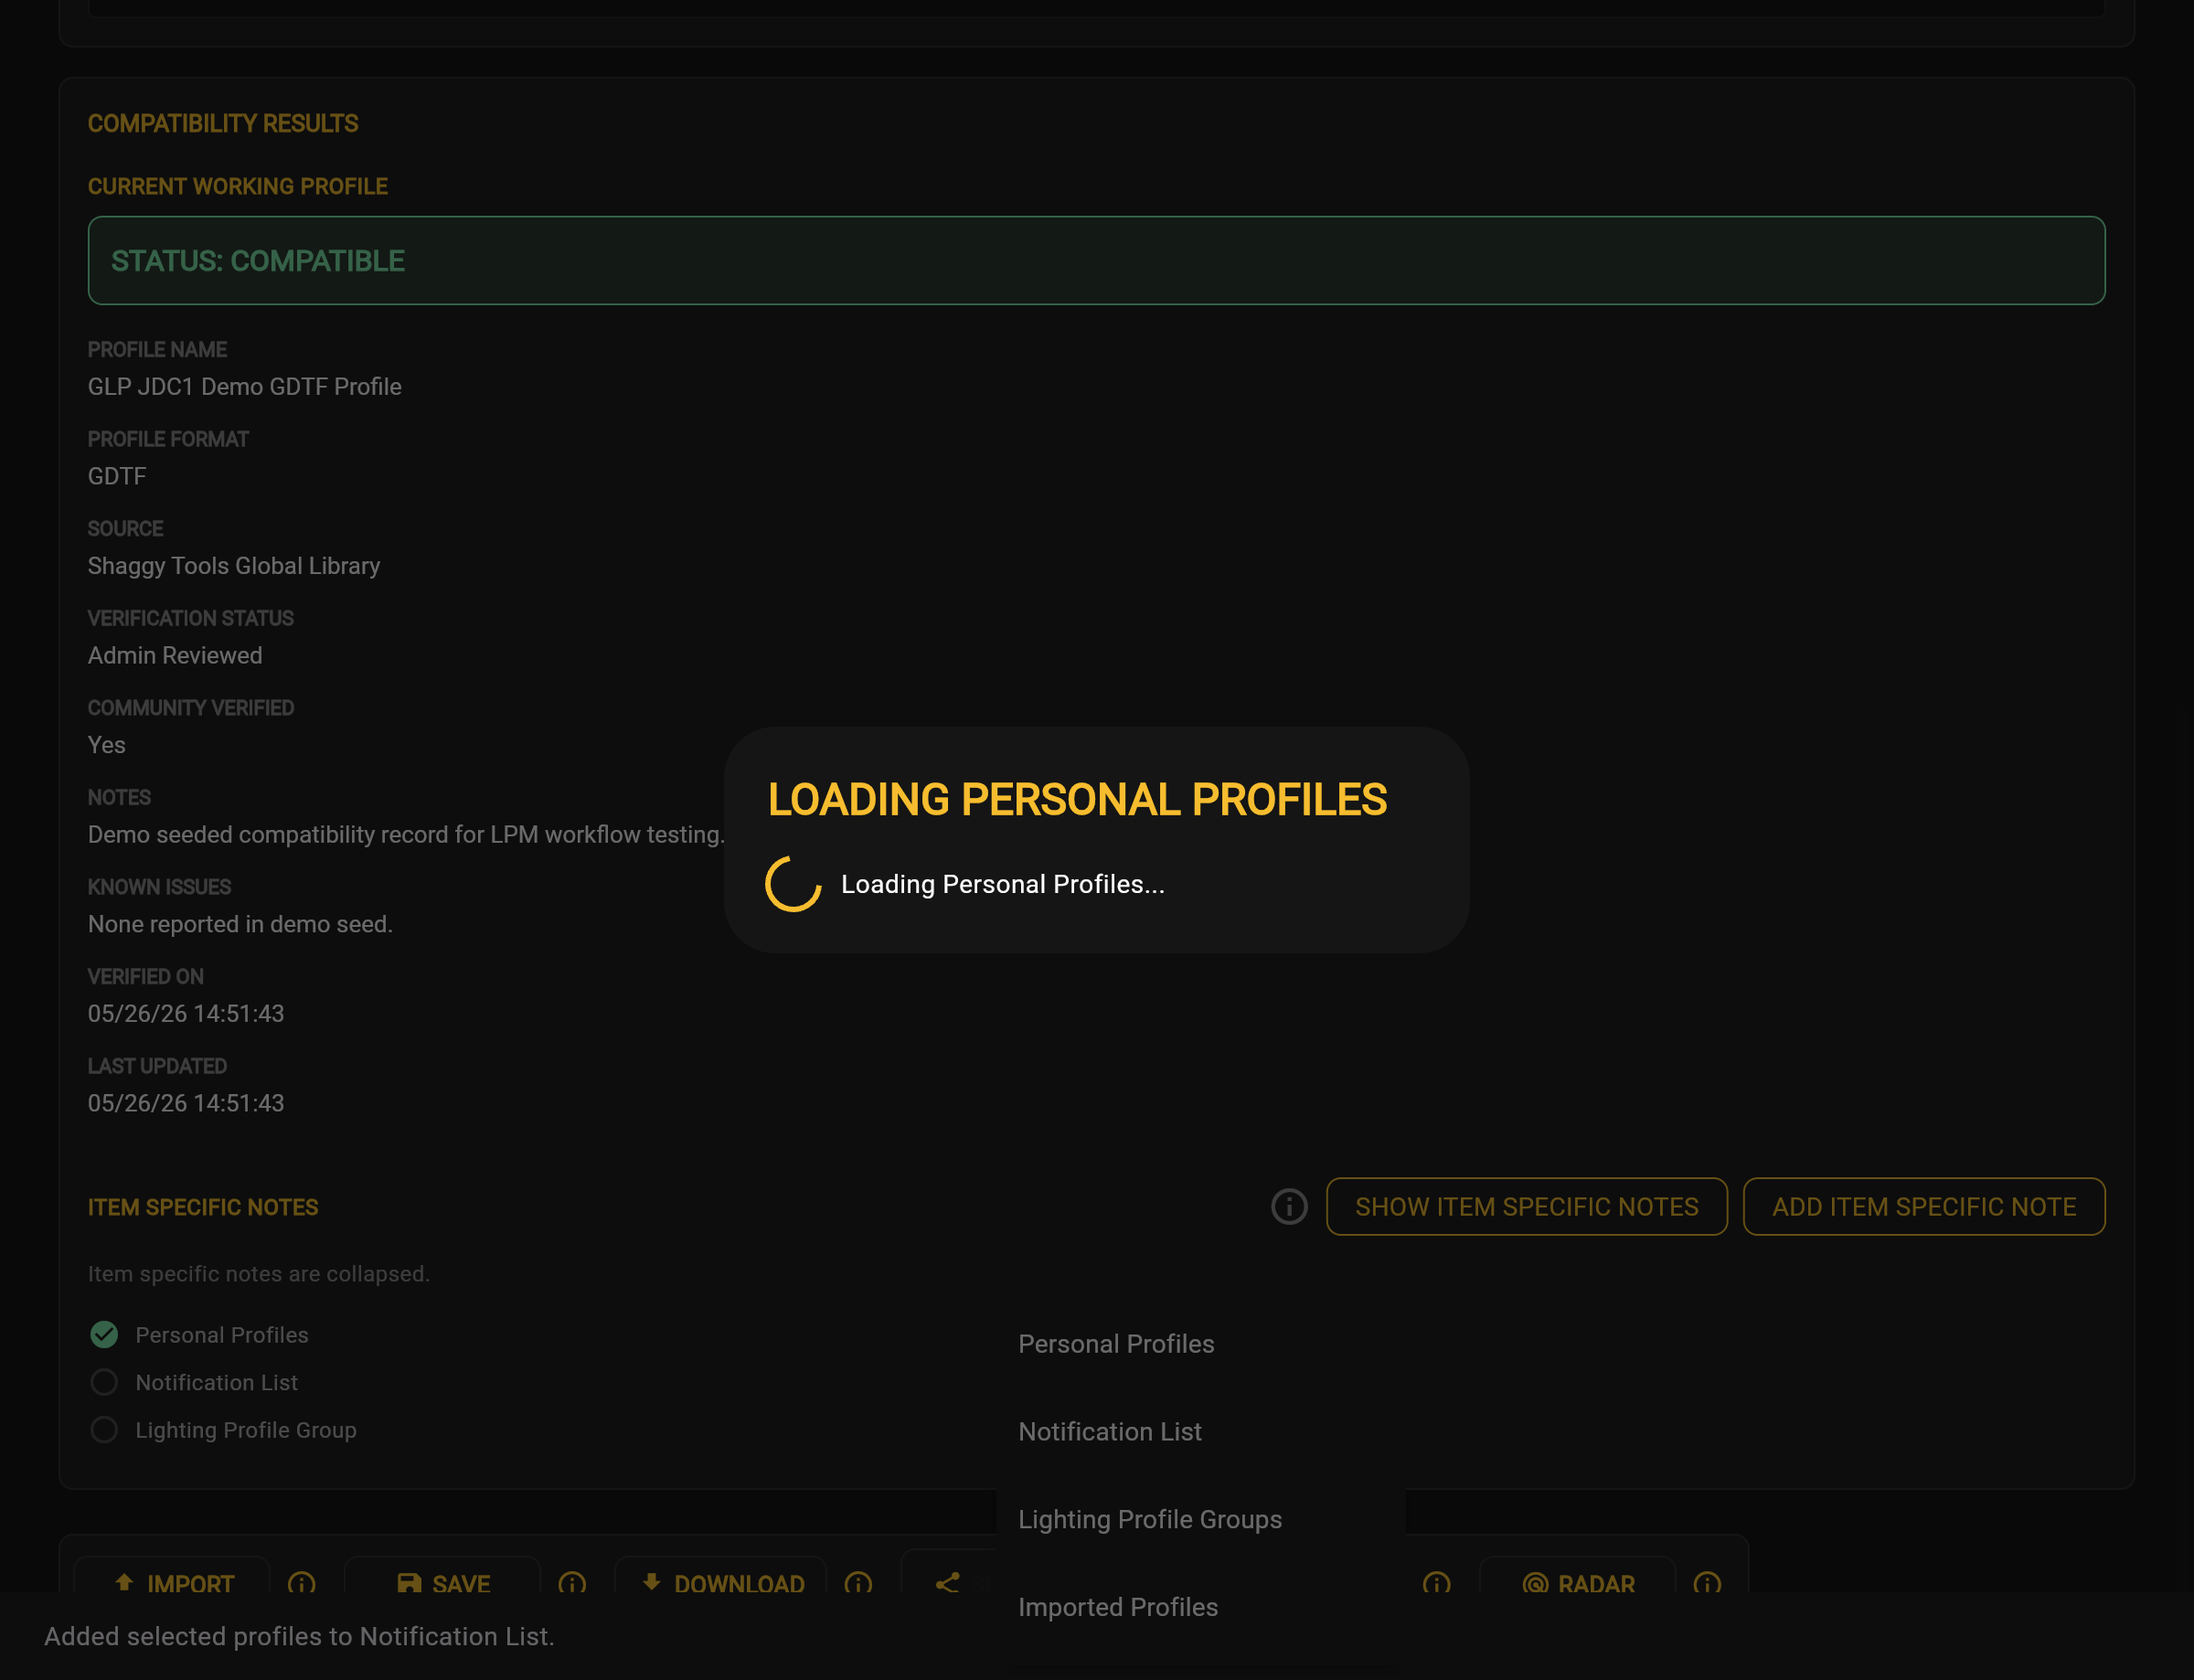
After the action, Lighting Profile Manager displays the message:

Added selected profiles to Notification List.

While the message is displayed, Personal Profiles briefly enters a loading state.

Confirmation message displayed while Personal Profiles refreshed
Confirmation message displayed while Personal Profiles refreshed Application screenshot

The workspace refreshes after adding the profile.

Settled state after adding the profile
Settled state after adding the profile Application screenshot

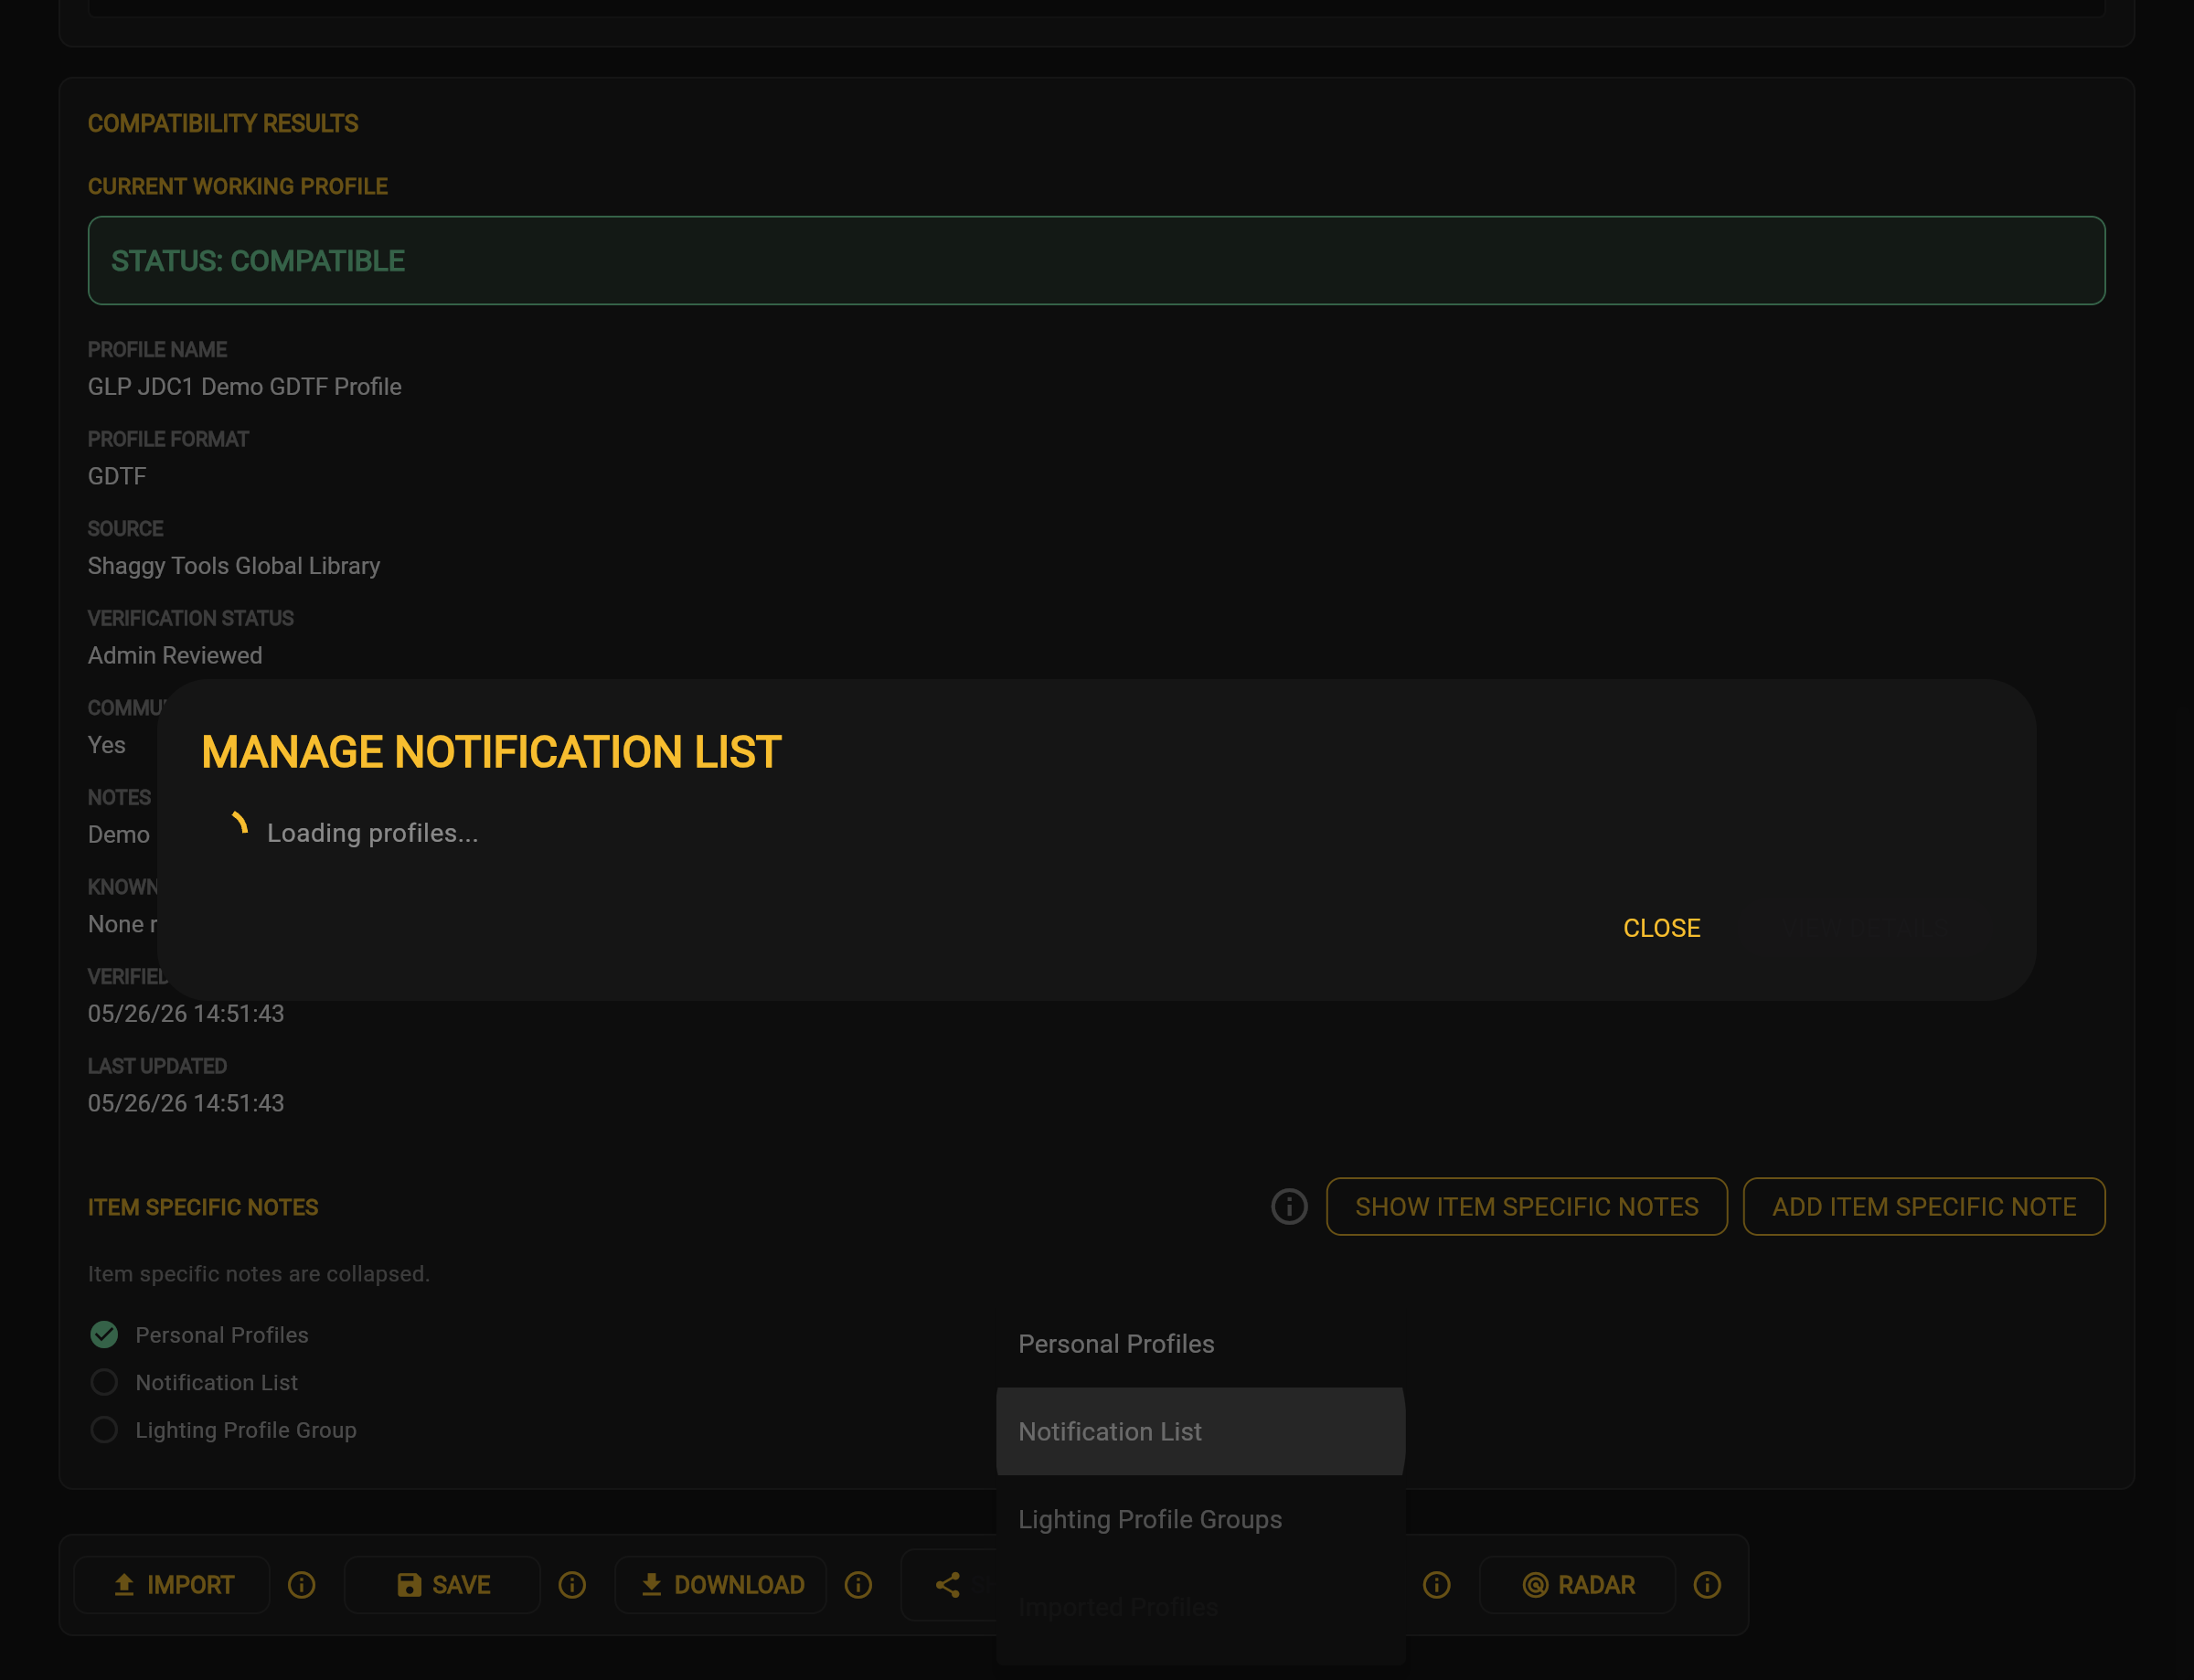
When you open Notification List, LPM displays a loading state.

Loading Notification List
Loading Notification List Application screenshot

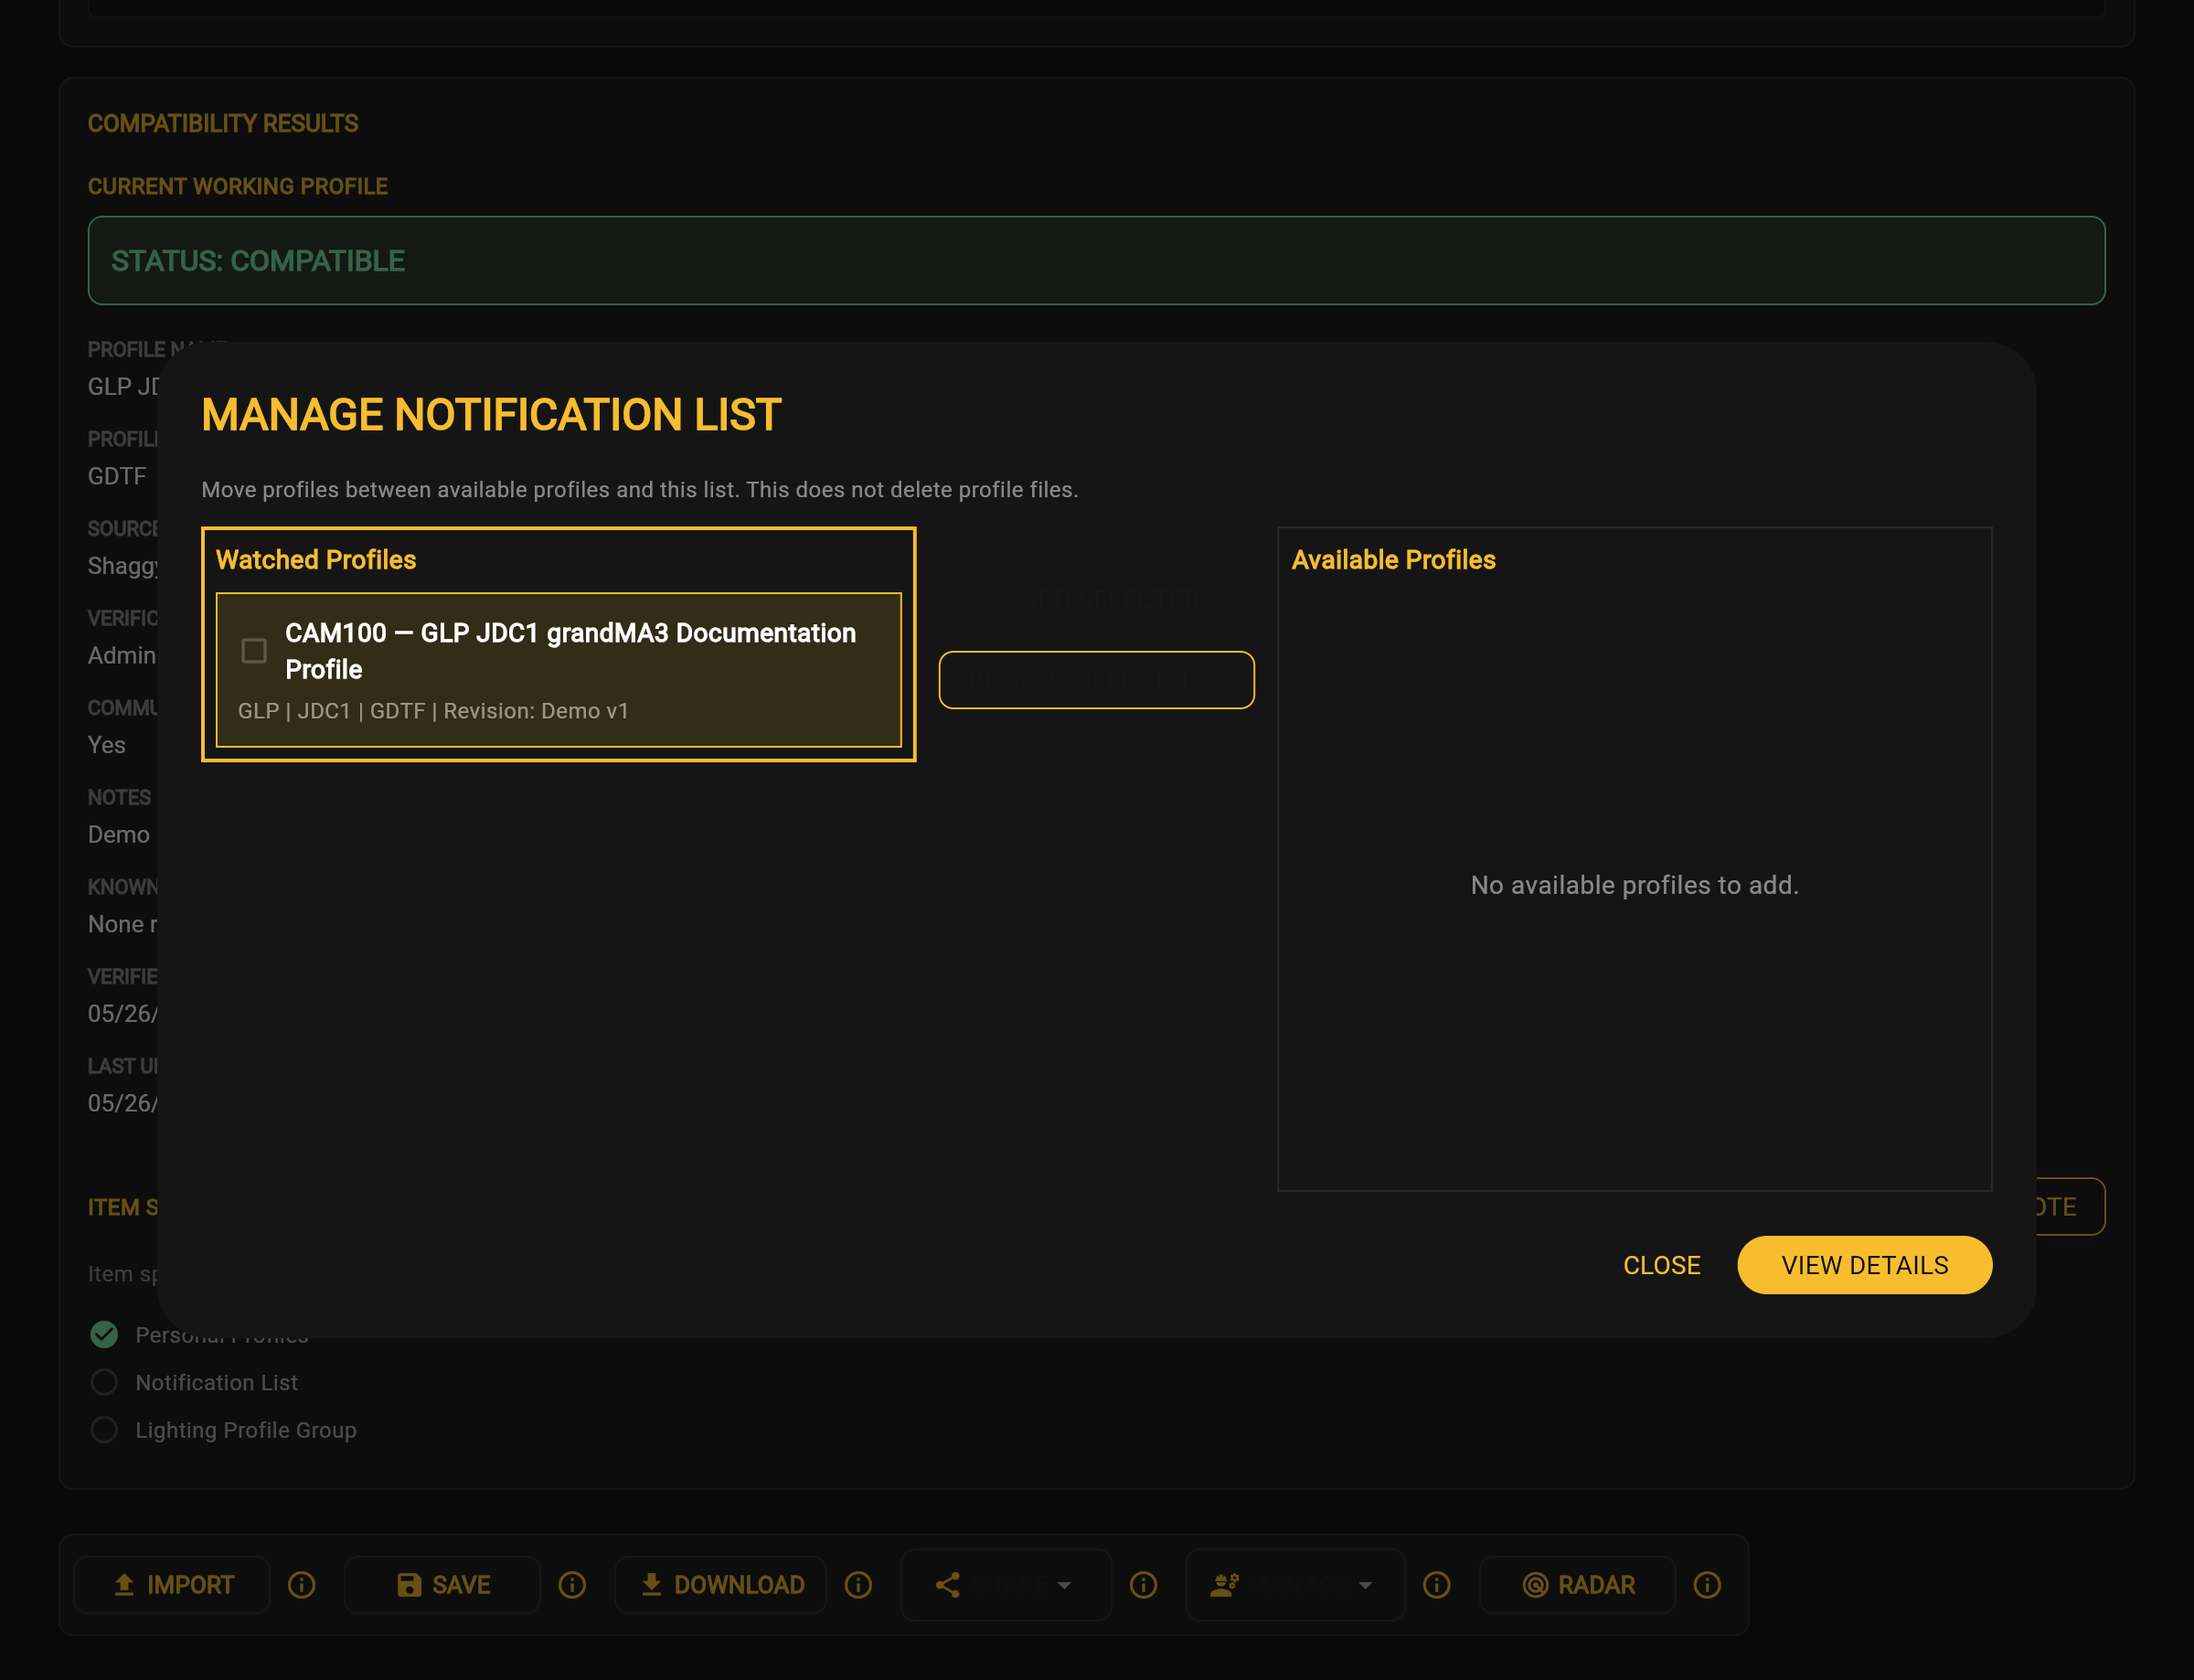
After loading, the added profile appears under Watched Profiles. If every available profile is already on the list, Available Profiles displays No available profiles to add.

Notification List showing the watched profile
Notification List showing the watched profile Application screenshot

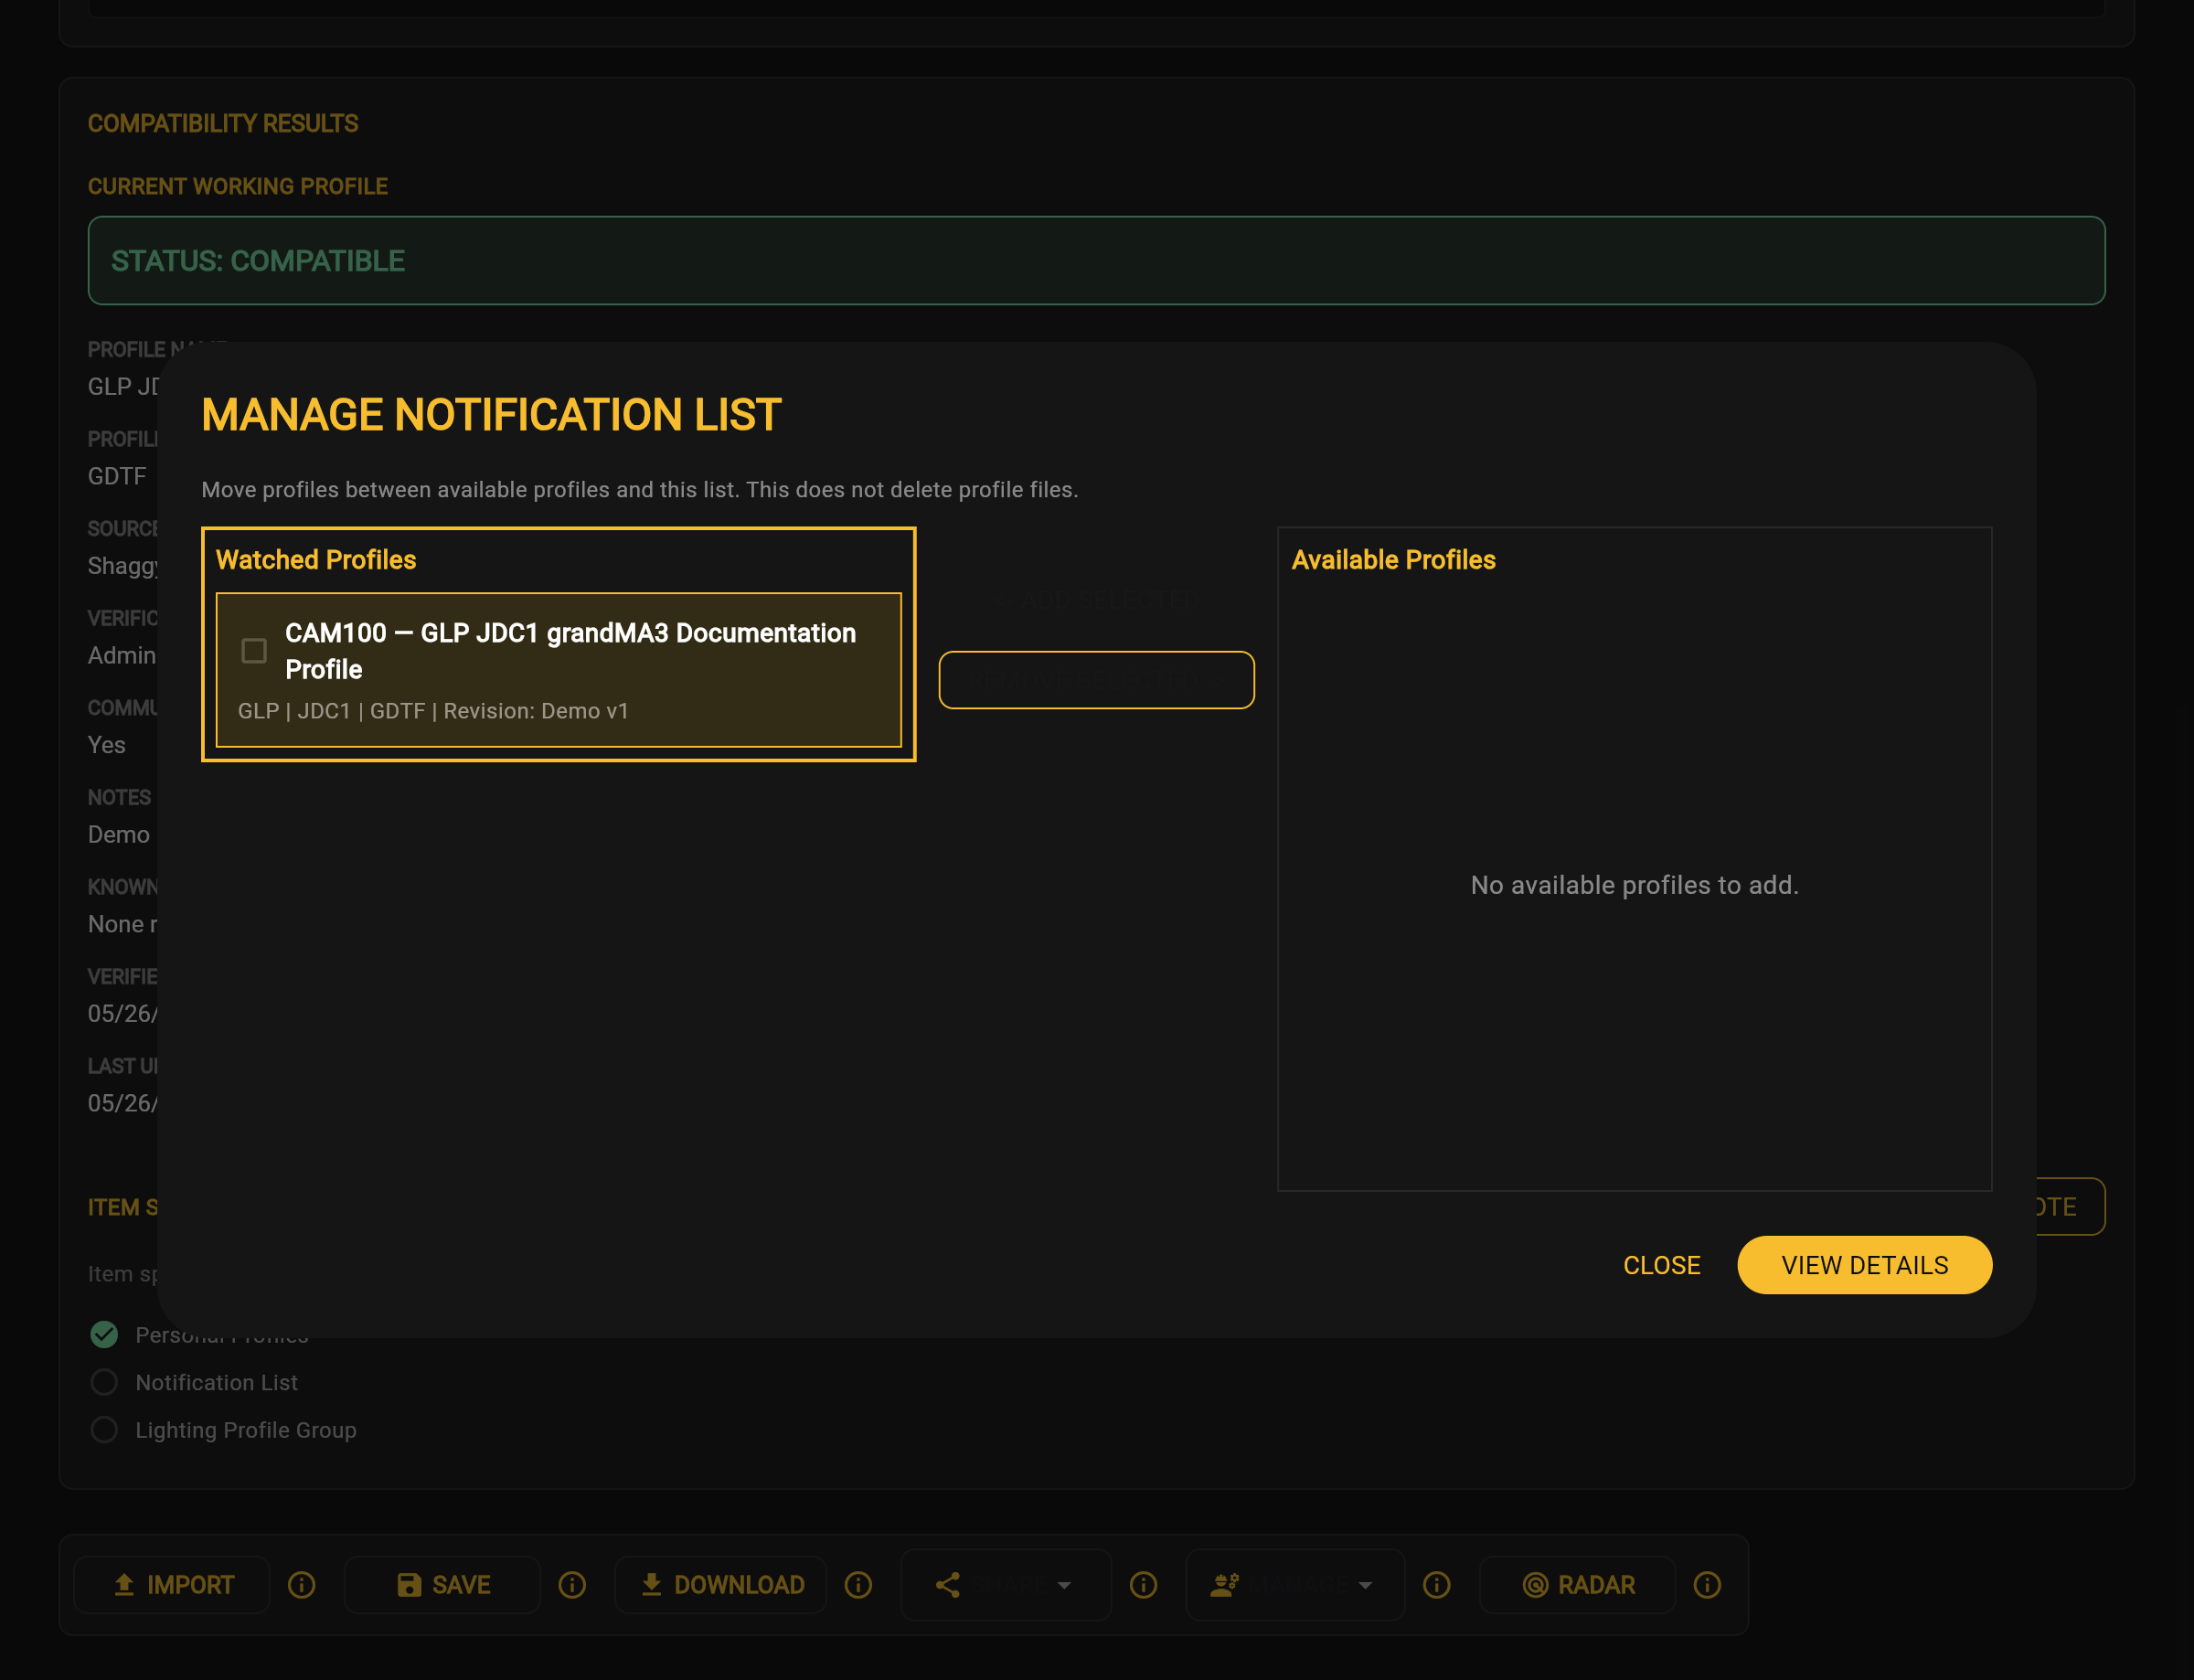
Selecting the watched profile enables REMOVE SELECTED ->. Removal steps are not included here.

Notification List profile selected
Notification List profile selected Application screenshot

Notification List Addition Tips

  • Wait for Notification List to finish loading.
  • Verify that the expected profile appears under Watched Profiles.

Notification List Addition Frequently Asked Questions

Was an external notification sent?

Adding a profile to the Notification List does not by itself confirm that an external notification was sent.

Troubleshoot Adding a Profile to the Notification List

  • Look for the confirmation message, then open Notification List and verify that the expected profile appears under Watched Profiles.
  • Wait for Notification List to finish loading.

Notification List Addition Related Topics

Notification List Indicators

Understand Notification List Controls

The Notification List separates profiles you are watching from profiles still available to add. After a profile appears under Watched Profiles, select it to make the available control visible.

Notification List displaying the watched profile
Notification List displaying the watched profile Application screenshot

Select a watched profile. The REMOVE SELECTED control becomes available.

Watched profile selected
Watched profile selected Application screenshot

The Notification List displays:

  • Watched Profiles
  • A selected profile
  • REMOVE SELECTED control

Removal steps are not included here.

Notification List Control Tips

  • Select a watched profile to enable the REMOVE SELECTED control.
  • Verify that the correct profile is selected.

Notification List Controls Frequently Asked Questions

Can I remove a watched profile?

The REMOVE SELECTED control appears after you select a watched profile. Removal steps are not included in this guide.

Troubleshoot Notification List Controls

  • Verify that Notification List has finished loading.
  • Confirm that the expected watched profile appears.
  • If REMOVE SELECTED is unavailable, verify that a watched profile has been selected.

Notification List Controls Related Topics

Lighting Profile Groups

Create and Populate a Lighting Profile Group

Lighting Profile Groups let you organize saved Lighting Profiles together. Follow the steps below to create a group, select an available profile, and confirm whether the profile appears in the group.

Open the Lighting Profile Groups Workspace

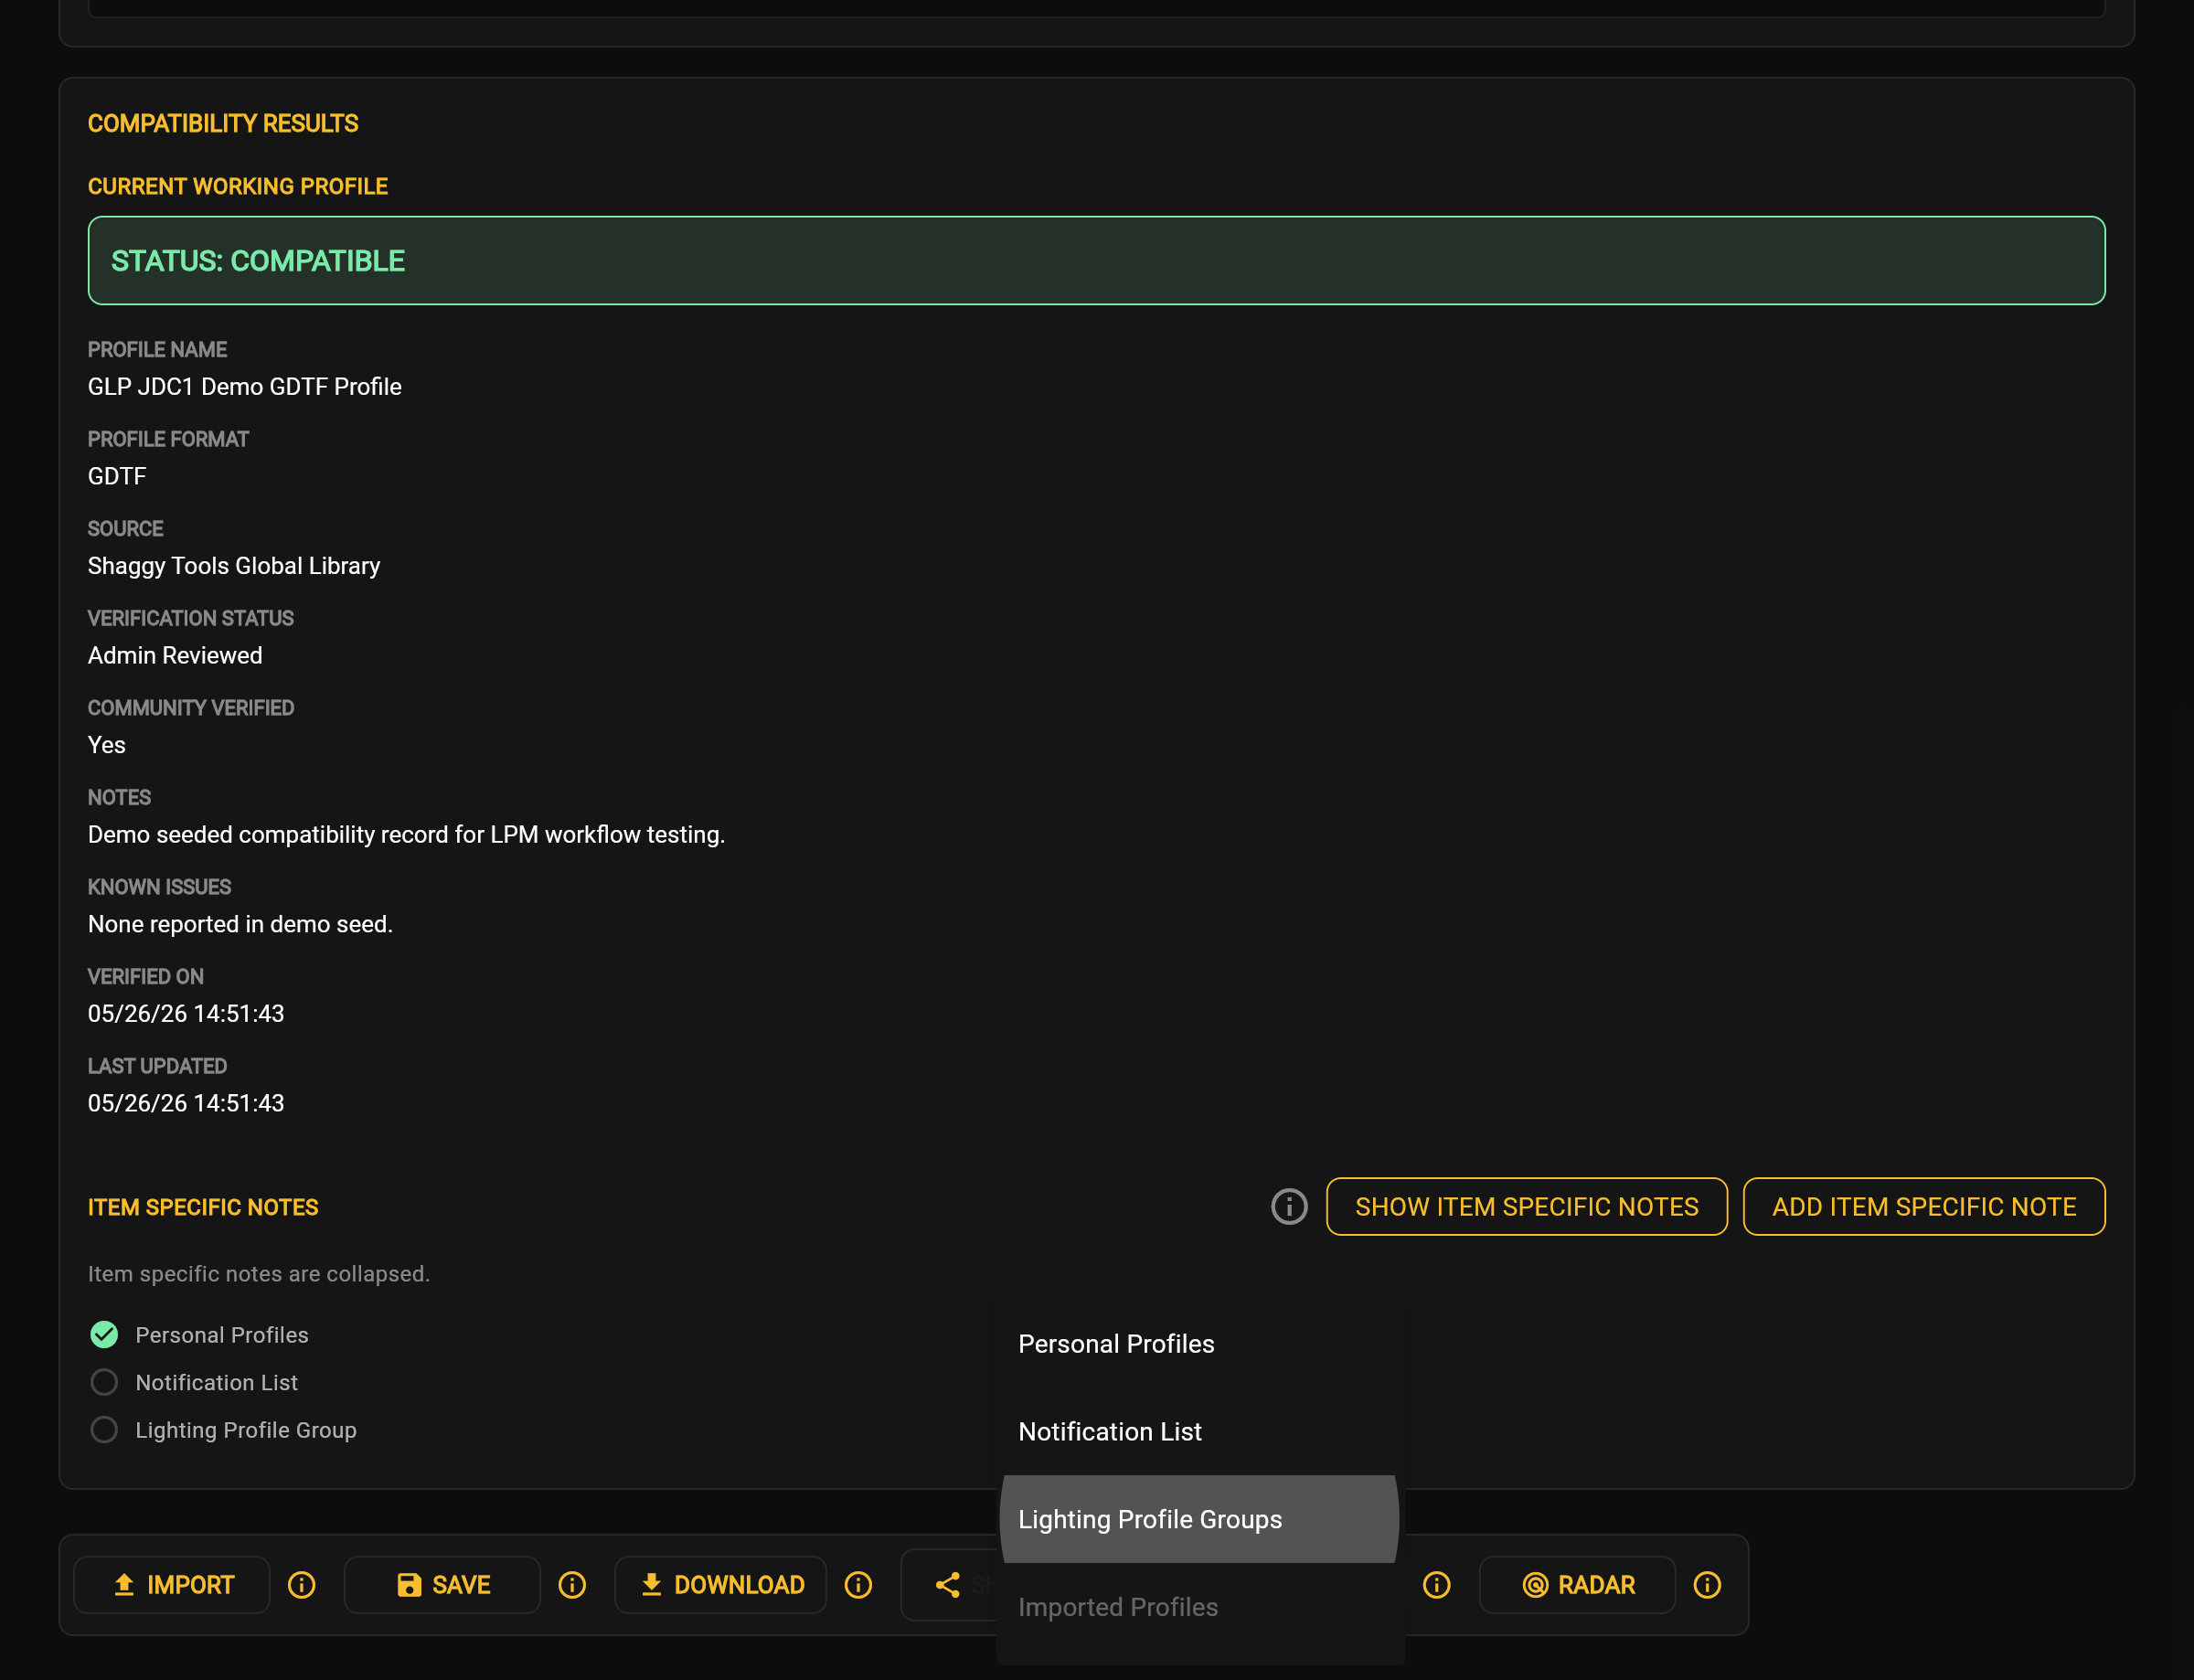
Open Manage and select Lighting Profile Groups.

Lighting Profile Groups selected from Manage
Lighting Profile Groups selected from Manage Application screenshot

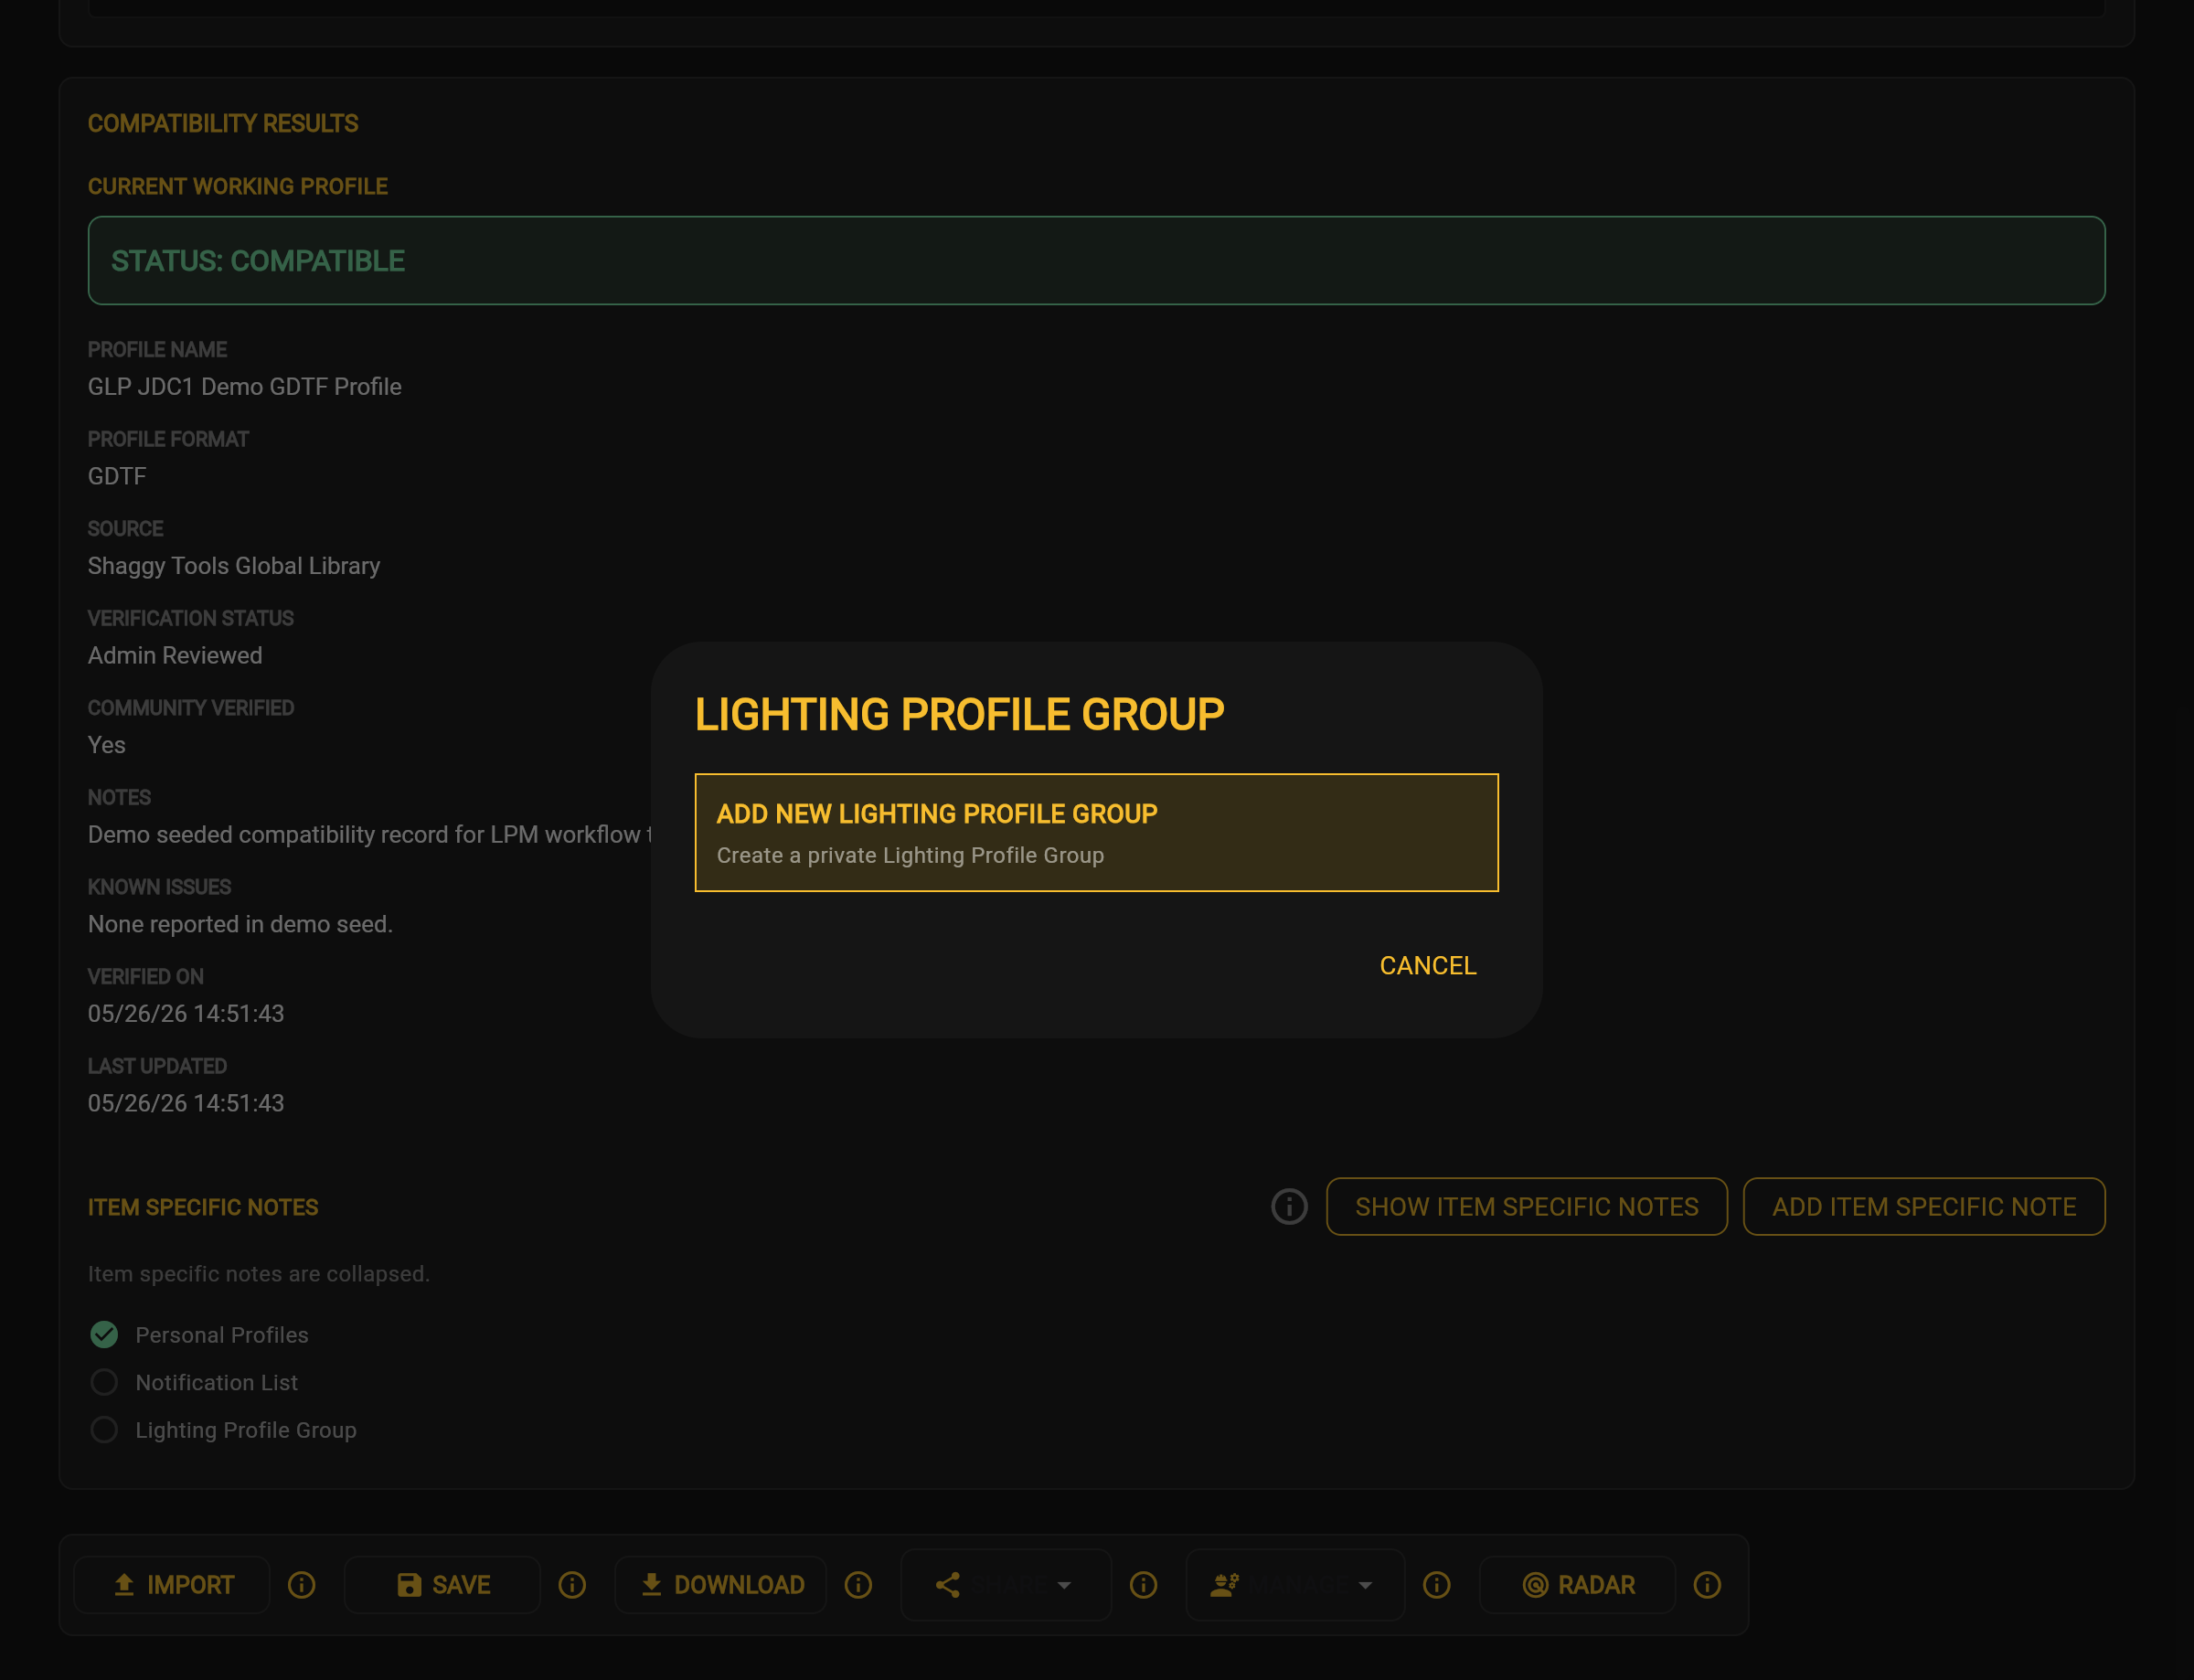
When no group exists, the Lighting Profile Groups workspace displays ADD NEW LIGHTING PROFILE GROUP.

Initial Lighting Profile Groups workspace
Initial Lighting Profile Groups workspace Application screenshot

Create a Lighting Profile Group

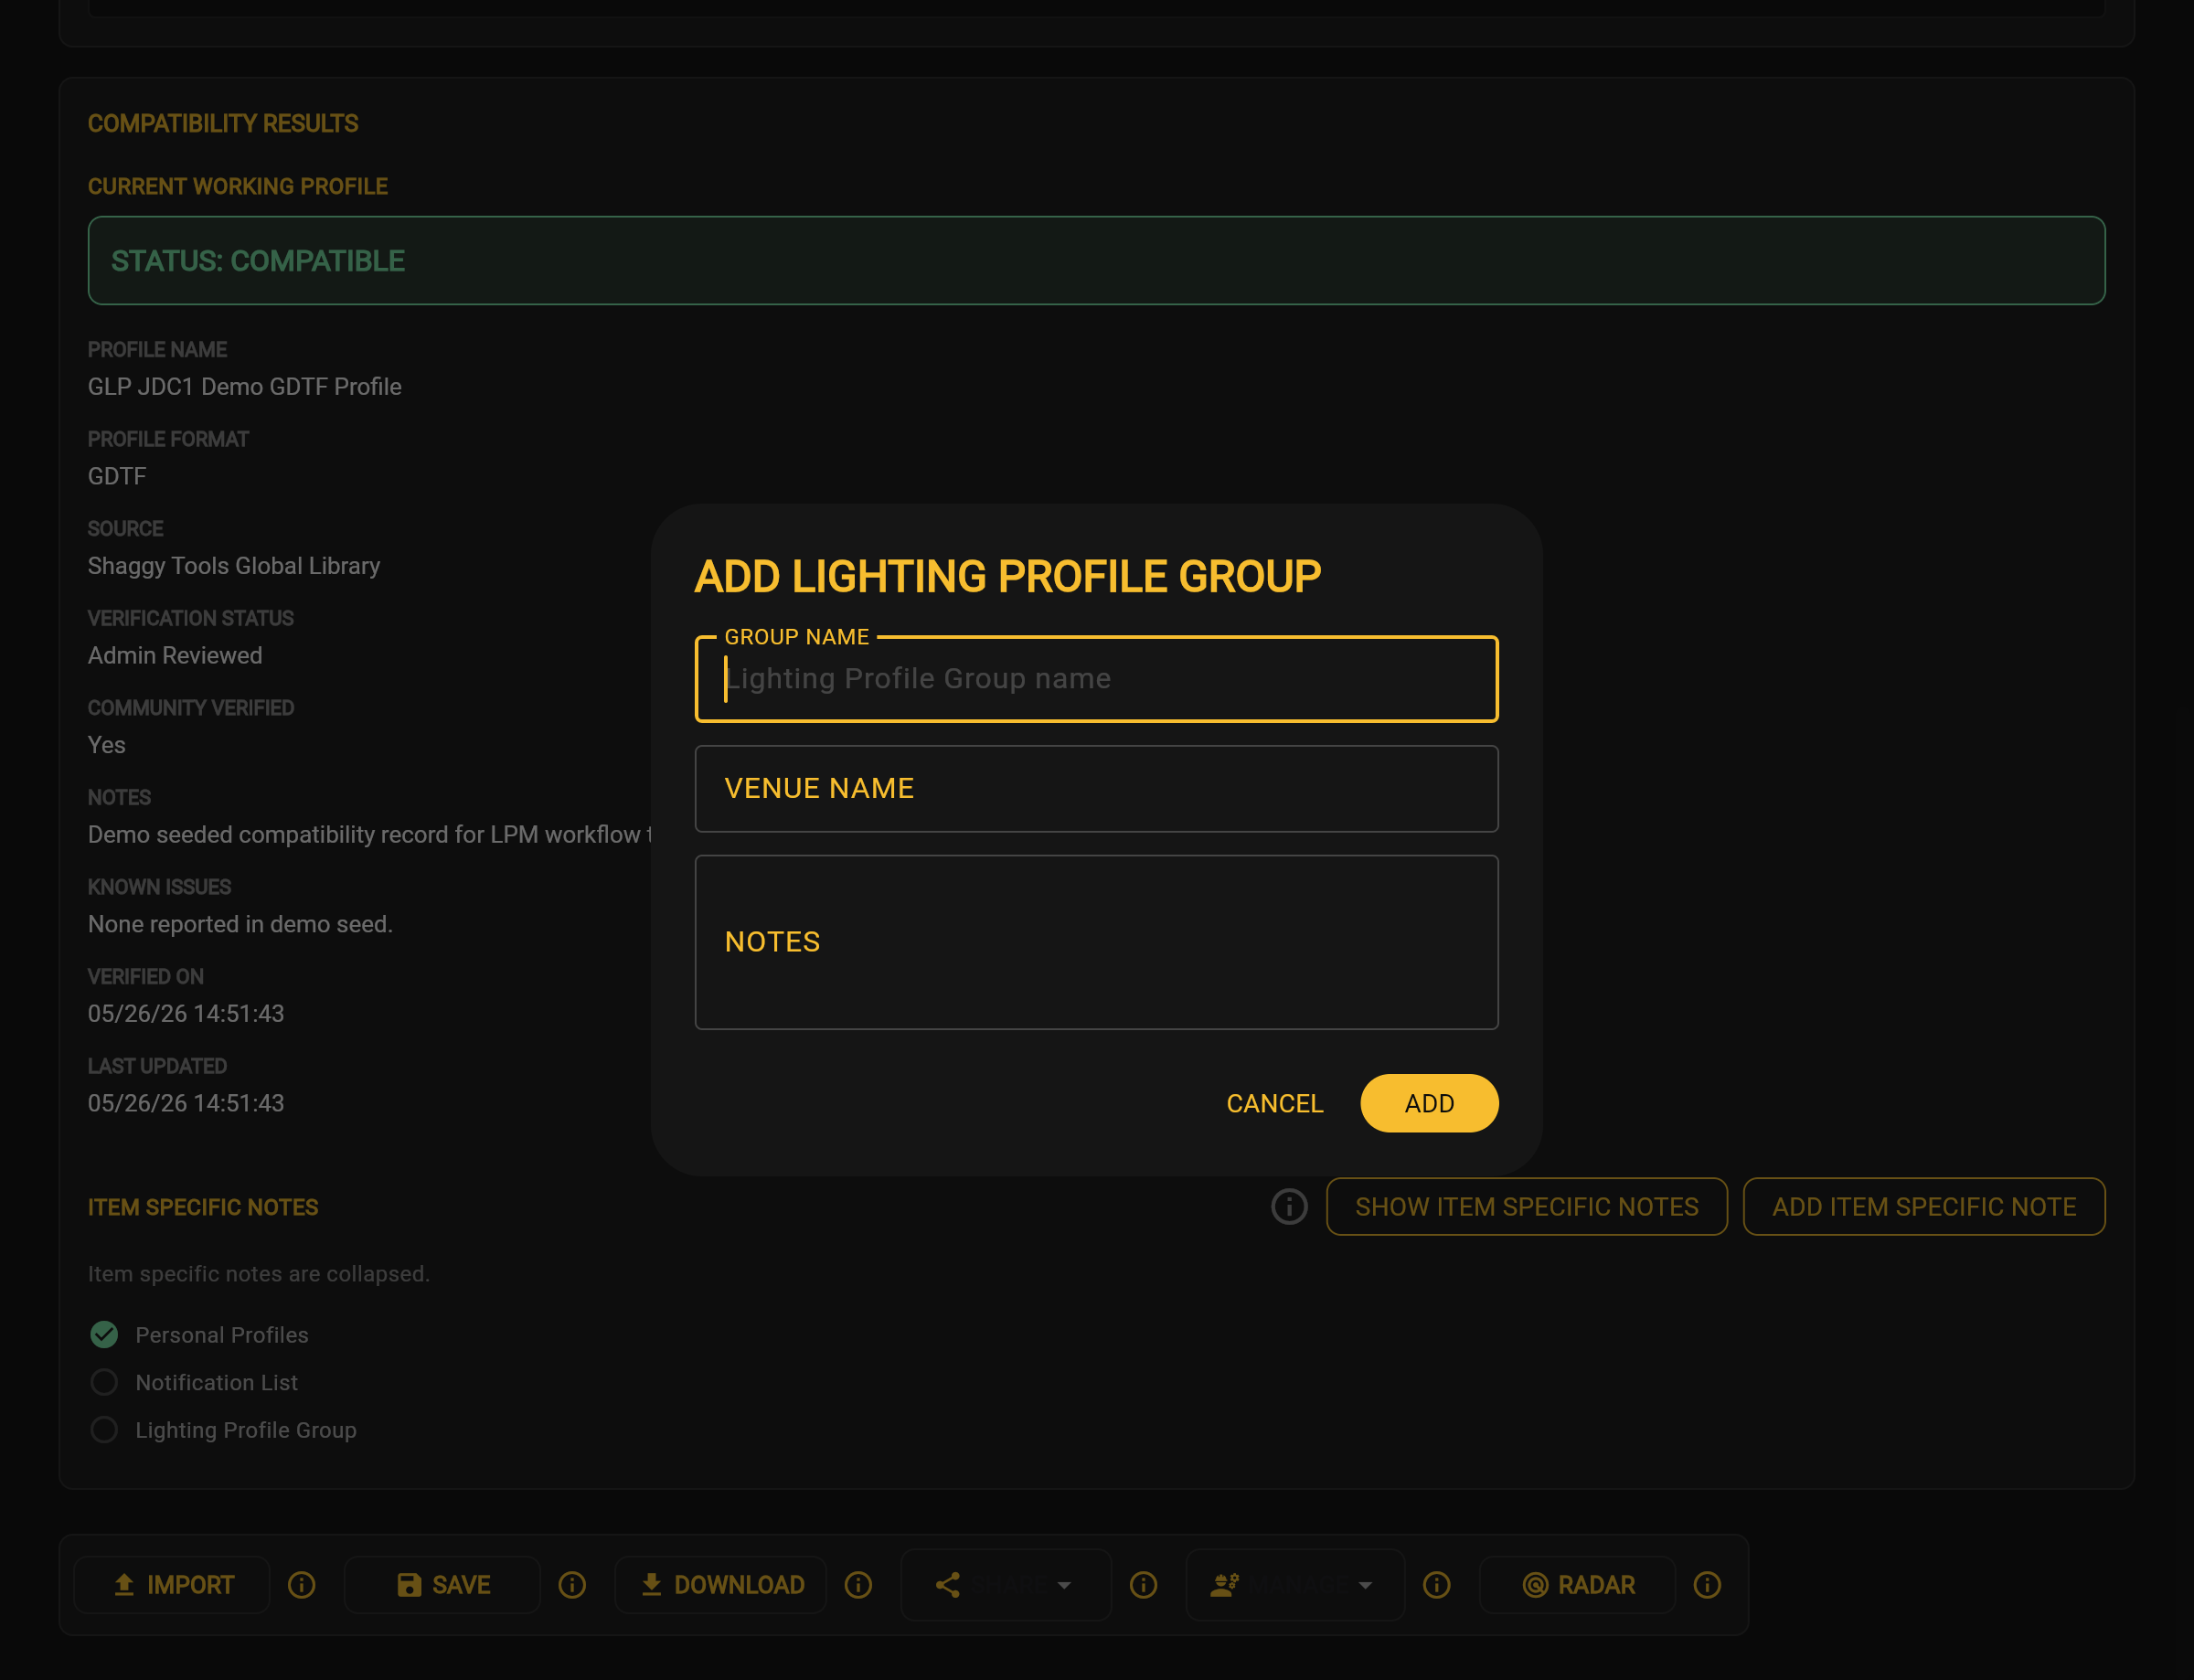
Choose ADD NEW LIGHTING PROFILE GROUP. The form displays Group Name, Venue Name, and Notes. It does not display a Description field.

New Lighting Profile Group form
New Lighting Profile Group form Application screenshot

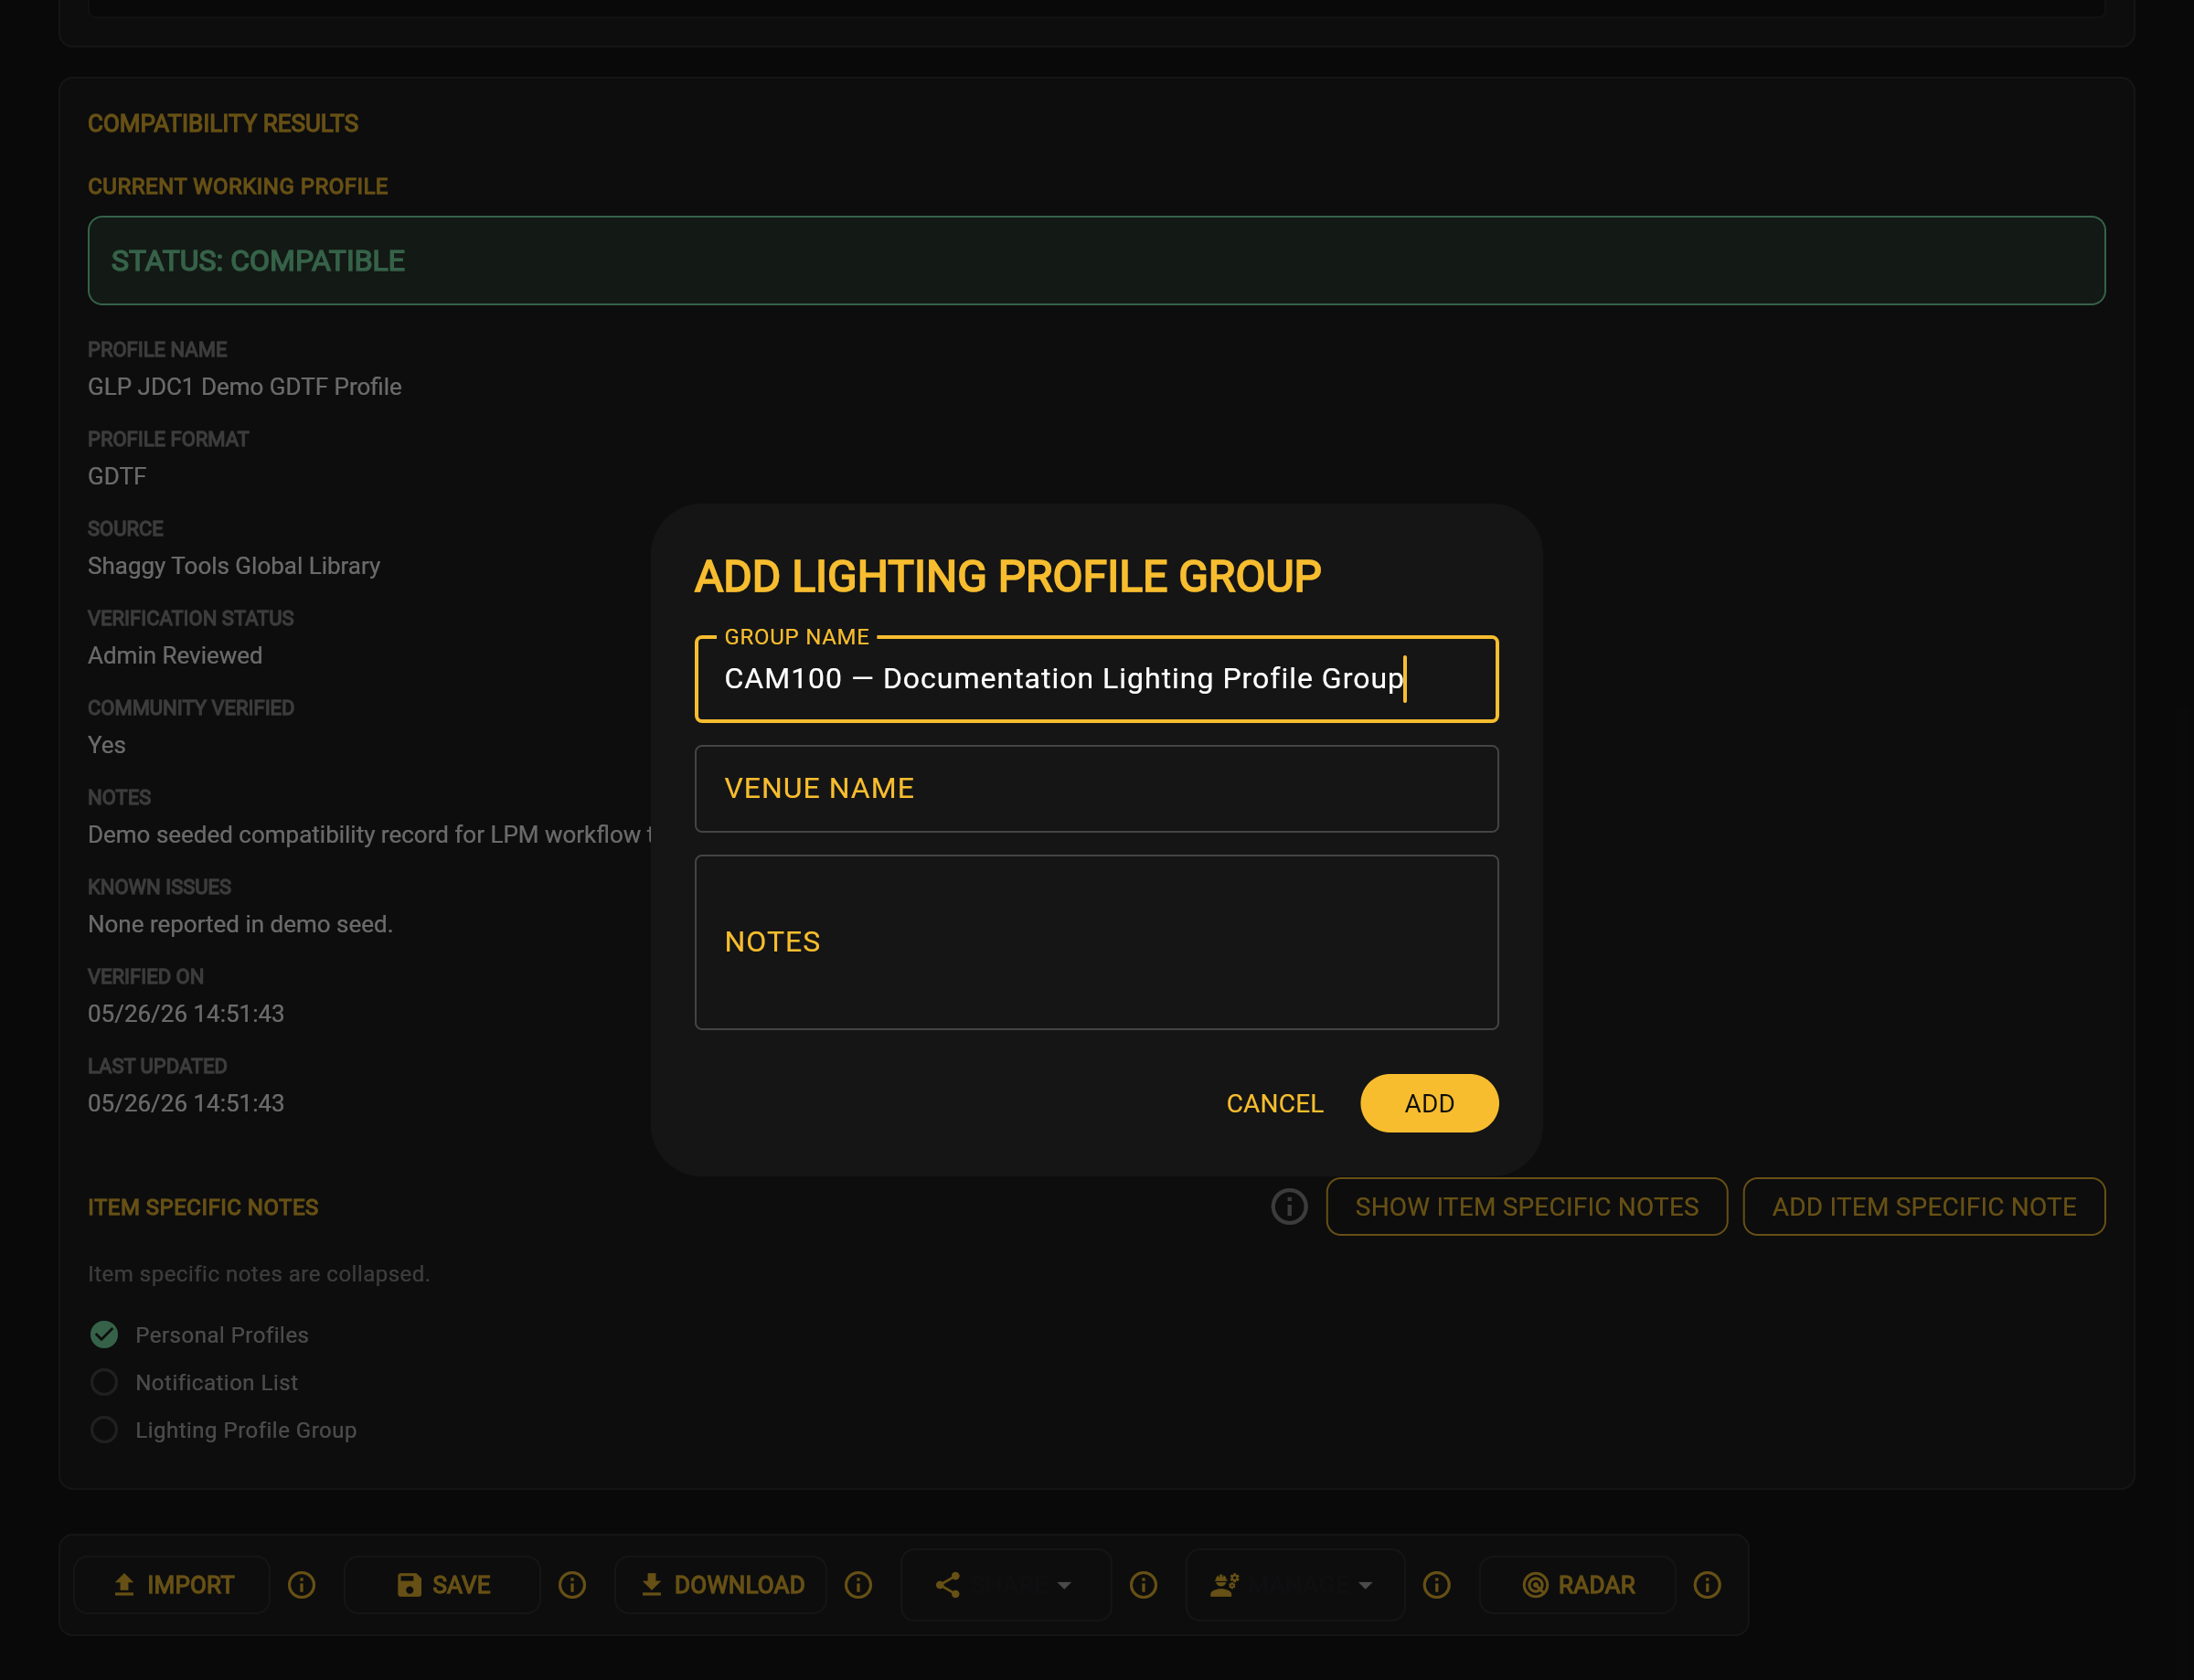
Enter a Group Name. Venue Name and Notes may remain empty when they are not needed.

Completed group form before creation
Completed group form before creation Application screenshot

After creation, the new group displays No profiles in this group yet. Saved profiles that can be selected appear under Available Profiles.

Workspace after group creation
Workspace after group creation Application screenshot
Created empty group
Created empty group Application screenshot

Add a Profile to a Lighting Profile Group

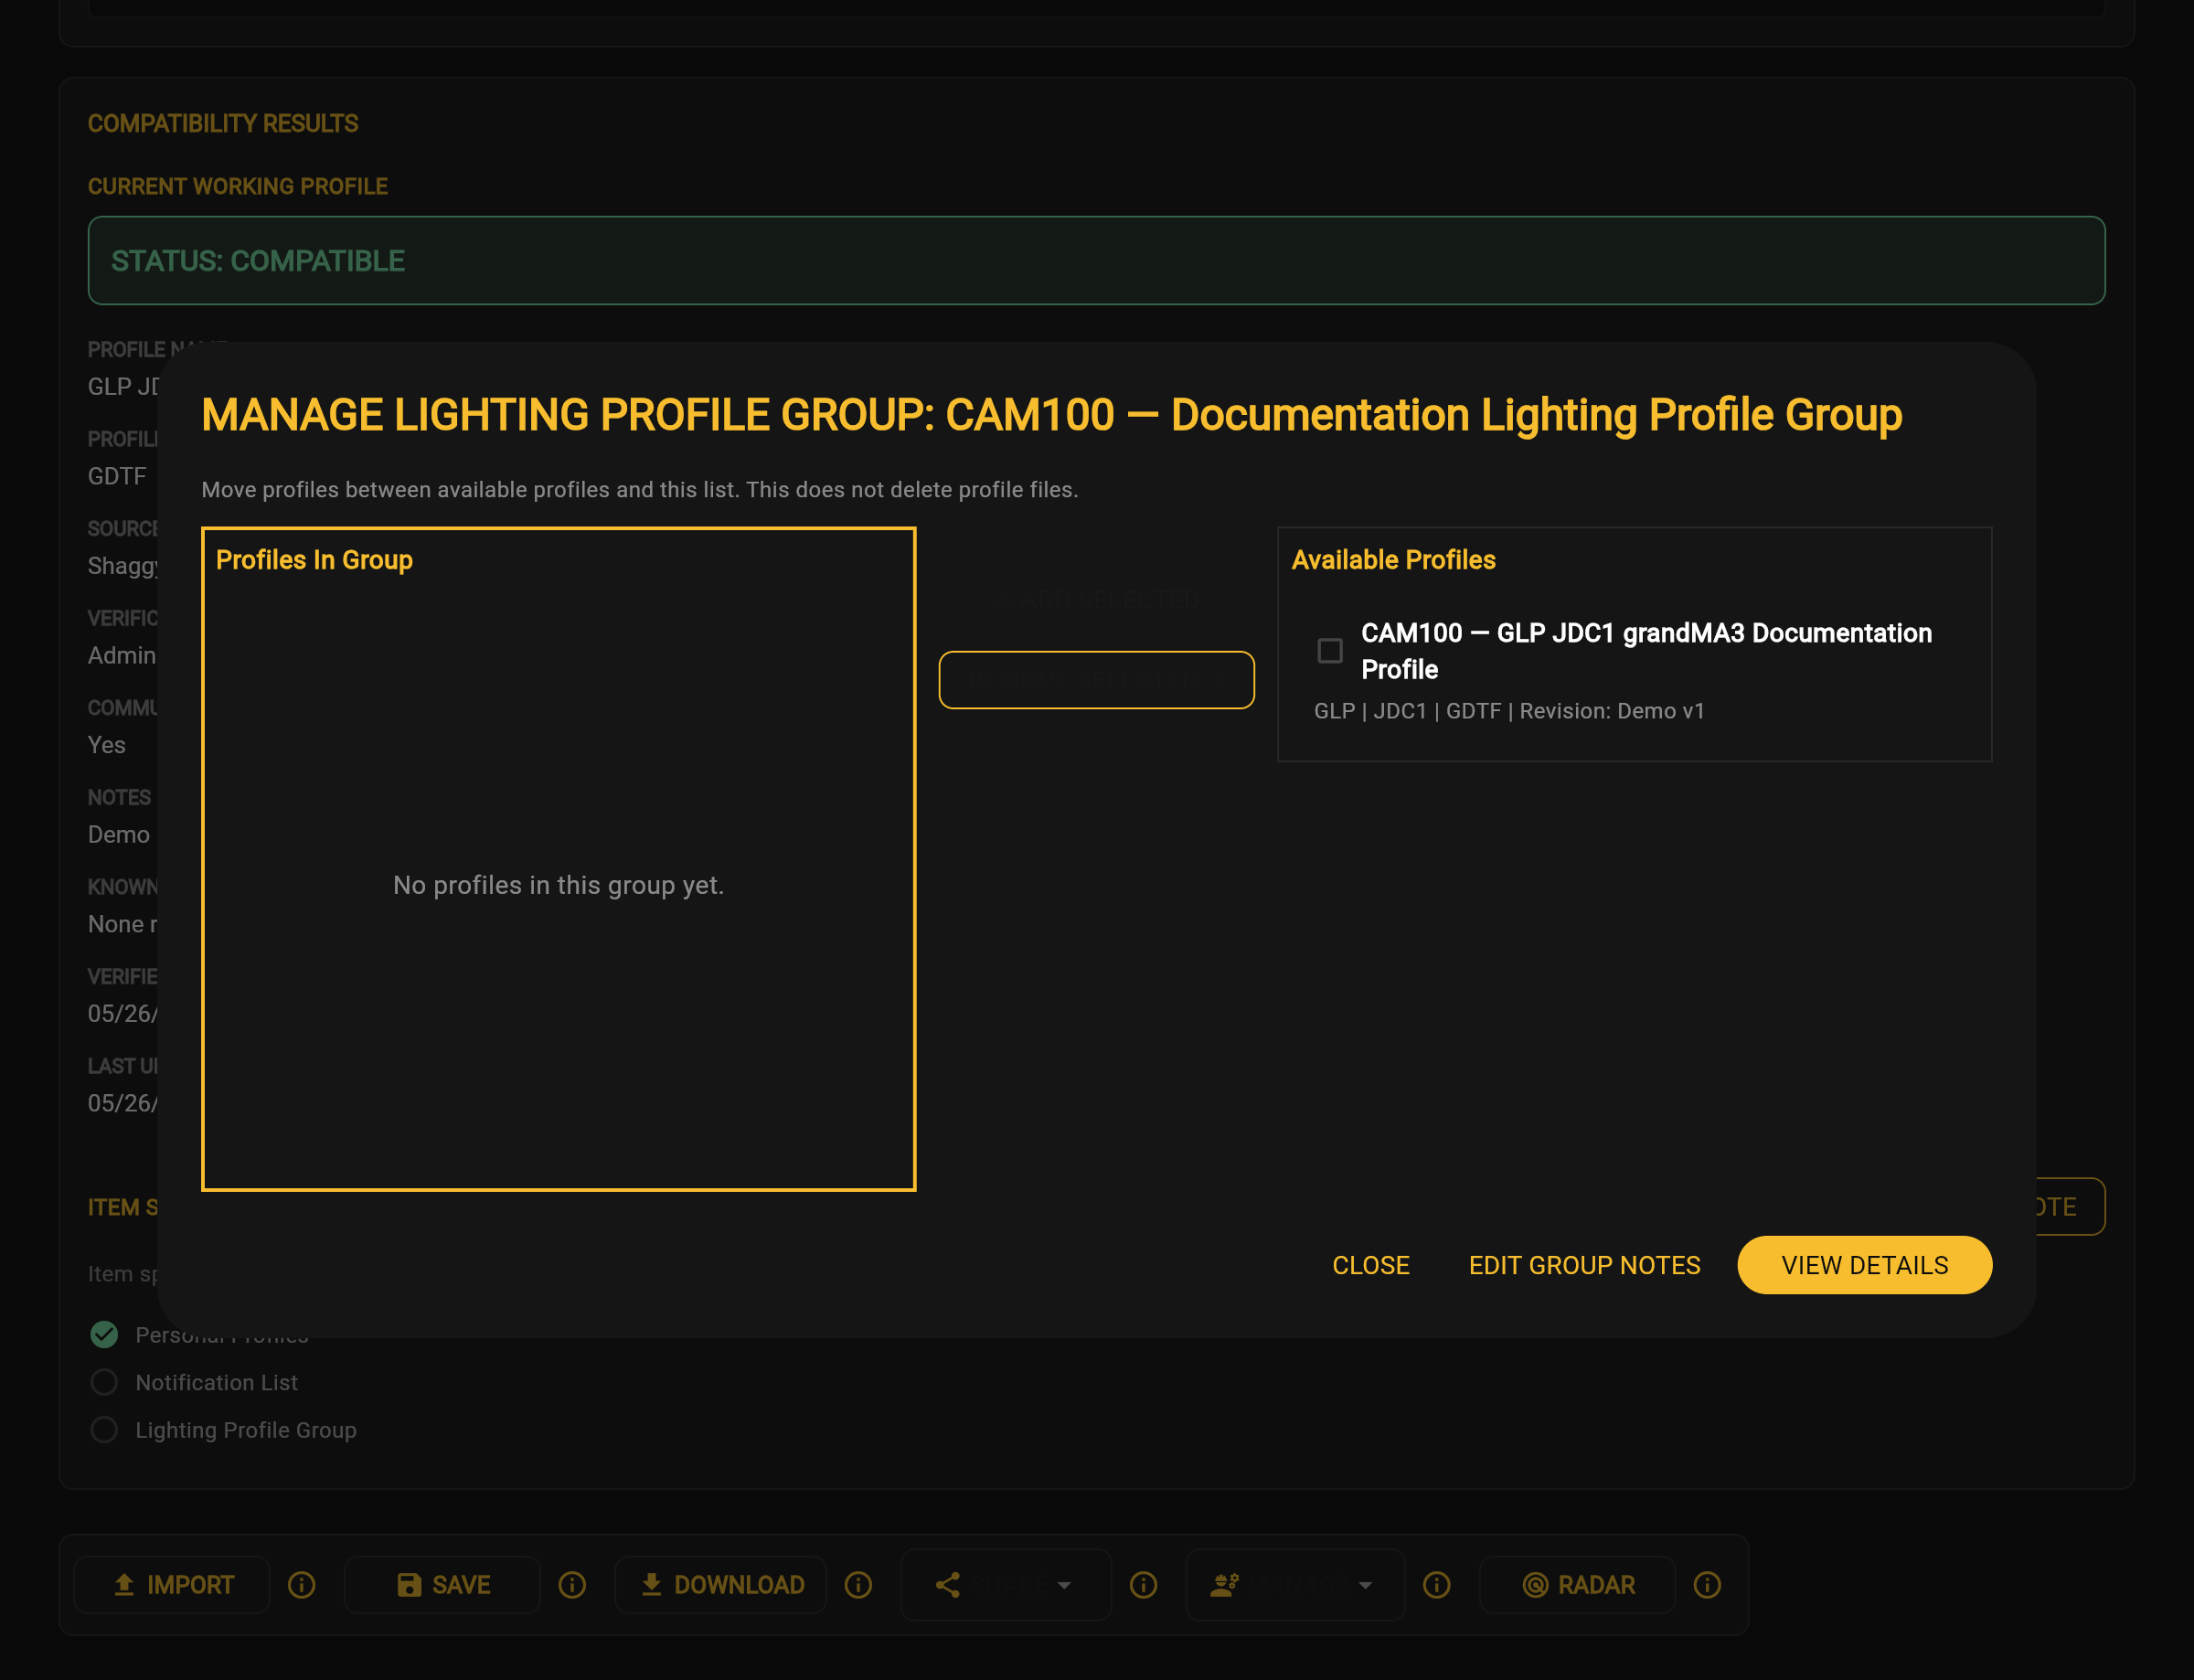
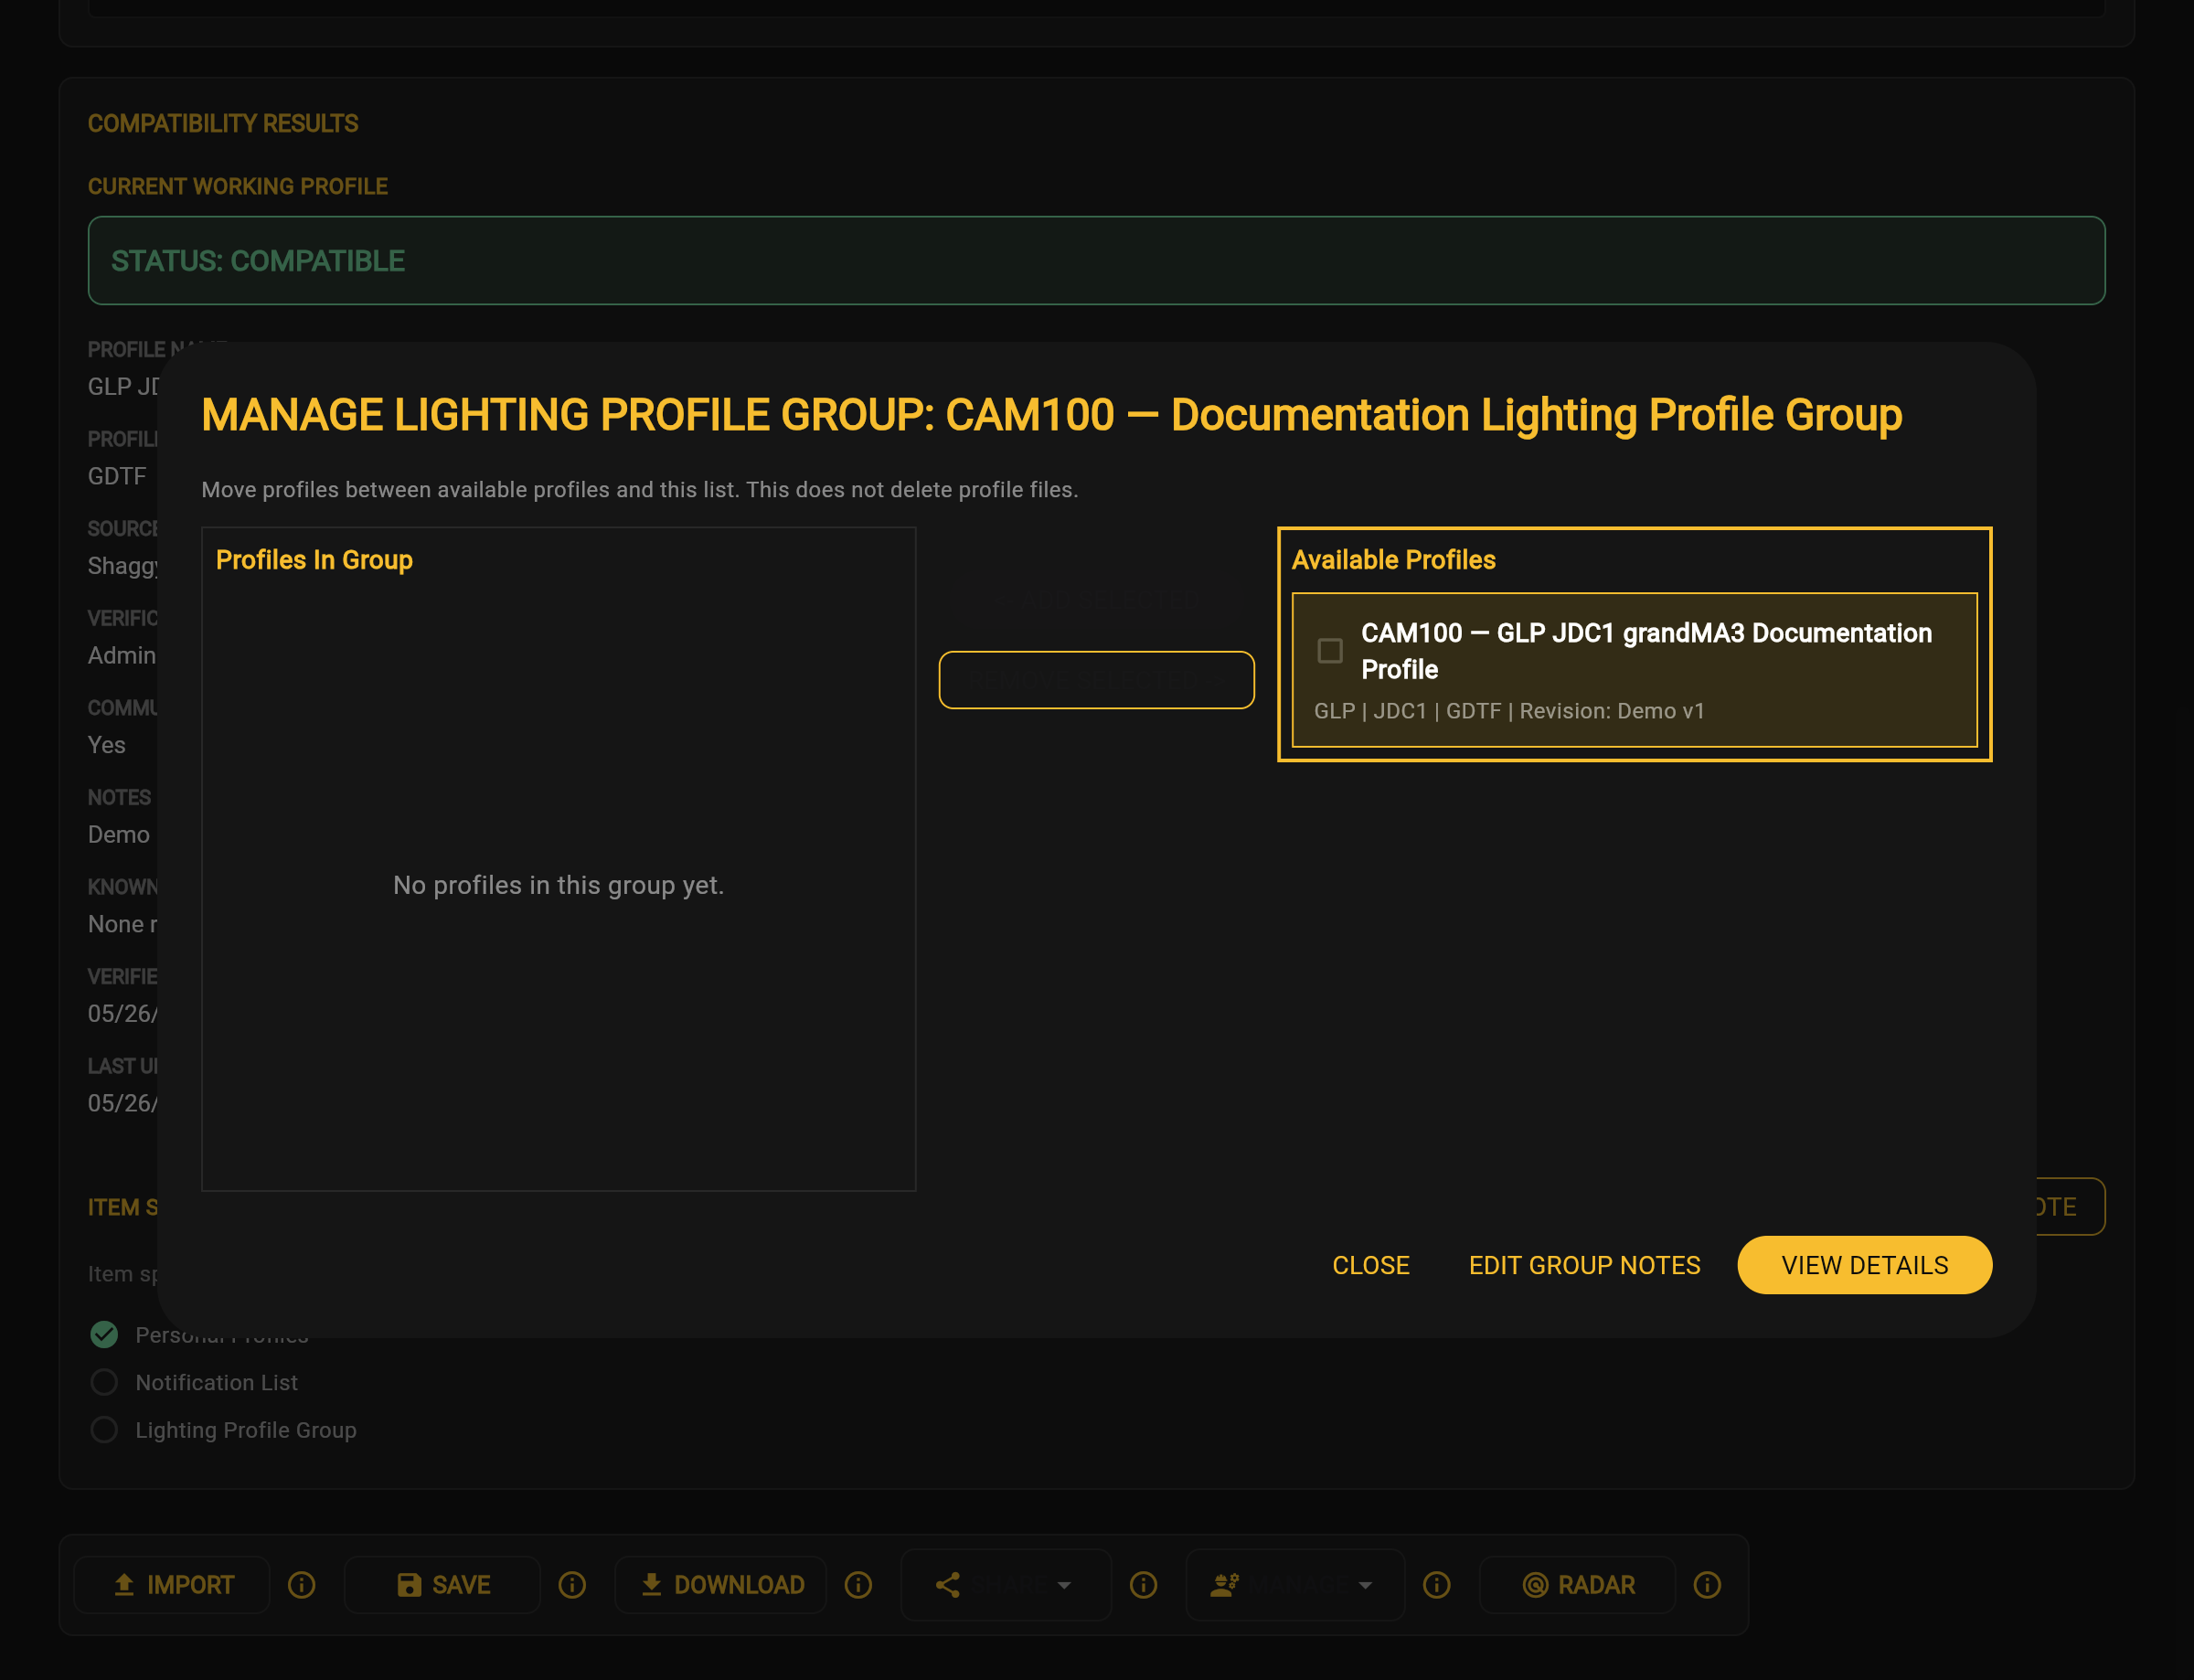
Select a profile under Available Profiles. The <- ADD SELECTED button becomes available.

Profile selected for addition
Profile selected for addition Application screenshot

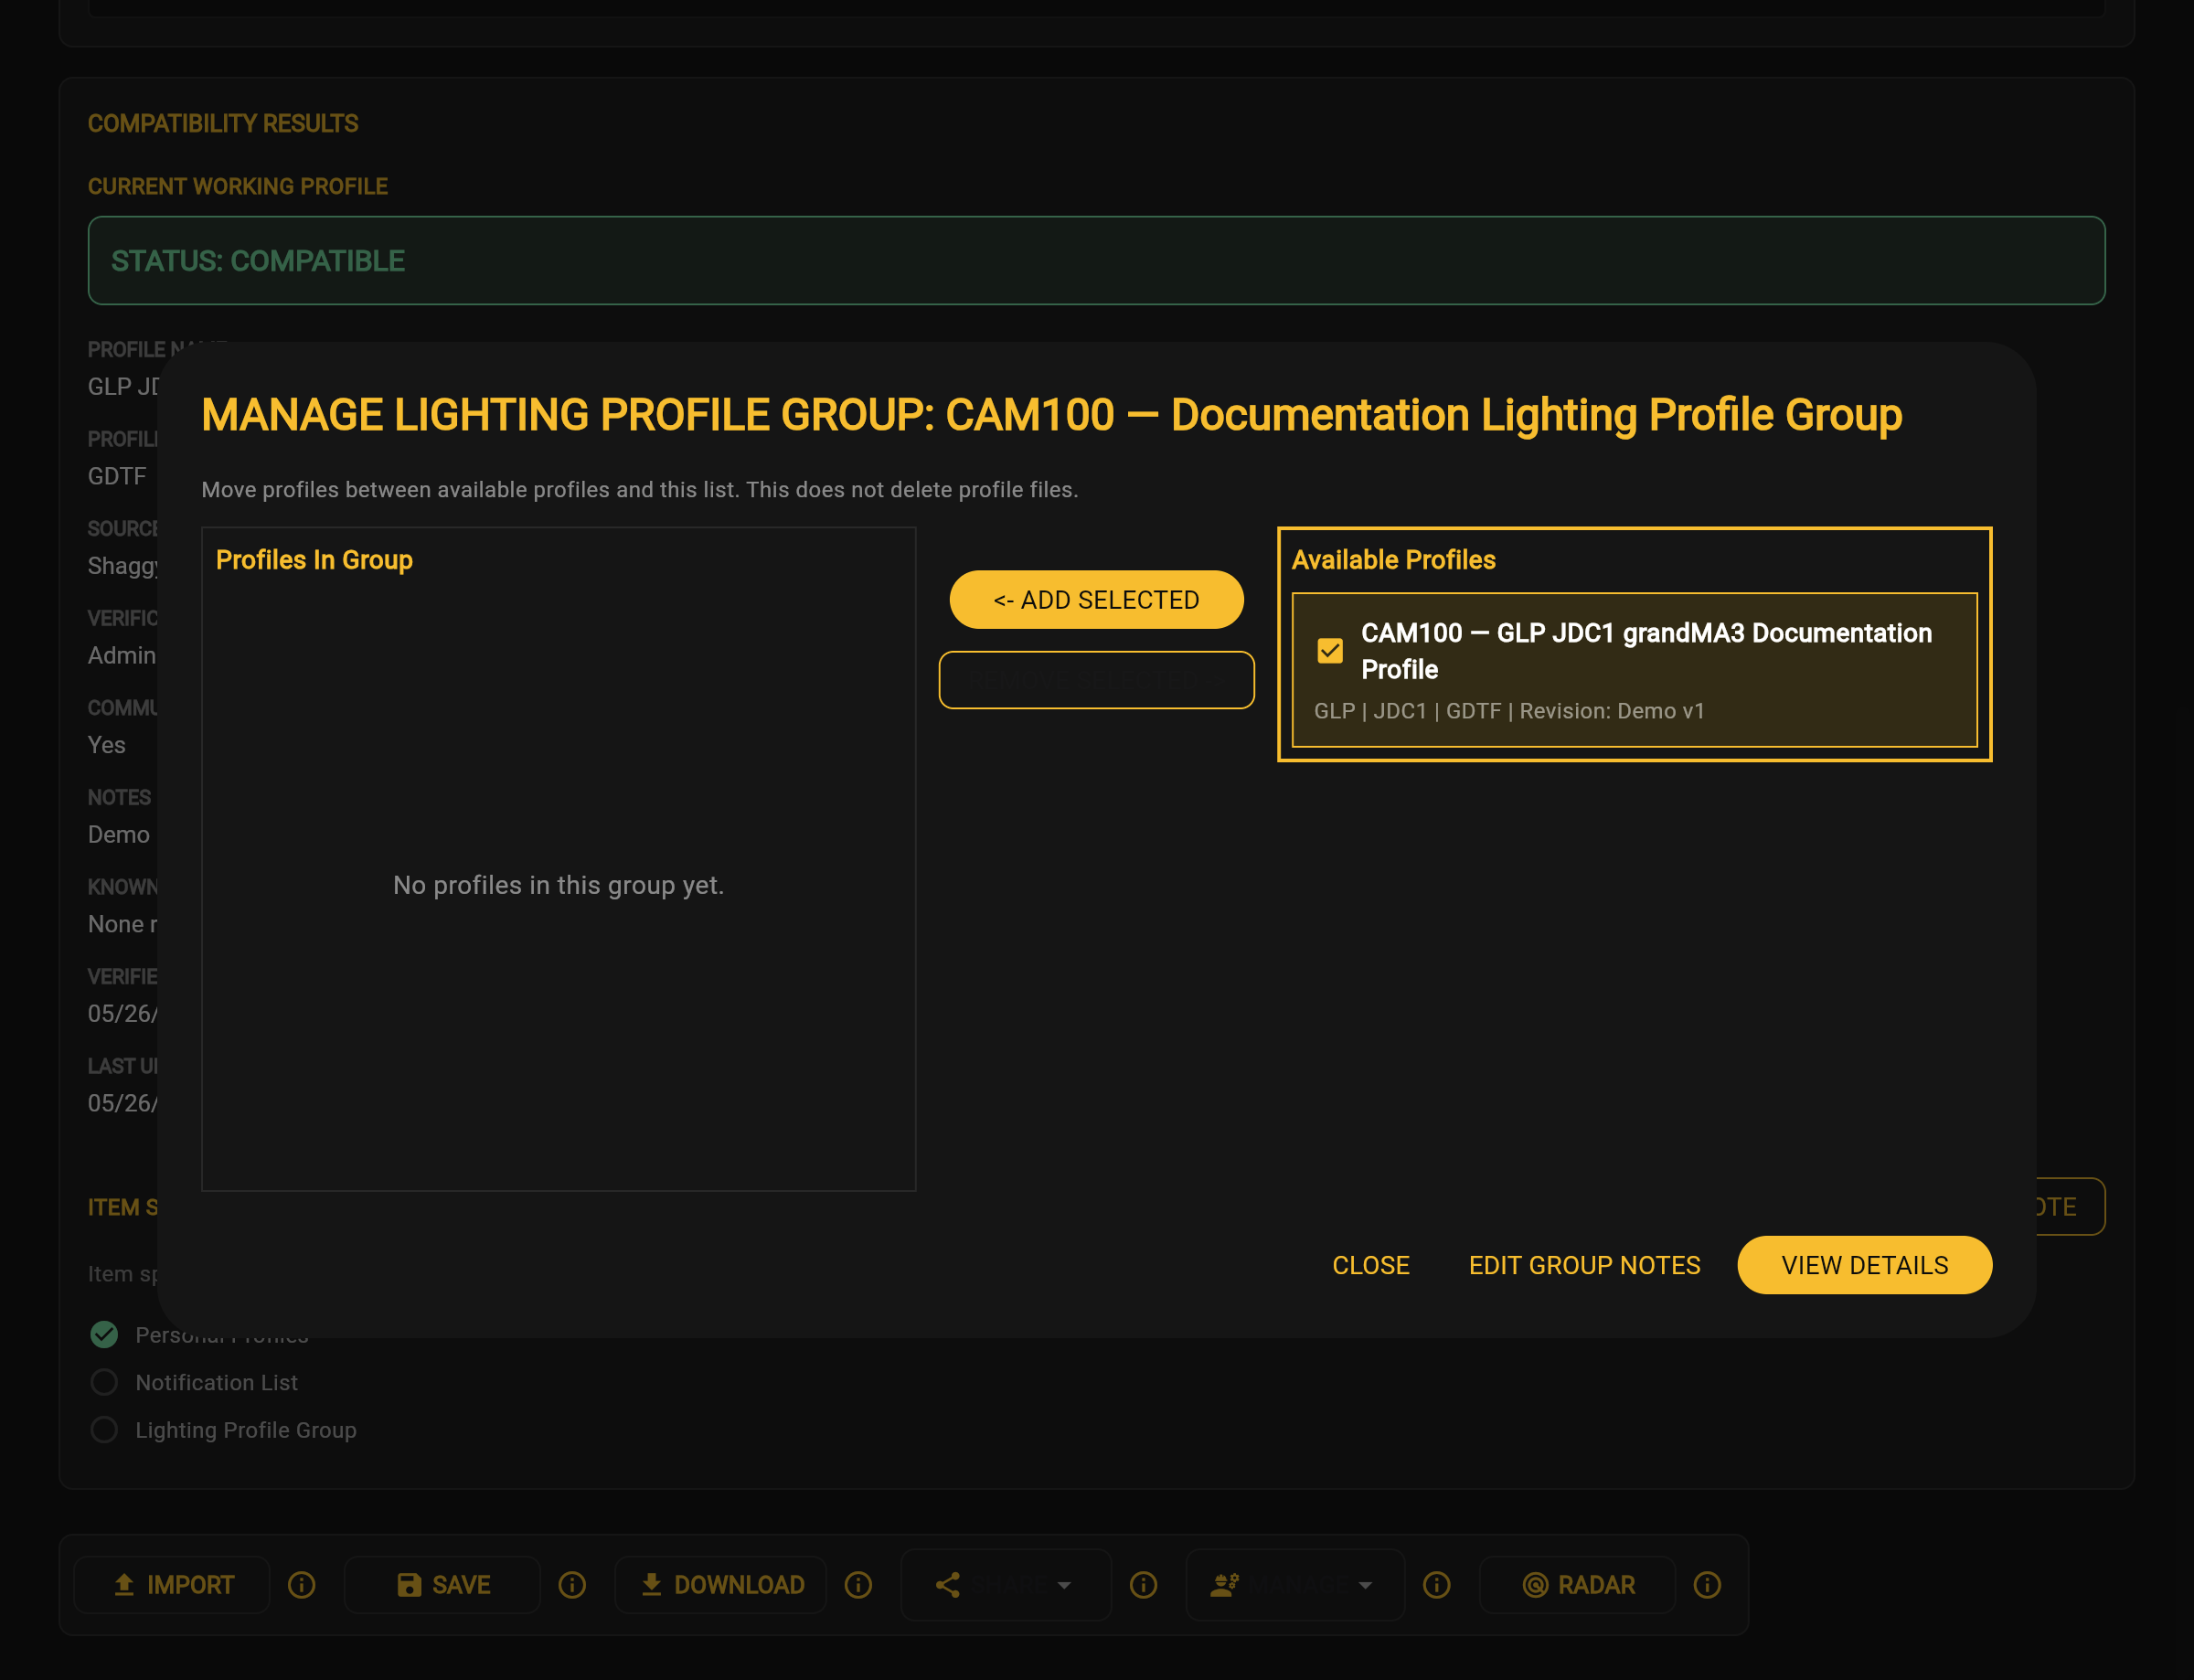
After selecting <- ADD SELECTED, check the two profile lists. A successful addition places the profile under Profiles In Group. If it remains under Available Profiles, the addition did not complete.

Profile remains under Available Profiles
Profile remains under Available Profiles Application screenshot

Confirm the Profile Is in the Lighting Profile Group

After using <- ADD SELECTED, verify that the profile moves from Available Profiles to Profiles In Group. If it remains under Available Profiles and the group remains empty, the addition did not complete.

Lighting Profile Group Tips

  • Verify that the group exists before attempting to add a profile.
  • If the group remains empty without a confirmation or error message, verify whether the profile still appears under Available Profiles.

Lighting Profile Groups Frequently Asked Questions

How do I know whether the profile was added?

The profile should appear under Profiles In Group. If it remains under Available Profiles, the addition did not complete.

Troubleshoot Adding a Profile to a Lighting Profile Group

  • Confirm that the group was created.
  • Verify that the profile appears under Available Profiles.
  • If the group remains empty and the profile stays under Available Profiles, the addition did not complete. Avoid repeatedly selecting <- ADD SELECTED.

Lighting Profile Groups Related Topics

RADAR

Help content is coming soon.